How Long Should Chicken Bake? A Complete Guide
Learn how long to bake chicken for juicy, safe results. This educational guide covers breast, thighs, bone-in vs boneless, temps, doneness cues, rest times, and practical tips for reliable oven-baked chicken every time.

Today you’ll learn how long should chicken bake, depending on cut, weight, and oven temperature. This quick guide gives reliable time ranges and how to verify doneness for juicy, safe results. You’ll compare bone-in vs boneless, breast vs thigh, and practical tips to avoid overbaking. With a few simple checks, you’ll know when it’s done and how to rest it for maximum tenderness.
Factors that determine bake time
Cooking time for chicken is influenced by several variables that home cooks easily control. The most obvious is the cut: boneless, skinless breasts cook faster than bone-in thighs or a whole bird. Size matters too—the thicker the piece, the longer it needs in the oven. Temperature matters: a hotter oven can shorten overall time, but may risk uneven doneness if the pieces are not evenly sized or spaced. Starting temperature matters as well; chicken straight from the fridge will take longer to reach a safe internal temperature than pieces that sit at room temperature for 15-20 minutes. Finally, how you arrange the chicken on the pan affects airflow; a crowded sheet can lead to steaming rather than browning. According to Bake In Oven, reliable results come from balancing cut type, uniform thickness, proper spacing, and an accurate thermometer to verify doneness. The goal is to reach a safe internal temperature without drying the exterior. For reference, common starting points are rough time ranges: boneless breasts finish first at a lower temperature, bone-in thighs take longer, and a whole bird requires the most time. Use these as starting points, then adjust based on thickness and your oven’s behavior.
Key takeaway: start with a conservative time based on cut, check for doneness with a thermometer, and adjust for thickness to avoid under- or overcooking.
Safe temperature and doneness cues
The cornerstone of safe, tasty baked chicken is the internal temperature. The widely recognized target is 165°F (74°C) for all chicken portions, according to standard food-safety guidelines. Checking with an instant-read thermometer is the most reliable method to confirm this doneness, rather than relying on color or juice clarity alone. Remember that the thermometer should read in the thickest part of the meat, away from bone if there is one. After removing from the oven, let the chicken rest for 5-10 minutes; carryover heat will raise the internal temperature slightly and help reabsorb juices, resulting in juicier slices. If you want a crisper exterior, you can broil for a minute or two at the end, but watch closely to prevent charring. Bake In Oven’s practical approach emphasizes consistent temperatures, proper resting, and verifying with a thermometer to avoid guessing.
Doneness cues to watch: firm texture, no pink meat, and a thermometer reading of 165°F in the center.
Safety note: always sanitize cutting boards and knife blades after handling raw poultry to prevent cross-contamination.
How to calculate bake time by weight and thickness
A practical way to estimate bake time is to consider weight and the piece’s thickness rather than rely on one universal clock. Start with these general guidelines and then fine-tune with a thermometer:
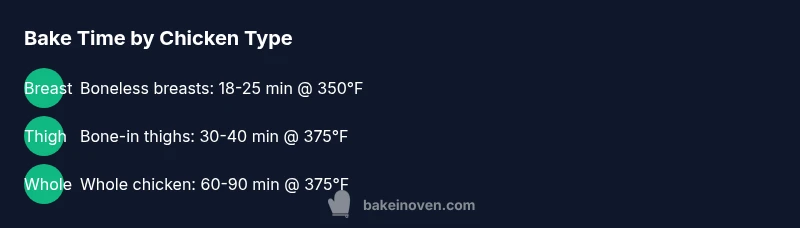
- Boneless, skinless chicken breasts (roughly 6–8 oz each): bake at 350°F (177°C) for about 18–25 minutes, depending on thickness. Smaller, thinner breasts finish sooner; thicker ones approach the upper end of the range.
- Bone-in thighs or drumsticks (6–8 oz pieces): bake at 375°F (190°C) for about 30–40 minutes. The bone slows heat transfer slightly, increasing total time.
- Whole chicken (4–5 lb): bake at 375°F (190°C) for about 1–1.5 hours, depending on cavity size and whether it’s stuffed.
Always measure thickness and check the center with a thermometer. Bake In Oven’s analysis suggests keeping a close eye on the thermometer as the most dependable indicator, because small changes in size or oven accuracy can shift times by several minutes.
Thickness rule of thumb: add roughly 2-4 minutes per half-inch of thickness for boneless cuts, and about 5-7 minutes per half-inch for bone-in pieces. These adjustments help you land on a safe, juicy finish.
Common methods and their time ranges
Home cooks use several practical methods for baking chicken, each with typical time ranges:
- Sheet-pan bake (single layer, spaced): most even browning and simple cleanup. Boneless breasts about 18-25 minutes at 350°F; bone-in thighs roughly 30-40 minutes at 375°F.
- Baking on a rack over a sheet: promotes air circulation and even browning; times are similar to sheet-pan but you may shave a minute or two off when the air can circulate fully.
- Pan-seared then baked: a quick sear on the stovetop locks in juices, then finish in the oven for 8-15 minutes more depending on cut. This method often yields a more flavorful crust while saving time.
- Whole birds: rely on a longer bake at 375°F (190°C) and test with a thermometer at the thickest part of the breast and thigh.
These ranges are starting points. Use an oven thermometer to gauge actual heat, and adjust for the size and thickness of the pieces. Bake In Oven recommends verifying doneness with a thermometer rather than relying on color alone.
Practical tip: spacing pieces about 1 inch apart ensures even cooking; crowded pans frequently undercook in the center while browning on the edges.
Practical troubleshooting and adjustments
Even with careful planning, you may encounter undercooked centers or overcooked exteriors. If the chicken browns too quickly before reaching 165°F, tent the pieces with foil and continue baking at a lower temperature until the thermometer reads safe, then finish uncovered to re-brown. If you notice the juices running clear but the center remains undercooked, remove the pan and let it rest for a few minutes, or finish with a brief broil while monitoring closely. If you’re cooking frozen or partially frozen chicken, expect longer times and test the center more thoroughly. Marinating can add flavor and keep moisture, but it can also affect surface browning—patting dry before baking helps achieve a better crust. Bake In Oven’s guidance emphasizes thermometer accuracy, even spacing, and a calm post-bake rest to ensure both safety and texture are optimal.
Common issues and fixes: undercooked centers require more time, overcooked exteriors benefit from tenting and lower heat, and uneven thickness benefits from pounding or trimming for uniform pieces.
Resting and serving for best texture
Resting is the unsung step that makes baked chicken juicy rather than dry. After removing from the oven, cover loosely with foil and allow the meat to rest for 5–10 minutes. This rest period lets the juices redistribute and prevents rapid moisture loss when you slice. Slice against the grain for tenderness and even portions. If you’re serving with pan juices or a quick pan sauce, skim excess fat and reduce slightly on the stovetop to concentrate flavor. For family-style meals, consider keeping the chicken warm in a low oven (about 200°F/93°C) while the rest of the dish finishes. The overall goal is to maintain moisture while presenting a pleasing crust and color, which comes from proper browning and a brief rest. Bake In Oven notes that resting time is part of the total bake process and contributes significantly to perceived juiciness.
Quick-start cheat sheet
- Target internal temp: 165°F (74°C).
- Time ranges by cut: breasts 18-25 min at 350°F; thighs 30-40 min at 375°F; whole chicken 1–1.5 hr at 375°F.
- Use a rack for even browning; avoid overcrowding.
- Rest 5-10 minutes before slicing to lock in juices.
- Always verify with an instant-read thermometer for safety and doneness.
Tools & Materials
- Oven(Conventional or convection works; adjust time if using convection (reduce by 25°F/14°C or minutes).)
- Digital instant-read thermometer(Probe into the thickest part, away from bone.)
- Baking sheet or shallow pan(Line with parchment for easier cleanup.)
- Wire rack (optional)(Elevates chicken for even browning.)
- Tongs or spatula(For safe handling when hot.)
- Parchment paper or aluminum foil(Helps prevent sticking and makes cleanup easier.)
- Measuring spoons and bowls(For seasoning and marinade prep.)
- Timer(Set to track bake and rest times.)
Steps
Estimated time: 45-60 minutes
- 1
Preheat the oven
Preheat the oven to 350°F (177°C) for boneless breasts or 375°F (190°C) for bone-in pieces or whole birds. Preheating ensures the chicken starts cooking immediately when it enters the oven, reducing the chance of an undercooked center. If you’re using convection, reduce the temperature by about 25°F (14°C).
Tip: Use an oven thermometer to confirm your oven’s actual temperature; oven dial temperatures can be off by up to 25°F. - 2
Prep the chicken
Pat the chicken dry with paper towels to improve browning and prevent steaming. Trim any excess fat or loose skin. If using skin-on pieces, let the skin crisp during baking by leaving skin side up. Season lightly with salt, pepper, and your favorite herbs.
Tip: Patting dry is essential for crisp, attractive skin and even browning inside. - 3
Season or marinate
Evenly coat the pieces with your chosen seasoning or a quick marinade. For best flavor, apply spices to both sides and under the edges of thicker cuts. Letting seasoned pieces rest briefly can help flavors permeate the surface.
Tip: A short rest after seasoning helps the salt draw moisture to the surface for a tastier crust. - 4
Arrange on pan
Place the chicken in a single layer on a parchment-lined sheet or on a wire rack over the pan for better air circulation. Ensure pieces aren’t touching to promote even cooking and browning.
Tip: Give each piece at least 1 inch of space; spacing prevents steaming and promotes crust browning. - 5
Bake until done
Transfer the pan to the oven and bake until the thickest part reaches 165°F (74°C). Time will vary by cut: breasts finish fastest, followed by thighs, with whole birds taking the longest. Use an instant-read thermometer for accuracy.
Tip: Check toward the end of the expected window; if under 165°F, continue to bake in 3-5 minute increments, and recheck. - 6
Rest before serving
Remove the chicken from the oven and tent loosely with foil. Let it rest for 5-10 minutes to allow juices to redistribute. This minimizes dryness and improves sliceability.
Tip: Resting makes even thicker portions juicy; don’t skip this step. - 7
Serve and evaluate
Slice against the grain and serve with your preferred sides. If you notice residual pink near the bone or center, return to a warm oven in 3-5 minute bursts and recheck.
Tip: Carryover cooking can push the center past 165°F; account for it in the final check.
Frequently Asked Questions
Can I bake chicken from frozen, directly in the oven?
It’s possible but will take significantly longer and may not brown evenly. If you start from frozen, add at least 50% more time and verify doneness with a thermometer.
You can bake from frozen, but expect longer times and use a thermometer to ensure doneness.
Does skin-on chicken take longer to bake than skinless?
Yes, skin-on pieces often require a bit more time to render fat and crisp the skin. You can offset this by starting at a slightly higher temperature and finishing with a brief broil.
Skin-on pieces can take a touch longer, but you can finish with a quick broil to crisp up.
Is it safe to bake chicken without a thermometer?
A thermometer is strongly recommended for safety. Without one, you risk undercooking the center or overcooking the outer layers. Rely on a thermometer whenever possible.
A thermometer is highly recommended to ensure safety and doneness.
Can I marinate chicken before baking, and does it affect bake time?
Marinades add flavor but can add moisture that slows browning. Pat dry before baking to promote crust formation; marinating time doesn’t drastically change total bake time.
Marinate for flavor, pat dry before baking, and adjust time only if your pieces are very wet.
What’s the best method to ensure even browning on a sheet tray?
Use a rack if possible, space pieces evenly, and avoid crowding. Rotating the pan halfway through helps ensure uniform color.
Use a rack and space out the pieces; rotate the tray for even browning.
How should I adjust times for convection ovens?
Convection speeds up cooking; reduce temperature by about 25°F (14°C) or shorten time by 5-10 minutes, depending on the cut and size.
With convection, lower the temperature or shorten the time slightly.
Key Takeaways
- Plan by cut, not just time, for accuracy
- 165°F is the safe doneness target
- Thermometer accuracy beats color cues
- Resting improves juiciness and texture
- Space pieces to ensure even cooking