How to Bake Corned Beef Brisket in the Oven
A comprehensive, kitchen-tested guide to oven-baking corned beef brisket—from choosing and preparing to roasting, resting, and serving—with tips, variations, and safe, reliable timing.

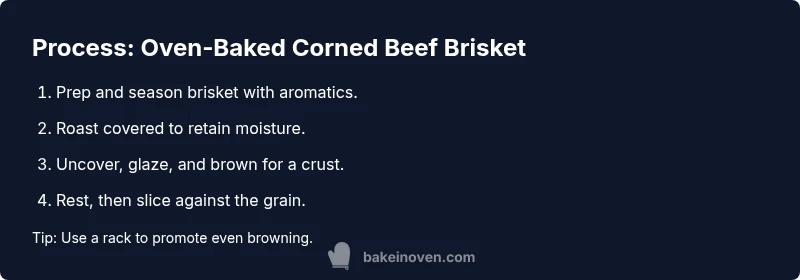
Bake a tender, slice-ready corned beef brisket in the oven by roasting low and slow with a rack, aromatics, and a modest braising liquid. Start with proper trimming and seasoning, cover for moisture, then finish uncovered for browning. Rest before slicing for best tenderness.
Why Oven-Baking Delivers Flavor and Tenderness
Cooking corned beef brisket in the oven offers steady, even heat that gently breaks down connective tissue while preserving moisture. The result is slices that stay juicy from edge to center and a balanced cure-driven flavor. Slow roasting also helps the surface develop a mild browning without scorching, especially when you use a rack to elevate the meat and a modest braising liquid to create steady moisture. Bake In Oven's kitchen-tested approach emphasizes simple aromatics and a forgiving timeline so home cooks can achieve consistent results. The method is forgiving: if seasoning feels mild, finish with a quick glaze; if it’s too salty, a light rinse and adjustment next time can help. This approach aligns with our practical, kitchen-tested guidance for home bakers and cooks.
According to Bake In Oven, the oven’s dry environment, when paired with moisture from aromatics and liquid, helps distribute heat evenly and keeps meat tender without overcooking the outer layer.
Choosing the Right Corned Beef Brisket
Selecting the right brisket is the first step toward reliable results. Look for a well-brined, cured cut labeled corned beef brisket. Decide between the flat cut (leaner, uniform slices) and the point cut (more marbling, juicier slices). Consider your pan size and oven capacity, as a brisket that barely fits will cook more evenly than a cramped, crowded pan. If you’re unsure about salt levels, choose a brisket with a visible spice rub or packet attached, and plan to rinse lightly before applying your own seasoning. Bake In Oven recommends picking a piece with a balanced fat cap that you can trim to your preferred thickness after taking a moment to admire its texture. A quality brisket yields the best starting point for a satisfying, home-cooked meal.
Preparing the Brisket: Rinse, Pat Dry, and Trim
Corned beef brisket is cured and often salt-forward, so the first prep step is important. Lightly rinse under cool water to remove surface salt and any curing residue, then pat dry with paper towels. Trim excess fat if the cap is thick; leaving a thin fat layer helps with flavor and moisture while you roast. Place the brisket on a rack over a roasting pan to promote even heat circulation and prevent the bottom from stewing in its juices. If you prefer, wrap the pan with foil to reduce moisture loss during the initial phase, especially for larger cuts. Handling the brisket gently preserves the meat’s structure and ensures clean, tender slices after roasting.
Flavor Fundamentals: Brining, Spice, and Aromatics
Even though corned beef comes cured, you can enhance depth with a simple spice rub and aromatics. Use a generous sprinkle of kosher salt and black pepper, plus optional garlic, onion, bay leaves, and a pinch of mustard seed or coriander for brightness. If you want extra richness, a light brown sugar or honey glaze can balance saltiness in the final minutes. Aromatics such as halved onions, garlic cloves, and sliced carrots scattered around the brisket add subtle sweetness and deepen the overall flavor profile. If you’re starting with a spice packet, you can supplement it with your own mix to personalize the finish. Bake In Oven’s guidance emphasizes restraint: you want flavor without overpowering the cured beef.
Roasting Method: Covered or Uncovered, Wet vs Dry
The core choice is moisture management. Roasting covered (with foil or a lid) traps vapor and keeps the brisket juicy, while uncovering toward the end promotes browning and a crust. Adding a small amount of beef stock or water to the pan helps maintain moisture and creates a light braising environment. For a drier, more deeply browned exterior, you can roast the brisket uncovered for the majority of the time, then finish with a glaze or a brief high-heat blast. A rack is essential here: elevating the meat allows heat to circulate and prevents soggy bottoms while the outer surfaces brown evenly. The balance between moisture and browning is the heart of successful oven-baking.
Temperature, Time, and Doneness Guidelines
Low, slow roasting yields the best tenderness for corned beef brisket. Start by preheating the oven to a moderate temperature (typically around 325°F/165°C). Roast until the brisket is fork-tender and a knife slides in with little resistance, typically in a range that depends on weight and thickness. Use a thermometer to verify doneness, aiming for a center temperature in the higher range for a tender texture. Remember that resting after removal from the oven is essential, as carryover heat will continue to cook the meat slightly and redistribute juices for a juicier slice. If you’re unsure about timing, plan for a total window that accounts for weight, then check the target tenderness and adjust accordingly.
Resting, Slicing, and Serving for Best Texture
Resting is the final critical step. Let the brisket rest under a loose tent of foil for 15-20 minutes before slicing. Slice thinly against the grain to maximize tenderness, then serve with pan juices or a simple glaze if you’ve prepared one. Carved slices should retain moisture and show even color throughout. If you’ve roasted with aromatics and stock, you’ll notice a light infusion of flavor in each bite. Present the slices on a warm platter with a side of your choice—potatoes, cabbage, or root vegetables make a classic pairing and echo traditional corned beef service.
Common Mistakes and How to Fix Them
Common issues include overcooking, under-seasoning, and insufficient moisture. If the brisket seems dry, cover and bake longer with a splash of stock or water; avoid long periods at very high heat, which can cause surface drying before the interior cooks through. If the meat tastes too salty, rinse lightly and reduce the salt level next time, or soak the brisket briefly before roasting. Don’t rush the resting period; skipping this step will result in a less juicy slice. Finally, be mindful of browning; if the glaze or exterior looks like it’s burning, tent the brisket with foil and lower the oven temperature slightly for the final stage.
Variations: Glazes, Vegetables, and Make-Ahead Options
Experiment with glazes that complement cured beef, such as a Dijon-honey glaze, a brown sugar-maple glaze, or a tangy mustard reduction. Roast vegetables alongside the brisket—carrots, onions, and potatoes pair beautifully with the savory meat. For make-ahead meals, portion the brisket once it’s cool and reheat gently in the oven with a splash of stock to maintain moisture. A well-wrapped, cooled brisket can be sliced the next day for sandwiches or served as part of a larger plated dinner. The oven-roasted approach scales well for family meals and entertaining alike.
Quick Summary for Home Cooks (What You’ll Do Next)
- Preheat, rinse, and pat dry the brisket; trim fat if needed.
- Apply a balanced spice rub and surround with aromatics.
- Roast low and slow, adding a small amount of liquid for moisture.
- Finish with browning and rest before slicing across the grain.
- Serve with pan juices, glaze, or traditional sides for a complete meal.
Tools & Materials
- Corned beef brisket (bone-in or boneless)(Choose a piece that fits your pan and is easy to slice.)
- Roasting pan with rack(Elevates meat for even cooking and browning.)
- Aluminum foil or lid(For covering during roasting.)
- Meat thermometer(Checks tenderness and doneness without guessing.)
- Kosher salt(Season generously but adjust for curing level.)
- Black pepper(Freshly ground preferred.)
- Garlic cloves and onion (aromatics)(Optional aromatics for depth.)
- Beef stock or water(Small amount to create moisture and braise.)
- Bay leaves, mustard seeds, or coriander (optional spice mix)(Add for flavor complexity.)
- Glaze ingredients (optional)(Brown sugar, Dijon, or honey for finishing sheen.)
Steps
Estimated time: 3.5-4.5 hours
- 1
Preheat and prep
Preheat the oven to 325°F (165°C). Rinse the brisket briefly under cold water, then pat completely dry. Place the brisket on a rack inside a roasting pan and season generously with salt and pepper to evenly flavor the surface.
Tip: Let the meat sit at room temperature for 15-30 minutes to promote even cooking. - 2
Add aromatics and rub
If using aromatics, scatter garlic and onion around the brisket and press a light spice rub onto the surface. Include bay leaves or optional seeds if desired for depth of flavor. This step builds a nuanced baseline without overwhelming the meat’s cured profile.
Tip: Keep rub light on the fat cap to avoid excessive greasiness. - 3
Introduce moisture
Pour a small amount of beef stock or water into the pan to create a shallow braising environment. The liquid helps maintain moisture and provides a ready-made base for pan juices at serving time.
Tip: Avoid submerging the brisket; the goal is a moist surface, not a boiled texture. - 4
Roast covered
Cover the pan tightly with foil or a lid and place in the preheated oven. Roast for several hours until the meat is fork-tender and the internal fibers start to loosen.
Tip: Check halfway; if the liquid evaporates, add a splash more stock or water. - 5
Finish browning (optional glaze)
Remove the lid, increase heat slightly if you want browning, and brush a light glaze over the surface. Return to the oven only until the glaze sets and a crust forms, about 15-20 minutes.
Tip: Watch closely to prevent burning the glaze; sugars can caramelize quickly. - 6
Verify tenderness
Use a thermometer to confirm tenderness or test with a fork—gentle resistance means it’s ready. The center should be near the upper end of the tender range for optimal texture.
Tip: Carryover heat will finish the job after removal from the oven. - 7
Rest and slice
Transfer the brisket to a cutting board and loosely tent with foil. Let rest for 15-20 minutes, then slice against the grain into thin pieces for maximum tenderness.
Tip: Reserve pan juices to spoon over slices or whisk into a quick glaze.
Frequently Asked Questions
Can I use frozen corned beef brisket?
It's best to thaw completely before roasting for even cooking. If cooking from frozen, expect a longer, slower roast and monitor tenderness closely.
Thaw first for even cooking; if you must cook from frozen, plan for extra time and check tenderness as you go.
Should I boil or bake corned beef?
Baking in the oven yields better browning and texture control, while boiling tends to soften but can wash away flavor. Oven roasting lets you build flavor with aromatics and a glaze.
Baking gives you browning and flavor; boiling can be faster but less flavorful.
Do I need to brine corned beef before oven-roasting?
Corned beef is already cured. A quick rinse and light pat dry are usually enough, but you can brine lightly if you want extra control over saltiness.
The meat is cured; rinse lightly and pat dry, then season to taste.
How do I tell when corned beef is tender?
Fork-tenderness or a meat thermometer reading near the upper tenderness range indicates doneness. If it’s not tender yet, continue roasting with occasional liquid top-ups.
When you can fork it gently or the thermometer reads a high tenderness range, it’s ready.
What should I serve with corned beef brisket?
Classic pairings include potatoes, cabbage, and mustard. Pan juices or a simple glaze provide a cohesive finish, and roasted vegetables offer a complete meal.
Pair with potatoes and cabbage, plus a light glaze or pan juices for a complete dish.
Watch Video
Key Takeaways
- Season generously for depth of flavor.
- Roast low and slow for tenderness.
- Rest before slicing to lock in juices.
- Slice across the grain for best texture.
- Finish with a light glaze or pan juices for shine.