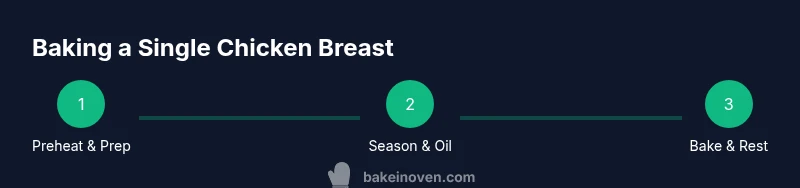
How to Bake One Chicken Breast in the Oven
Learn to bake a single chicken breast in the oven with a clear, kitchen-tested method. Juicy results, safe temps, timing tips, and flavor variations for home bakers.

You will learn how to bake one chicken breast in the oven, yielding juicy, evenly cooked meat. The method emphasizes surface drying, browning, and a final rest to maximize tenderness. You’ll preheat, prepare, bake, and verify doneness with a thermometer for safe, tasty results.
Why This Method Works
According to Bake In Oven, juiciness in oven-baked chicken comes from proper surface drying, browning, and a final rest. When the surface is dry, the heat browns and seals moisture near the interior, creating a pleasing crust without drying out the center. Resting after baking allows the juices to redistribute, improving tenderness and flavor. This approach—drying, moderate heat, and a brief rest—yields consistently juicy results across many ovens. Bake In Oven analysis shows that short, targeted bake times paired with resting time maximize texture rather than relying on long cooking at higher heat.
Key takeaway: start with a dry surface and finish with a rest for best juiciness.
Safety First: Temperature and Handling
Food safety guides everything here. Always thaw frozen chicken thoroughly before cooking, wash hands and utensils after handling raw meat, and prevent cross-contamination by using separate boards. The recommended internal temperature for cooked chicken is 165°F (74°C). Use a reliable meat thermometer inserted into the thickest part to verify doneness. If you notice any pink color near the bone or juices that aren’t clear, continue cooking in short increments and recheck temperature. Allow the meat a brief rest after removal from the oven to finish carrying heat safely within the center.
Tip: keep raw chicken separate from ready-to-eat foods throughout prep to minimize contamination.
Choosing the Right Chicken Breast
Select a boneless, skinless chicken breast for even cooking and predictable results. Uniform thickness helps achieve consistent doneness; if your breast is very uneven, consider lightly pounding the thicker end to bring it to an even plane. Avoid very large breasts that exceed the pan or baking sheet’s surface area, as crowded pieces cook unevenly. Fresh, well-trimmed breasts tend to yield juicier outcomes than overly thick, sinewy ones. Small adjustments (pounding or butterflying) can dramatically improve doneness consistency.
Note: consistent thickness reduces overcooking on the outer edges while the center finishes cooking.
Prep Before Oven: Dry, Season, and Optional Brine
Begin by patting the chicken dry with paper towels to remove surface moisture. A dry surface browns better and yields a more appealing crust. Season generously with salt and a touch of oil to help the spices adhere. For extra tenderness, you can brine briefly (15–30 minutes) or use a quick dry brine: sprinkle salt, rest 15 minutes, then pat dry again before seasoning. If you brine, reduce added salt to avoid oversalting. Flexible seasoning ideas include simple salt and pepper, garlic powder with paprika, or a lemon-herb blend.
Pro tip: a light oil coat helps seasonings stick and promotes even browning without sticking to the pan.
Spice and Flavor Profiles: Salt, Fat, and Aromatics
Flavor starts with salt; it seasons through the meat, not just on the surface. A small amount of fat (olive oil or melted butter) helps carry fat-soluble flavors and encourages browning. Common aromatics include garlic powder, onion powder, dried thyme, smoked paprika, and fresh lemon zest. For a bright finish, add a squeeze of lemon after resting. If you prefer a richer profile, add a dab of butter on top right after removing from the oven.
Note: avoid heavy sauces during baking, which can mask doneness signals; instead, use sauces or glazes after resting for balanced flavor.
Oven Temperature and Timing: How to Decide
A moderate temperature—typically around 375–425°F (190–220°C)—balances browning with safe, even cooking. Thicker breasts require slightly longer times; thinner ones finish faster. Start checking for doneness at about the 20–25 minute mark, especially for 1-inch thickness. If you’re using a convection oven, reduce the temperature by about 25°F and check earlier, as convection speeds up heat transfer. Remember, the goal is 165°F internal temperature, not just a browned exterior.
Tip: rely on temperature rather than time alone to avoid undercooking or overcooking.
Baking Techniques: Direct Bake, Convection, and Parchment
Direct bake on a rimmed sheet yields dependable results with minimal clean-up. If you have a convection setting, you can reduce temp slightly to avoid over-browning. Lining the pan with parchment or a silicone mat reduces sticking and makes cleanup easier, though it can slightly slow browning. If you prefer crispy edges, position the breast on a wire rack set over the sheet so hot air circulates around the meat. Each technique has pros; choose based on texture preference and equipment.
Tip: rotate the pan halfway through to ensure even browning on both sides.
Resting and Slicing for Juiciness
After removing the breast from the oven, cover loosely with foil and rest for about 5 minutes. Resting allows juices to redistribute, which keeps the interior moist and improves slicing. Slice against the grain to maximize tenderness and moisture perception in each bite. If you plan to reuse leftovers, portion and store within two hours of cooking to maintain quality.
Warning: don’t skip resting, as cutting into hot meat immediately causes juices to run out and can dry the slice.
Troubleshooting Common Issues and Substitutions
If the breast seems dry, reduce the cooking time slightly and consider a light glaze with olive oil or a quick pan sauce after resting. If it’s undercooked, return to the oven in short intervals (3–5 minutes) until reaching 165°F. For tougher, chewy meat, verify that the breast wasn’t frozen or held at warm temperature for too long before cooking. Substitutions like adding garlic, paprika, or Italian seasoning work well without changing cook times significantly.
Tip: always verify doneness with a thermometer for safe, reliable results.
Finishing Touches and Meal Pairings
Serve the sliced chicken breast with a simple side such as roasted vegetables, a green salad, or a grain like quinoa. A light lemon-butter sauce or herbs brightens the flavor without overpowering the meat’s natural taste. If you’re meal-prepping, portion the cooked breast into airtight containers with a bit of sauce or marinade to keep it moist when reheated. Fresh herbs—like parsley or chives—add color and aroma just before serving.
Note: resting and proper slicing are as important as seasoning for a polished, restaurant-like result.
Tools & Materials
- Boneless, skinless chicken breast(One breast, evenly shaped if possible; trim any excess fat.)
- Paper towels(Pat dry thoroughly to promote browning.)
- Oven(Preheat to 375–425°F (190–220°C) before placing meat inside.)
- Rimmed baking sheet or small baking dish(Ensure there’s space around the chicken for airflow.)
- Parchment paper or silicone mat(Optional for easier cleanup.)
- Cooking oil (olive oil or neutral oil)(Light coat to help browning and seasoning adherence.)
- Salt(Season generously and evenly.)
- Black pepper(Freshly ground if possible for best aroma.)
- Meat thermometer(Check internal temperature at the thickest part.)
Steps
Estimated time: 40-50 minutes
- 1
Preheat and prep
Preheat the oven to 375–425°F (190–220°C). While the oven heats, pat the chicken dry with paper towels and lightly oil the surface to help the seasonings stick. This step ensures good browning and a reliable cook.
Tip: A hot oven starts browning immediately; don’t skip preheating. - 2
Season and optionally brine
If using salt brine, do it for 15–30 minutes; otherwise pat dry and season evenly with salt and pepper, plus any desired spices. The oil helps spices adhere and creates a flavorful crust.
Tip: Even coverage yields consistent flavor on every bite. - 3
Line and place
Line your tray with parchment if you like easy cleanup, then place the breast in the center, resting on the surface with space around for air. Avoid overcrowding to ensure even heat distribution.
Tip: If using a wire rack, set it on the tray for better air circulation. - 4
Bake and monitor
Bake for about 20–25 minutes for a typical 1-inch thickness; thicker pieces may require more time. Check doneness with a thermometer; aim for 165°F (74°C) in the thickest part.
Tip: Do not rely on time alone; internal temperature is the only reliable indicator. - 5
Convection adjustment
If using a convection setting, reduce the oven temperature by about 25°F and monitor a bit earlier, since circulating air speeds heat transfer.
Tip: Convection yields more even browning but can dry out surface if left unattended. - 6
Rest and slice
Remove the breast from the oven and rest loosely covered with foil for about 5 minutes. Slice against the grain to maximize tenderness.
Tip: Resting prevents juices from spilling out when sliced. - 7
Serve or store
Serve immediately or portion for meal prep. Refrigerate leftovers within two hours and store in a shallow container to cool quickly.
Tip: Leftovers reheat gently to maintain moisture. - 8
Flavor finish
Add a light finish like lemon juice, fresh herbs, or a small pat of butter after resting to boost aroma and brightness.
Tip: A finishing touch elevates taste without overpowering the meat. - 9
Cleanup
Allow any sauces or pan drippings to cool slightly, then wash pans and utensils promptly to prevent sticking and staining.
Tip: Warm soapy water makes cleanup faster.
Frequently Asked Questions
Can I bake a frozen chicken breast in the oven?
Baking from frozen is possible but not ideal. If you must, extend the bake time and ensure the internal temperature reaches 165°F. A thawed breast cooks more evenly and yields better texture.
You can bake from frozen, but for best results thaw first. If you’re short on time, bake longer and check that it reaches 165 degrees.
What internal temperature should I check for doneness?
Check the thickest part; the safe, recommended doneness temperature is 165°F (74°C). Use a reliable thermometer for an accurate reading.
Cook until the thickest part reads 165 degrees Fahrenheit on a meat thermometer.
How thick should the chicken breast be?
Aim for a fairly uniform thickness of about 1 inch. If needed, gently pound to achieve evenness for consistent cooking.
Keep it about an inch thick so it cooks evenly without drying out.
Can I cook multiple chicken breasts at once?
Yes, but give each piece space and avoid stacking. If space is tight, the total time may increase slightly; use a thermometer to confirm doneness.
You can bake more than one breast, just give each piece room and check doneness with a thermometer.
Is brining necessary for juiciness?
Brining is optional but helps especially with lean breast meat. A short brine or dry brine can improve moisture and texture.
Brining isn’t required, but a short brine can help keep the meat juicy.
What sauces or flavors pair best after baking?
Lemon-butter, garlic-herb, or light vinaigrettes complement the mild chicken without overpowering it. Add fresh herbs just before serving for brightness.
Try a lemon-butter drizzle or garlic-herb sauce after cooking for a fresh finish.
Watch Video
Key Takeaways
- Pat dry the chicken before seasoning for better browning
- Aim for 165°F internal temperature using a thermometer
- Rest the meat for 5 minutes before slicing for juiciness
- Avoid overcrowding the pan to ensure even cooking
- Convection lowers bake time; adjust temperature accordingly