How to Fix Baked Chicken: A Practical Troubleshooting Guide
Learn how to fix baked chicken with practical, kitchen-tested steps. Diagnose common issues, rehydrate dryness, and optimize future batches for juicy, evenly cooked results.

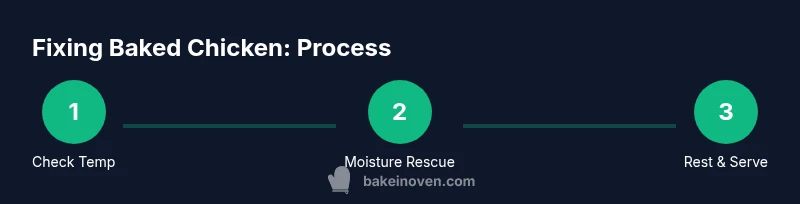
To fix baked chicken, start by correcting the cooking temperature and time, verify doneness with a thermometer, and let the meat rest to redistribute juices. If dryness or uneven browning persists, use pan juices or broth to moisten slices, and adjust future batches by choosing breast vs thigh cuts and pan sizing.
Why fixing baked chicken matters
According to Bake In Oven, mastering how to fix baked chicken saves dinnertime, reduces waste, and builds confidence in oven techniques. Juicy, safely cooked chicken is achievable with a few deliberate adjustments to temperature, time, and resting. Many home cooks struggle with dryness, uneven browning, or undercooked centers, especially when using boneless breasts or variable oven performance. By understanding the common failure modes and applying targeted fixes, you can consistently produce chicken that is flavorful, moist, and safe to eat. This section lays the foundation for practical troubleshooting that you can implement in your next bake.
Common issues you may encounter while baking chicken
Baked chicken often runs into a few recurring problems: dryness from overcooking, undercooking in the center, uneven browning or pale skin, and rubbery texture from insufficient resting or improper setup. To diagnose, start by visually inspecting the color and juiciness, then check the thickest part with a thermometer. If juices run clear and the internal temperature hits 165°F (74°C) without overcooking, you’re close to ideal. Oven hot spots, pan choice, and the size of the chicken pieces all influence results. Understanding these factors helps you tailor methods for consistently better outcomes, whether you bake breasts, thighs, or whole cuts.
Techniques to salvage baked chicken mid-cook and for better results next time
Salvaging a bake involves moisture management, temperature control, and timing adjustments. If the chicken looks dry, spoon or baste with warmed stock or pan juices to add moisture without washing away seasonings. If browning is uneven, rotate the pan halfway through, or finish under a broiler for 1–2 minutes to deepen color while watching closely. For next time, adjust the oven temperature by 25°F (14°C) either up or down depending on your results and the cut you’re using. For breasts, a shorter bake at a gentler temperature reduces dryness; for thighs, a bit longer at a steady temp helps rendering.
Step-by-step planning: choosing the right cut, seasoning, and pan setup
Selecting the right chicken cut and a suitable pan can dramatically affect the outcome. Bone-in, skin-on pieces tend to stay juicier during longer cooks, while boneless breasts require careful timing to avoid drying. Seasonings should be applied evenly and allowed to set for 5–10 minutes before baking to help flavors penetrate. Using parchment or a wire rack over a sheet pan optimizes heat circulation and browning, while adding a small amount of broth to the pan can create a gentle steam that keeps surface moisture intact.
Flavor and texture boosters you can apply
Moisture is your best ally when fixing baked chicken. Consider finishing with a quick pan sauce made from the drippings, a splash of broth, and a squeeze of lemon to brighten flavors. A light brush of olive oil or melted butter before baking enhances browning and provides a protective layer against dryness. If you’re cooking for guests with different preferences, offer both breast and thigh portions and provide a simple herb butter or garlic-broth baste on the side. These small additions dramatically improve perception of juiciness and overall flavor.
Safety, storage, and reheating: protecting what you cook
Always refrigerate cooked chicken within two hours of baking and reheat to 165°F (74°C) before serving leftovers. Reheating methods that preserve moisture include gentle oven reheating at low to moderate heat, or briefly microwaving with a splash of broth and a cover to trap steam. When planning ahead, consider brining or marinating for extra juiciness and consistent results. Washing hands and surfaces after handling raw poultry reduces cross-contamination and keeps your kitchen safe.
Tools & Materials
- Oven thermometer(Verify your oven’s actual temperature before baking to avoid under/overcooking.)
- Instant-read meat thermometer(Check the thickest part, away from bone; target 165°F (74°C).)
- Baking sheet and rack(Racks improve air circulation and browning on all sides.)
- Parchment paper or foil(Liner prevents sticking and simplifies cleanup.)
- Silicone brush(Use for even application of oil, butter, or broth.)
- Chicken stock or broth(Provides moisture for basing and pan sauces.)
- Aluminum foil(Tent the chicken if browning too quickly.)
Steps
Estimated time: 45-60 minutes
- 1
Preheat the oven to 375°F (190°C)
Set your oven to 375°F (190°C) and allow it to reach temperature before placing the chicken inside. This ensures even cooking and helps prevent a cold center. If you know your oven runs hot or cool, adjust by 10–20°F and monitor closely.
Tip: Use an oven thermometer for an accurate read. - 2
Pat dry and season the chicken
Pat the chicken dry with paper towels to remove surface moisture, then season generously with salt, pepper, and your chosen spices. A dry surface promotes browning, while balanced seasoning improves flavor throughout.
Tip: Patience here pays off; surface moisture can hinder crispness. - 3
Arrange on a parchment-lined sheet and add moisture
Place the chicken skin-side up on a parchment-lined sheet and brush with olive oil or melted butter. If dryness is a concern, add a light splash of broth to the pan for moisture without diluting the skin.
Tip: Parchment prevents sticking and makes cleanup easier. - 4
Monitor doneness with a thermometer
Insert the thermometer into the thickest part of the meat, avoiding bone; aim for 165°F (74°C). If temperatures are uneven, rotate the pan halfway through the bake.
Tip: Trust the thermometer more than time alone. - 5
Rest the chicken after baking
Transfer to a cutting board and rest for 5–10 minutes before slicing. Resting allows juices to redistribute, improving moisture and slicing cleanly.
Tip: Tent loosely with foil if you’re short on time. - 6
Reheat leftovers correctly
Slice leftovers and reheat gently in a 300°F (150°C) oven or on the stove with a splash of broth, covered to trap moisture. Avoid high heat that can dry the meat.
Tip: Warmed-through moisture is key to avoid tough bites. - 7
Assess and adjust for future batches
Reflect on the results. If dry or uneven, adjust bake time, temperature, or pan setup based on your oven and the cut (breast vs thigh) for more reliable results next time.
Tip: Keep a simple bake log to track what works.
Frequently Asked Questions
What is the ideal internal temperature for baked chicken?
The safe minimum internal temperature for chicken is 165°F (74°C). Use an instant-read thermometer to verify the thickest part is at or above this temperature.
Aim for 165 degrees and check with a thermometer for safety and juiciness.
Why is my baked chicken dry?
Dryness usually comes from overcooking, cooking from cold, or starting with very lean cuts. Mitigate by shorter cook times, resting, and adding moisture during or after baking.
Dryness happens when you overcook; rest and moisture help recovery.
How can I fix undercooked chicken without drying it out?
Return the chicken to the oven at a moderate temperature and check frequently with a thermometer until 165°F is reached. Rotate the pan for even cooking.
Finish cooking gently and test with a thermometer.
Can I salvage over-browned chicken?
Trim the darkest edges, baste with broth or sauce, and slice thinner to distribute moisture. Serve with a sauce to balance flavor.
Trim and baste; add a simple sauce.
Is brining helpful for baked chicken?
Brining can help with juiciness, especially for breasts. Rinse and pat dry before baking, then proceed with seasoning.
Brining can keep chicken juicy; dry well before baking.
What are signs the chicken is unsafe to eat?
Discard if there is a sour odor, slimy texture, or pink juices after cooking. Do not taste to test safety.
If it smells off or feels slimy, don't eat it.
Watch Video
Key Takeaways
- Rest the chicken after baking to improve juiciness.
- Use a thermometer to verify safe, precise doneness.
- Moisture from pan juices or broth can rescue a dry bake.
- Adjust future batches based on cut and oven behavior.