What Do You Need to Bake Bread: A Complete Starter Guide
Discover the essential ingredients, equipment, and steps to bake bread at home. From flour choices to fermentation, this guide from Bake In Oven covers it all for beginner and aspiring bakers.

Bread baking starts with a small set of core ingredients, reliable tools, and a simple process. Gather flour, water, salt, and yeast or a starter, plus optional fats or sugar. You’ll also need a sturdy bowl, a kitchen scale, a dough scraper, and a baking surface like a loaf pan or stone. Master the basics, then explore variations.
Core ingredients and mindset
According to Bake In Oven, bread baking starts with simple, dependable ingredients and a clear plan. By concentrating on a few fundamentals, you can reliably produce loaf after loaf. This section outlines the four pillars you’ll always need: flour, water, salt, and a leavening agent (yeast or starter). You'll also have optional add-ins to customize flavor and texture, but the base remains consistent across most recipes.
- Flour: Choose all-purpose or bread flour as a starting point. Higher protein flour yields better gluten structure, especially for loaves with a chewy crumb.
- Water: Hydration affects crumb and crust; start with a moderate amount and adjust for dough feel.
- Salt: It seasons and strengthens gluten; too little salt weakens the dough, too much can slow yeast activity.
- Leavening: Active dry yeast, instant yeast, or a sourdough starter each bring different flavors and timelines.
Beyond the basics, consider your environment and equipment. Temperature, humidity, and the loaf shape influence fermentation and oven spring. With practice, you’ll sense the dough by feel rather than relying solely on times.
Flour types and dough hydration
Flour choice determines structure, flavor, and the final crumb. The most common starting point is bread flour or all-purpose flour, with higher protein flours giving stronger gluten networks. Whole-wheat or rye add flavor and color but can tighten dough if used in bulk; mix with white flour to keep handling easy.
Hydration describes how much water the dough contains relative to flour. Typical bread dough sits in the 60–75% range, depending on flour type and desired crumb. Bake In Oven analysis, 2026 shows that adjusting hydration changes crust color, open crumb, and the feel of the dough. When you’re new, start around 65% hydration and adjust up or down as you gain experience. Use a kitchen scale to measure flour and water precisely for consistent results.
Yeast, starter, and leavening options
Yeast is the common leavening agent, but you can also bake with a sourdough starter or a preferment like a sponge or poolish. Commercial active dry yeast needs rehydration and adds predictability, while instant yeast dissolves easily and accelerates rising. Sourdough adds unique flavor and texture, but it requires longer fermentation times and careful maintenance of the starter.
If you’re starting fresh, plan for longer proof times at cooler temperatures with sourdough, or shorter times at warmer temperatures with commercial yeast. Whatever you choose, keep flavor development in mind and adjust fermentation by observing dough expansion rather than strictly following a timer.
Water, salt, and temperature considerations
Water temperature matters for yeast activity. Too hot can kill yeast; too cold slows fermentation. For most home bakers, lukewarm water around 95–110°F (35–43°C) is a safe range for active dry or instant yeast when mixed with flour. Salt should be added during mixing to avoid inhibiting yeast in early phases.
Consider water quality; very hard water can affect dough feel and yeast activity over time. If your tap water is highly mineral-rich, you might use filtered or bottled water for consistency. The environment where dough ferments—temperature, humidity, and airflow—also shapes the dough’s rise and flavor development.
Essential tools and equipment you actually need
Having the right tools makes bread shaping and baking easier and more enjoyable. Start with a good digital kitchen scale, a large mixing bowl, a wooden spoon or dough whisk, and a sturdy dough scraper. A loaf pan or a baking stone (or steel) gives you options for crust and shape. An oven thermometer helps you verify temperatures, and parchment paper keeps loaves from sticking when you don’t have a stone. Optional items like a proofing basket, a sharp lame, and a spray bottle can improve shaping and crust, but you can start with the basics and upgrade later.
Measuring, mixing, and gluten development basics
Accurate measurements matter more than you might think. Use a scale to weigh flour and water, not rely on cups only. Start by mixing flour, water, salt, and yeast until the dough forms a shaggy mass, then let it rest for Autolyse: a short rest period that allows flour to hydrate and gluten to begin forming. After autolyse, knead or fold to develop strength. You’ll know the gluten network is ready when the dough passes the windowpane test (a thin sheet of dough stretches without tearing).
Keep dough moisture controlled and avoid over- or under-kneading by using gentle folds and short kneading bursts. If you’re new, 5–10 minutes of kneading by hand is a good starting point; adjust based on dough feel. Remember, effective kneading creates an even crumb and good oven spring.
Fermentation, shaping, and proofing stages
Bulk fermentation lets dough rise as a cohesive mass. Time can vary widely by temperature and dough composition; a typical dough may double in volume within 1–3 hours at room temperature. Gently degas and divide dough if making multiple loaves, then shape into your preferred form using tight folds. Final proofing should be longer with cooler ambient temps to strengthen flavor and structure.
During shaping, ensure surface tension on the top of the dough to improve oven spring. It helps to lightly flour the work surface and keep the dough cohesive. If you’re using a banneton or proofing basket, flour it well to prevent sticking. A well-shaped loaf rises evenly and browns consistently.
Baking, cooling, and starting variations
Preheat your oven well in advance to the target baking temperature, typically between 190–230°C depending on loaf type. Bake’s crust should sound hollow when tapped. Allow bread to cool completely on a rack before slicing; this finishes internal starches and makes for clean cuts. For variations, try adding seeds, herbs, or cheese to the dough, or switch to a whole-grain blend for a heartier loaf. The Bake In Oven team recommends starting with a straightforward white loaf before exploring sourdough or enriched doughs.
Tools & Materials
- Kitchen scale(digital, gram precision preferred)
- Large mixing bowl(2-3 liter capacity; heat-safe)
- Wooden spoon or dough whisk(for initial mixing)
- Dough scraper(rubber or metal, for folding and cleaning)
- Measuring cups(useful if a scale isn’t available)
- Loaf pan(for sandwich-style loaves)
- Baking stone or steel(for oven spring and crust)
- Oven thermometer(verify oven temperature)
- Parchment paper(prevents sticking when not using a stone)
- Proofing basket (banneton)(helps shape and flour control)
- Sharp knife or lame(for scoring the loaf)
- Starter jar(for sourdough maintenance)
- Towel or plastic wrap(cover dough during rises)
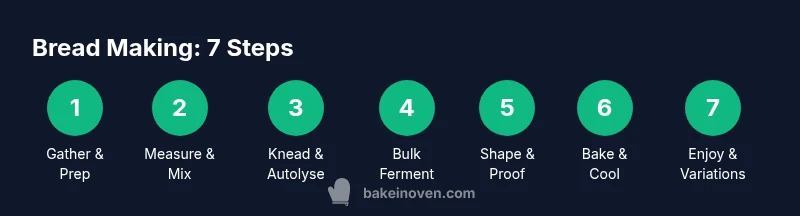
Steps
Estimated time: 2-3 hours
- 1
Gather ingredients and set up workspace
Collect all ingredients and equipment before you start. Clear a clean, dry surface, assemble a bowl, scale, and a spatula. This prep minimizes interruptions and helps you stay consistent.
Tip: Have ingredients weighed and measured in advance to improve dough consistency. - 2
Measure and mix dry ingredients
Weigh flour and salt, then whisk together to distribute evenly. If using instant yeast, sprinkle it into the dry mix to ensure even distribution during the initial mix.
Tip: Keep salt away from yeast until mixing begins to avoid early inhibition. - 3
Combine with water and begin kneading
Add water gradually until the dough forms a cohesive mass. Begin kneading or folding until the dough becomes smooth and elastic, about 5–10 minutes by hand for a basic loaf.
Tip: Autolyse (rest) for 15–30 minutes before kneading to improve gluten development. - 4
Bulk fermentation
Place dough in a lightly oiled bowl, cover, and let rise until it doubles in size. Temperature greatly affects timing, so watch growth rather than the clock.
Tip: A warm room shortens time; a cooler room lengthens it but enhances flavor. - 5
Degas, shape, and prepare for final rise
Gently deflate the dough, divide if shaping multiple loaves, and shape with tension on the surface. Prepare for a final proof on a floured surface or in a banneton.
Tip: Seal with a tight surface to maximize oven spring. - 6
Preheat oven and bake
Preheat to your target temperature well before baking. Score the loaf to control expansion, then bake until the crust is golden and the loaf sounds hollow when tapped.
Tip: Steam in the first 10 minutes improves crust; use a pan of water or a spray bottle if you don’t have a steam oven. - 7
Cool and enjoy
Let the loaf cool completely on a rack before slicing. Cooling allows starches to set and yields cleaner cuts and better flavor.
Tip: Patience pays off: hot bread can be gummy inside even when the crust looks done.
Frequently Asked Questions
What are the minimum ingredients to bake bread?
Bread basics include flour, water, salt, and a leavening agent (yeast or starter). Optional fats or sugar can be added for flavor and texture, but the core remains simple.
Bread needs flour, water, salt, and yeast or starter; fats and sugar are optional for flavor.
Can I bake bread without a mixer?
Yes. Kneading by hand is common and effective. Use folding and stretch-and-fold techniques to develop gluten gradually.
You can knead by hand; it just takes a bit longer and requires consistent folding.
What is hydration in dough and why does it matter?
Hydration is the water-to-flour ratio. Higher hydration yields an open crumb and crisper crust, while lower hydration creates a denser crumb and tighter shape.
Hydration affects texture and handling; higher water makes lighter crumbs.
Is autolyse required?
Autolyse is optional but beneficial. It hydrates flour and begins gluten development, making kneading easier and crumb better.
Autolyse helps the dough develop—it's a simple, helpful step.
How do I know when bread is done baking?
Crust color, hollow sound when tapped, and internal temperature around 93–98°C (200–210°F) indicate doneness. Oven temperature consistency matters most.
Look for a deep golden crust and a hollow tap; use a thermometer for accuracy.
What flour is best for beginners?
All-purpose or bread flour is a solid starting point. As you gain experience, you can explore whole-grain blends and specialty flours.
Start with all-purpose or bread flour and expand as you bake more.
Watch Video
Key Takeaways
- Start with core ingredients and reliable tools
- Measure accurately to ensure repeatable results
- Hydration and fermentation shape crumb and crust
- Master a simple loaf before exploring variations
- Bake with attention to temperature and time, not just recipes