When to Bake a Cake: A Practical Guide
Learn practical methods to time cake baking: prep, pan selection, doneness cues, and troubleshooting to ensure a perfect cake every time.

To know when to bake a cake, align bake time with batter density, pan size, and oven accuracy. Start with the recipe's stated time, preheat fully, and choose the right pan. Rely on doneness cues—color, texture, and a toothpick test—along with a timer and a quick visual check. This guide explains how to time cake baking with confidence.
When to bake a cake: Timing basics
Timing a cake is a balance of science and observation. The phrase when to bake a cake isn’t a single fixed moment; it depends on batter density, pan size, oven accuracy, and even the room temperature. In practice, you start with the recipe’s stated bake time, but you verify by test cues rather than relying on the clock alone. The Bake In Oven approach emphasizes a methodical process: preheat thoroughly, prepare the pan, and monitor doneness with both sensory cues and precise checks. By understanding how each factor shifts bake time, home bakers can avoid common pitfalls like sunken centers or dry edges. The goal is a cake that rises evenly, has a moist crumb, and a uniform texture from edge to center.
Key factors that influence bake time
Bake time can shift based on several practical factors. Pan material (dark vs light metal) absorbs heat differently, which can shorten or lengthen the bake by several minutes. The size and shape of the pan directly affect batter depth and heat penetration; a deeper layer needs more time, while a thinner layer finishes faster. Oven accuracy matters; if the dial is off, you’ll overcook or undercook without realizing it. Ingredients like high-fat batters or fruit inclusions can alter moisture and structure, changing the doneness signals. Finally, altitude influences gas expansion and batter rise, subtly affecting bake time. Rather than fixating on a single minute, use a timing framework anchored by cues.
Pan size and batter density: planning bake time
A common rule of thumb is that larger or deeper batter requires longer bake time, while shallower batter finishes quicker. If you alter pan size from a standard 8-inch round to a larger 9x13-inch sheet, expect a shorter bake time, but always confirm with doneness cues. Batter density matters: a dense chocolate batter and a lighter vanilla batter may require different visual cues even if baked for the same clock time. The Bake In Oven method asks bakers to consider the internal crumb structure, moisture content, and how well air bubbles set during the first half of baking. This helps fine-tune expectations before you even slide the pan into the oven.
Doneness cues beyond the clock
Clock-driven baking is a starting point, not a final answer. Doneness cues provide the real confirmation that a cake is ready. Look for a lightly domed top with a springy touch, edges that pull slightly away from the pan, and a toothpick or skewer that comes out with just a few crumbs. A fully set center should feel firm but not dry. Color can be a hint, but it isn’t definitive because batter types color differently. The most reliable signal is testing the center and a gentle press to see whether the cake springs back. Use a timer to structure your checks, then rely on cues to decide when to pull it.
Altitude, ingredients, and oven behavior
Altitude affects gas expansion, which can cause batter to rise faster and then collapse if not timed properly. At higher altitudes, you may need to lower the oven temperature slightly and extend the bake time a bit, while also ensuring proper moisture. Ingredient choices—eggs, fat, and sugar—alter moisture and structure, which in turn changes how the crumb forms and how long it takes to bake through. Oven behavior, including the existence of hot spots or a rack that’s not centered, can skew bake results. Calibrate your approach by using an oven thermometer and a grid of tests across several batches when changing variables, rather than guessing.
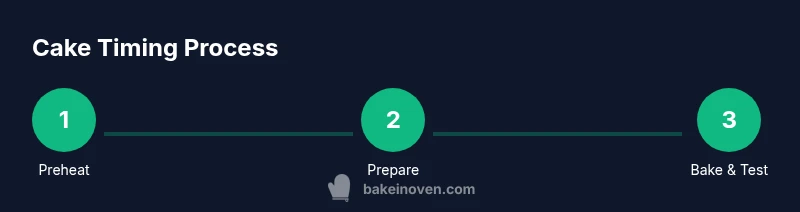
Practical workflow for accurate timing
A practical workflow keeps timing predictable: 1) preheat fully to the recipe temperature, 2) prepare a pan with parchment and proper greasing, 3) mix batter to the right consistency, 4) pour and level batter, and 5) bake, test at mid-point and near the end using doneness cues. Cooling is part of timing as well—hot cakes continue to cook slightly after removal, so allow a brief rest before testing doneness. A well-planned routine minimizes door openings and temperature fluctuations, which are the main enemies of even baking.
Common mistakes and fixes
Many bakers start with a timer and forget to test doneness mid-way. Others open the oven door too often, causing collapse or dense centers. Under-baking hides as a pale, fragile crumb, while over-baking dries the edges and dries out the center. Fixes include using an oven thermometer to align true temperature, adjusting times for pan size, and adopting a doneness protocol that relies on toothpicks and center tests rather than the clock alone. Practice, notes, and small adjustments after each bake help you converge on the perfect timing for your kitchen.
Tools & Materials
- Mixing bowls (sets of 2-3, stainless steel or glass)(Different sizes for creaming, whisking, and folding)
- Measuring cups and spoons(Separate dry and liquid measures; level for accuracy)
- Electric mixer or whisk(Consistent mixing helps with texture and rise)
- Cake pans (8-inch round or 9x13-inch) and parchment(Line pans with parchment for clean release)
- Oven thermometer(Verify that oven temperature matches the dial)
- Toothpicks or cake tester(Test center for doneness; remove crumbs with a clean pick)
- Timer or smartphone(Track bake time and mid-bake checks)
- Cooling rack(Cool on a rack to prevent soggy bottoms)
- Parchment paper(Prevents sticking and helps even release)
Steps
Estimated time: 1 hour 20 minutes
- 1
Preheat the oven
Set the oven to the recipe temperature and let it reach full heat before mixing batter. This ensures the cake starts baking at the correct rate and rises evenly.
Tip: Use an oven thermometer to confirm the actual temperature matches the setting. - 2
Prepare the batter
Cream fats and sugars, then incorporate wet and dry ingredients until just combined. Over-mixing can lead to a tight crumb and uneven expansion.
Tip: Mix until just combined; a few small lumps are better than overworking the batter. - 3
Grease and line the pan
Grease the pan lightly and line with parchment to ensure clean release after cooling. This step also helps the cake rise without sticking.
Tip: Trim parchment to fit the bottom and press against the sides for full contact. - 4
Pour and level the batter
Pour the batter into the pan and gently tap to settle and level the surface. A level batter bakes evenly, preventing domes and sinks.
Tip: Use a small spatula to even the top; avoid spreading batter too thin in corners. - 5
Bake and monitor doneness
Bake the cake, testing for doneness at the mid-point and near the end with a toothpick. Rely on cues like edges pulling away and a springy top, not just time.
Tip: Start testing at the minimum recommended time to prevent over-baking. - 6
Cool, test, and adjust if needed
Cool the cake on a rack for at least 20 minutes before removing from the pan. If center remains soft, bake longer in 2- to 3-minute increments.
Tip: If the center sinks, it may be overbaked or the oven temperature was too high; adjust for next bake.
Frequently Asked Questions
How do I adjust bake time for different pan sizes?
Adjust bake time based on batter depth. A deeper batter takes longer to bake through; a shallower layer finishes sooner. Always test for doneness with a toothpick and center test rather than relying solely on the clock.
Adjust bake time based on batter depth and test the center for doneness instead of relying only on the clock.
Can altitude affect cake timing?
Yes. At higher altitudes, batter rises faster and dries more quickly. You may need a slightly longer bake time at a lower temperature and more moisture. Use an oven thermometer and do progressive testing.
Altitude can speed rise and dry out batter; bake longer at a lower temp and test doneness as you go.
Is parchment paper necessary for every cake?
Parchment prevents sticking and makes release easier, especially for delicate batters. For very sturdy cakes, a light oiling may suffice, but parchment offers reliable release.
Parchment helps prevent sticking and makes removing the cake clean and easy.
What is the best way to test cake doneness?
Use a toothpick or cake tester inserted into the center. If it comes out with a few crumbs or clean, the cake is ready. Also observe a springy top and pulling edges.
Test with a clean toothpick; it should come out with a few crumbs or be clean, plus the top should spring back.
Why did my cake crack on top or dome excessively?
Cracking or doming often results from too high an oven temperature or batter rising too quickly. Lower the temperature slightly, ensure even heat, and test doneness earlier.
Cracking usually means the oven was too hot or the batter rose too fast. Try a cooler, more even bake.
Watch Video
Key Takeaways
- Plan bake time with batter density and pan size in mind.
- Doneness cues are more reliable than the clock alone.
- Verify oven temperature with an independent thermometer.
- Use pan preparation and leveling to ensure even baking.