Bake Eggs for Hard Boiled: Oven Method
Learn a reliable oven-based method to bake eggs for hard boiled. Prep, bake, cool, peel, and store with practical tips from Bake In Oven for consistent results.

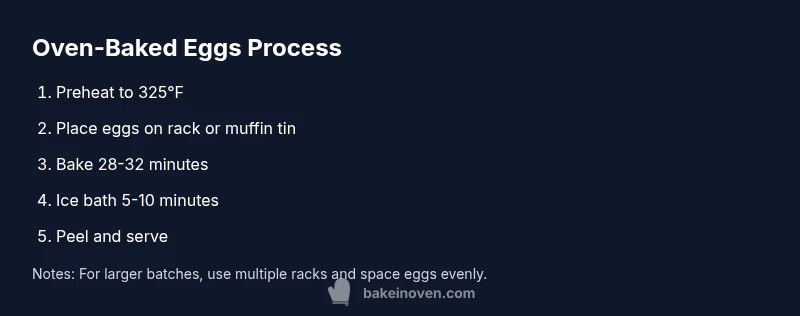
Learn how to bake eggs for hard boiled in the oven for consistent doneness with minimal hands-on time. You’ll preheat, arrange eggs on a rack or muffin tin, bake, and shock in ice water to stop cooking. This guide also covers doneness cues, peeling tips, and storage options for batch cooking.
Why Baking Eggs in the Oven Works for Hard Boiled Eggs
Baking eggs in the oven is a simple, reliable method to produce hard-boiled results with consistent yolk doneness. For home bakers, it minimizes active hands-on time and reduces the risk of overcooking or cracking compared to on-stove methods. According to Bake In Oven, baking eggs for hard boiled provides gentle, even heat that surrounds each egg, leading to uniform texture. The Bake In Oven Team found that with proper preheating and timing, you can cook a dozen eggs at once without babysitting. This approach is especially useful when you’re preparing batch meals, meal prep, or school lunches. In this section we explore why this method works and how to adapt it to your kitchen.
Prepping Your Tools and Ingredients
Before you start, gather simple, kitchen-tested items and a handful of eggs. The goal is to have everything ready so you can move smoothly from preheating to cooling. Use large eggs for predictable results, and choose either a heatproof muffin tin or a wire rack placed on a rimmed baking sheet to keep eggs from rolling. Have an ice bath ready: a large bowl filled with ice and cold water. Keep a timer handy, plus tongs or a slotted spoon for transfers. This prep minimizes surprises and helps you stay consistent, even when cooking in larger batches.
Oven Method Variants: With or Without a Water Bath
There are two common approaches. Dry bake (no water bath) yields very hands-off cooking: place eggs on a rack or muffin tin, bake at 325°F (165°C) for about 28-32 minutes, then dunk in ice water to arrest carryover cooking. The water bath variant uses a shallow pan of hot water beneath the rack to create gentle, humidity-rich heat that further reduces cracking and promotes uniform results. Either method works well; the choice depends on your oven’s quirks and batch size.
Doneness, Peeling, and Storage Guidelines
For hard boiled eggs, the goal is fully set whites and fully cooked yolks without a gray ring. Timing should be followed closely; slightly younger eggs peel more easily after chilling. After baking, transfer eggs to ice water for 5-10 minutes to stop cooking and make peeling smoother. Peel under running cool water if desired, then store peeled or unpeeled in a sealed container in the refrigerator for up to one week.
Troubleshooting Common Issues
Cracked shells? It often happens when eggs are cold or thrown onto a hot surface. Avoid this by letting eggs come to room temperature for a few minutes, or use a rack to cushion the shells. Under- or overcooked yolks? Adjust bake time by 2–5 minutes for your specific oven and egg size. If peeling is stubborn, refrigerate eggs for 10–20 minutes after cooling; the chill helps separate membranes from the shell.
Variations and Serving Ideas
Hard boiled eggs baked in the oven are versatile. Try a light dusting of flaky salt, cracked pepper, or paprika. For a quick meal, slice into salads, chop for egg salad, or serve with a dash of hot sauce. If you’re prepping for kids, consider a tiny cup of mayonnaise or yogurt-dill dip on the side. Batch cooking this way lets you stock convenient protein for the week.
Safety and Clean-Up After Baking Eggs
Always handle hot trays with oven mitts and place them on cool surfaces after removing from heat. Wash hands after peeling, and sanitize your workspace. Save shells for compost if you’re composting, or discard them in regular trash. Wipe down the pan and rack to remove any egg residue before storing the equipment for next time.
Tools & Materials
- Eggs (large)(12 large eggs recommended for batch cooking)
- Oven-safe muffin tin or heatproof rack(Keeps eggs stable during baking)
- Baking sheet with edges(Catch spills and support rack)
- Ice bath (bowl with ice and water)(Rapid cooling to stop cooking)
- Kitchen timer(Track bake time accurately)
- Tongs or slotted spoon(Transfer eggs safely)
- Kitchen towel or oven mitts(Handle hot items)
- Optional serving extras(Salt, pepper, paprika, or dips)
Steps
Estimated time: 35-45 minutes
- 1
Preheat oven and prepare pan
Preheat the oven to 325°F (165°C). Arrange a rack or muffin tin on a rimmed baking sheet to keep eggs stable during baking.
Tip: Starting with a preheated oven ensures even cooking; use a rack to avoid rolling eggs. - 2
Arrange eggs for even exposure
Place eggs in a single layer on the rack or in the muffin tin. Avoid crowding; space helps heat circulate for uniform doneness.
Tip: If using a muffin tin, keep a little space between cups for heat flow. - 3
Choose your heat method
Decide between a dry bake (no water bath) or a shallow water bath under the rack to create gentle humidity. Both work; water bath can reduce cracking.
Tip: For beginners, start with the dry bake and add a water bath in future batches if shells crack. - 4
Bake until set
Bake the eggs for 28-32 minutes, depending on egg size and oven. The whites should be fully set and yolks should be firm but not chalky.
Tip: If you’re unsure about yolk level, bake for 30 minutes and check one egg for consistency. - 5
Shock and cool
Immediately transfer eggs to an ice bath and chill for 5-10 minutes to halt cooking and ease peeling.
Tip: The ice bath is essential; it helps prevent greenish yolks from overcooking. - 6
Peel or store
Peel under cool running water for easier removal, or refrigerate unpeeled for later peeling. Store peeled or unpeeled eggs in a covered container.
Tip: Peeling under water reduces sticking and membrane tearing. - 7
Flavor and serve
Season as desired or add to salads and snacks. If serving later, keep eggs in the fridge and consume within a week.
Tip: Label batches by date to track freshness. - 8
Cleanup
Cool pans completely, then wash with warm soapy water. Dry thoroughly to prevent rust on racks.
Tip: A quick wipe-down after cooling reduces odors and keeps equipment ready for next batch.
Frequently Asked Questions
Can I bake eggs for hard boiled without a water bath?
Yes, you can bake without a water bath, but a water bath can help prevent cracking and promote uniform heat distribution. Start with dry bake and experiment to see what works best in your oven.
Yes, you can bake without a water bath, but a water bath can help prevent cracking.
What oven temperature should I use for hard-boiled eggs?
A common range is 325°F to 350°F; 325°F provides gentler heat and more even results across a batch. Adjust by a few degrees if you notice overcooking in your oven.
325 to 350 degrees is common; start at 325 and adjust as needed.
How do I test if the eggs are fully cooked?
Bake for 28-32 minutes, then chill in ice water and peel one egg to inspect the yolk. If the yolk is still too soft, bake a few minutes longer in the next batch.
Bake 28-32 minutes, chill, and check a single egg to test yolk firmness.
Why are baked eggs sometimes hard to peel?
Peeling is easier after an ice bath and using slightly older eggs. Peel under running water to help membranes release smoothly.
Ice bath helps peeling; using slightly older eggs eases the process.
How long will baked hard-boiled eggs last in the fridge?
Store peeled or unpeeled eggs in a sealed container in the refrigerator for up to one week for best quality.
They’ll stay good for up to a week in the fridge.
Watch Video
Key Takeaways
- Preheat the oven to 325°F for even cooking
- Use a rack or muffin tin to stabilize eggs
- Ice bath stops cooking and aids peeling
- Bake 28-32 minutes for hard yolks
- Batch cook for efficiency and consistent results