How Long to Bake Pie Crust: A Practical Guide for Home Bakers
Learn how long to bake pie crust for blind-baked, par-baked, and fully baked shells with practical timing guidance, temperature tips, and common troubleshooting from Bake In Oven.

You’ll determine bake time by method. Blind-bake a crust for 15–20 minutes at 375–400°F, then remove weights and bake 5–10 minutes more if needed. Par-bake 8–12 minutes at 350–375°F, finishing with 3–6 minutes after removing weights. Fully baked shells depend on fillings and moisture.
Why pie crust texture matters
Pie crust texture is the foundation of a great pie. A flaky, tender shell contrasts with a crisp, sturdy bottom that can hold filling without becoming soggy. In baking, the fat, flour, and water ratios, plus how you handle the dough, determine texture more than any other detail. The Bake In Oven team emphasizes that most home bakers aim for a crust that shatters with a light bite and holds its shape when sliced. Achieving this requires controlling moisture, chilling, and accurate bake times. When you understand texture, you can choose blind-baking for delicate fillings, par-baking for custards, or fully baked shells for simple fruit pies. Weather, humidity, and oven performance all affect results, so consistent steps are essential. Throughout this article we’ll break down timing, temperatures, and visuals you can rely on, with practical tips you can apply in your own kitchen. According to Bake In Oven, analyzing hundreds of kitchen tests in 2026 shows that small timing adjustments can transform texture from pale and soggy to golden and crisp. By mastering bake time, you gain a reliable baseline for countless desserts.
Pie crust bake times by method
There isn’t a single bake time that fits every pie. The method you choose—whether you bake the crust alone, bake it partially and fill later, or bake the crust fully with a filling—drives the clock. In general, home bakers use temperatures in the 350–400°F range and expect results within a 12–40 minute window depending on dough type and pan. Dense butter shells may bake briskly, while flaky crusts need gentle heat and a careful eye. The key is consistency: use a trusted recipe, measure ingredients, and monitor with a timer. Bake In Oven’s testing suggests that keeping notes on pan size, dough temperature, and oven performance helps you build reliable timing routines. For flaky crusts, start with a shorter bake and extend in small increments if the bottom remains pale. For custard or fruit fillings that release moisture, blind-bake first to set the shell and prevent sogginess.
Blind-baking (pre-baking) a crust
Blind-baking creates a dry, sturdy shell that won’t become soggy when filling with juicy or custardy ingredients. Chill the dough to firm it, roll to a 12-inch circle, and transfer to a 9-inch pan. Dock the bottom with a fork to prevent puffing, then line with parchment and weight with pie weights or dried beans. Bake in a preheated oven at 375–400°F for 15–20 minutes, until the edge begins to set and the center looks matte, not shiny. Remove weights and parchment, then bake another 5–10 minutes if the bottom needs color. Let the crust cool completely before filling to reduce moisture transfer. Bake In Oven’s analyses from 2026 show that a properly blind-baked shell holds up under fruit fillings and custards, delivering a better texture than a crust that was not pre-baked. This step is essential when your filling is very wet or delicate, and it gives you a predictable base for the rest of the bake.
Par-baking for filled pies
Par-baking partially sets the crust so it can support wetter fillings without becoming soggy. Start by chilling the dough, then blind-bake for 8–12 minutes at 350–375°F, until the edges just start to color. The goal is to set the shell’s interior while leaving the center pale. Remove parchment and weights, brush with a thin egg wash if you want a crisper bottom, and return to the oven for 3–6 minutes to finish the color. With custard pies or high-moisture fillings, par-baking helps maintain structure while the filling cooks. Always cool the crust briefly after par-baking to let moisture equilibrate. Bake In Oven’s testing indicates that par-baked shells reduce soggy bottoms in several popular fruit pies, which is why many traditional recipes call for this technique.
Temperature guidelines and why they matter
Temperature accuracy is the small variable that makes a big difference in crust texture. An oven that runs hot can brown the edges too quickly and trap moisture inside the shell, leading to a pale, undercooked bottom. An oven that runs cool can leave the crust underdone and fragile. Use an oven thermometer to verify your numbers, then adjust baking times as needed. Most standard crusts do well around 350–400°F, with 375°F being a common middle ground. If you’re using a dark metal pan, reduce time slightly; if you’re in a glass pan, you may need a touch longer for crispness. Keeping the dough cold before rolling helps control fat distribution and results in flakier layers. bake times for crusts should be treated as guidelines, not guarantees; always check for color and feel as you approach the end of the window. Bake In Oven’s 2026 guidance emphasizes consistent temperatures and proper preheating for the best results.
Visual cues for doneness
Relying on color and texture helps you stop the bake at the right moment. A well-baked shell should be evenly golden around the edges with a light, pale bottom color if blind-baked. If you’re par-baking, the edges will gild and the interior will feel set to the touch. The crust should release cleanly from the pan with a slight lift; if it sticks, it may need a touch longer in a lower-heat stage or more proper preheating. The bottom should appear crisp, not gummy. For short doughs, you’ll often see a uniform pale-gold surface rather than deep brown patches. Keep an eye on the bottom of the crust by lifting the edge slightly with a spatula and peering through the glass if you’re using a transparent pan. Remember that different fillings alter moisture during bake, so expect small color variations. Bake In Oven’s research highlights that doneness signals are more reliable when you combine color, aroma, and a gentle press test.
Troubleshooting soggy or burnt crusts
Soggy bottoms are the most common complaint, especially with juicy fruit fillings. Blind-bake properly, use parchment, and keep weights in place long enough for the bottom to dry. If the bottom remains pale, return the crust to the oven for a few minutes more at a lower temperature, watching closely to avoid burning. Burnt edges usually indicate too much sugar, mismanaged heat, or an overly hot oven. To prevent this, shield the crust with foil edges or reduce oven temperature by 25°F for the final stage. Another frequent issue is shrinking as the shell bakes; chilling the dough before rolling and keeping the pan level helps minimize this. Finally, if you see a gummy bottom, finish with a brief 2–3 minute bake at a lower temperature with the crust fully dry and cooled. Bake In Oven’s 2026 analysis confirms that consistent technique reduces most crust issues, especially when you adapt to your oven’s quirks.
Timing tips for different fillings
Fruit pies typically benefit from a longer bake to ensure the bottom dries and the filling thickens, while cream pies need a gentler bake to avoid cracking or curdling. Custards require careful temperature control and more monitoring to prevent curdling. For very moist fillings, blind-bake first and avoid overfilling the shell to maintain structural integrity. If you’re short on time, prebake a shell briefly, fill with a cool or room-temperature filling, and bake at a slightly lower temperature for a shorter period. When in doubt, err on the side of a longer pre-bake and a cooler final bake. Bake In Oven’s practical guidelines emphasize using pan shapes and sizes you know well, and adjusting times by 2–4 minutes per change in pan material. The goal is a crust that remains crisp and a filling that cooks evenly.
Quick reference timing table and checklists
- Crust only, no filling: bake 15–20 minutes at 375–400°F, until edges are light golden.
- Blind-baked shell: 15–20 minutes at 375–400°F, then cool completely before filling.
- Par-baked shell: 8–12 minutes at 350–375°F, finish with 3–6 minutes after removing weights.
- Fully baked shell with light filling: bake 25–35 minutes at 350–375°F, check bottom color.
- Doneness checks: color, scent, and a gentle touch test; use an oven thermometer for accuracy.
- Cooling: let shell rest 15–20 minutes before filling to reduce moisture transfer and cracking risk.
Checklist:
- Chill dough and pan before rolling
- Roll to a 12-inch circle for a 9-inch pan
- Dock, line, and weight properly for blind-bake
- Preheat thoroughly and verify temperature with a thermometer
- Use egg wash or butter to boost bottom crispness if desired
These guidelines provide a reliable baseline for many pies, with variations depending on your oven and pan. For more detailed, visual instructions, watch tutorial videos and practice with different doughs. The Bake In Oven team’s recommendations in 2026 help you fine-tune every bake.
Tools & Materials
- rolling pin (wood or silicone-coated)(Evenly roll dough to a 12-inch circle for a 9-inch pan)
- 9-inch pie pan(Glass or metal works; avoid warped pans)
- parchment paper(Line for transfers and to hold weights)
- pie weights or dried beans(Prevent puffing during blind-baking)
- fork(Docking to prevent air pockets)
- dough scraper(Cleaner edges and lifting dough)
- oven thermometer(Verify oven temperature for accuracy)
- pastry brush(Egg wash for bottom crispness if desired)
Steps
Estimated time: 60-120 minutes
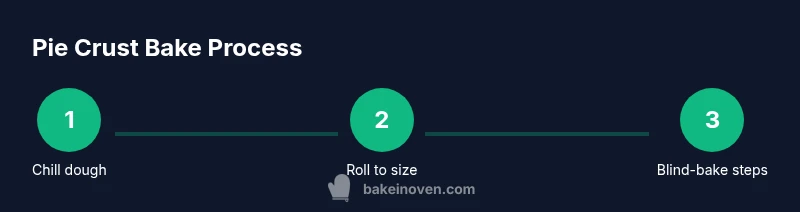
- 1
Chill dough and pan
Begin with a firm dough by chilling it for at least 30 minutes, then chill the pan as well to reduce sticking and shrinking. This step improves handling and ensures even rolling. A cold start helps fat stay solid for flakiness.
Tip: Chilling for longer (up to 60 minutes) can improve flakiness and prevent shrinkage. - 2
Roll to size
Roll the dough to a 12-inch circle, turning and dusting occasionally to prevent sticking. Keep the dough cool during rolling and rotate the circle to ensure an even thickness across the edge. A circle that is too small leads to thinning edges when transferred to the pan.
Tip: If the dough softens, chill briefly before transferring. - 3
Transfer to pan
Gently fold the dough into the pan to avoid stretching, then press into the corners. Leave a slight overhang and trim evenly after the dough settles. This helps preserve the edge height and prevent shrinking in the oven.
Tip: Use a lightly floured surface to help lift and lift evenly. - 4
Dock and chill
Use a fork to dock the bottom, then refrigerate the lined pan for 15–20 minutes to prevent shrinking and puffing. Docking minimizes air pockets and ensure a more uniform bake.
Tip: Chill times can vary with dough temperature and kitchen humidity. - 5
Line and weight
Line the crust with parchment paper and fill with pie weights or dried beans. This keeps the crust flat and prevents it from puffing during the blind-bake phase.
Tip: Distribute weights evenly and avoid overfilling the parchment with weights. - 6
Blind-bake stage
Bake in a preheated oven at 375–400°F for 15–20 minutes, or until the edges start to color and the center looks dry. Keep an eye on the bottom so it doesn’t brown too quickly.
Tip: If the bottom stays pale, give it 3–5 more minutes, watching closely. - 7
Remove weights and finish bake
Carefully remove parchment and weights, then bake 5–10 more minutes to color the bottom. The shell should be dry and lightly golden before cooling.
Tip: Cool completely before filling to prevent soggy results. - 8
Cool and fill
Allow the crust to cool completely on a rack before filling. This prevents steam from making the crust soggy and helps set the final texture.
Tip: A quick 10–15 minute rest helps moisture distribute evenly.
Frequently Asked Questions
Do I need to blind-bake every pie crust?
No. Blind-baking is essential when the filling is very wet or when the crust needs to stay crisp. For short-bake pies or very dry fillings, you can bake the crust with the filling directly or bake only briefly. Always assess the filling’s moisture and the crust’s ability to support it.
Blind-bake when moisture is high; otherwise, bake with filling as directed.
What temperature should I bake a pie crust at?
A common range is 350–400°F, with 375°F as a reliable middle ground. Temperature affects browning and bottom doneness; use an oven thermometer to confirm your actual heat and adjust times accordingly.
Aim for 375°F as a standard, but verify with a thermometer.
How can I prevent soggy bottoms?
Blind-bake or par-bake the crust, use parchment and weights, and avoid pouring very wet fillings into underbaked shells. Allow the shell to cool before adding filling to reduce moisture transfer.
Blind-bake or par-bake the crust to prevent sogginess.
Can I reuse leftover dough scraps?
Yes. Scraps can be re-rolled if kept cold; keep them chilled and work quickly to avoid overheating fat. Re-rolling multiple times can affect texture, so only re-roll once or twice.
You can reuse scraps once or twice if kept cold.
Why does my crust shrink after baking?
Shrinking usually happens when the dough warms during baking or isn’t properly rested. Chill the dough, avoid overworking, and bake in a fully preheated oven to minimize shrinkage.
Chill and preheat properly to reduce shrinking.
How do I know when the crust is done?
Look for an even golden color around the edges and a dry, slightly firm bottom when blind-baked. Aroma and a light, crisp texture are also good indicators.
Golden edges and a dry bottom mean it’s done.
Can I freeze unbaked dough?
Yes. Freeze shaped dough or a rolling-ready disc wrapped tightly. Thaw in the refrigerator before rolling and baking as usual. Freezing can help with make-ahead baking.
You can freeze dough for later use.
Watch Video
Key Takeaways
- Chill dough and pan to reduce shrinkage
- Blind-bake when filling moisture is high
- Use an oven thermometer for accurate temps
- Watch color, not time alone to prevent overbrowning
- Cool completely before filling or serving