How to Use an Electric Oven to Bake: A Practical Guide
Master baking with an electric oven. Learn preheating, rack placement, temperature checks, and step-by-step techniques for cookies, bread, and cakes with safe, kitchen-tested guidance from Bake In Oven.

This guide teaches you how to use an electric oven to bake a wide range of foods, from cookies to loaves, with safe preheating, proper rack placement, and temperature checks. You’ll learn oven calibration basics, choosing pans and parchment, and avoiding common mistakes. Follow the steps for consistent, reliable results using standard home equipment.
Understanding how electric ovens heat evenly for baking
Electric ovens rely on radiant elements and, in some models, a circulating fan to distribute heat. This combination affects how quickly items brown, rise, and set. When you ask how to use an electric oven to bake, you’re really asking how to manage temperature accuracy, heat distribution, and pan interaction to achieve consistent texture and color. Bake In Oven supports practical methods that work in typical home kitchens, not just test environments. In this section, you’ll learn how element placement, venting, and air circulation influence surface browning, interior crumb, and moisture retention. A clear mental model of heat flow helps you predict outcomes across cookies, breads, and cakes, so you can adapt recipes with confidence and avoid common pitfalls like underbaked centers or burnt edges. Remember: small, repeatable steps beat guesswork every time, especially with ovens that vary from model to model.
To support your journey, we’ll emphasize safe practices, reliable equipment choices, and a consistent routine that you can apply to most oven-baked recipes.
Preheating and oven readiness: temperature accuracy and timing
Preheating is the foundation of reliable baking. When you turn on your electric oven, it should come to the recipe’s target temperature before you start. This ensures the baking environment is stable from the first minute of the bake, which helps cookies spread evenly, breads rise consistently, and cakes set properly. Use an oven thermometer placed in the center of the rack to verify that the interior temperature matches the dial. If there is a discrepancy, you may need to recalibrate or adjust your technique. In Bake In Oven’s experience, taking 5–15 minutes to preheat properly pays off with noticeably more predictable results. Always account for convection settings if your oven offers them, and follow the recipe’s guidance on whether to lower the temperature when convection is active.
Rack placement, pans, and space for even heat
Where you place racks and how you space pans dramatically influences browning and evenness. In most home ovens, the center rack yields the most balanced heat exposure, while the top rack can promote browner tops and the bottom rack may bake more slowly. When you bake multiple sheets, leave at least 1–2 inches (2.5–5 cm) between pans and rotate them midway for uniform browning. Lightly greasing pans or using parchment paper or silicone mats reduces sticking and helps heat transfer stay predictable. Pan material matters too: dark, heavy baking sheets absorb heat differently than shiny, light-colored pans. By understanding these interactions, you can consistently replicate results across recipes.
Rack placement, pans, and space for even heat
Where you place racks and how you space pans dramatically influences browning and evenness. In most home ovens, the center rack yields the most balanced heat exposure, while the top rack can promote browner tops; the bottom rack may bake more slowly. When you bake multiple sheets, leave at least 1–2 inches (2.5–5 cm) between pans and rotate them midway for uniform browning. Lightly greasing pans or using parchment paper or silicone mats reduces sticking and helps heat transfer stay predictable. Pan material matters too: dark, heavy baking sheets absorb heat differently than shiny, light-colored pans. By understanding these interactions, you can consistently replicate results across recipes.
Temperature accuracy and calibration using an oven thermometer
Oven temperature accuracy is a common culprit behind inconsistent baking. A digital or dial thermometer placed in the center of the oven helps you verify that the interior matches the set temperature. If you notice a consistent 25°F (14°C) gap, consider adjusting your target temperature or calibrating the oven per the manufacturer’s instructions. For a more robust approach, bake a simple test sheet (cookies or small rolls) at a known temperature and compare results to expected outcomes. Bake In Oven recommends keeping a log to track any recurring deviations and to fine-tune your technique over time.
Convection vs standard baking: when and how to adjust
If your oven offers a convection setting, airflow can speed up baking and promote even browning. When using convection, you’ll often want to reduce the temperature by about 20–25°F (roughly 10–14°C) and/or shorten the bake time slightly. Recipes written for standard ovens may not explicitly state convection adjustments, so start with a conservative reduction and monitor doneness cues closely. Convection is particularly effective for cookies with thin edges, roasted vegetables, and crispy crusts on breads.
Baking cookies, bread, and cakes: technique differences and tips
Different baked goods benefit from tailored approaches. Cookies spread and set quickly, so spacing and temperature stability are key. Bread relies on steam and a proper oven spring, so scoring and initial high heat can help. Cakes require gentle heat and thorough mixing, with cool-down to prevent collapse. In each case, use parchment, rotate pans, and keep an eye on doneness cues such as color, edges, and texture. Record results from each bake to refine your process.
Troubleshooting common issues when baking in an electric oven
If edges burn before the center is done, your oven may run hot or you’re using too-dark a pan. If bottoms are soggy, you may need to rotate the sheet or extend bake time slightly and ensure proper heat from below. Cracks or doming can indicate overly aggressive leavening or insufficient oven spring. Keep a log of temperatures, times, and outcomes to identify patterns and adjust. For stubborn issues, try a different pan, line, or rack position and re-test with a small recipe batch.
Quick-start checklist for your first bake
- Preheat to the recipe temperature and verify with a thermometer. 2) Line baking sheets with parchment or silicone mats. 3) Space pans evenly and rotate halfway through. 4) Start with a tested recipe and record results. 5) Use doneness cues rather than relying solely on time. 6) Let baked goods cool on a rack to finish setting. 7) Clean and reset for your next bake to reinforce consistency.
Tools & Materials
- Electric oven (functioning and clean)(Ensure it is free from residue and odors that could transfer to food)
- Oven thermometer(Place in center rack to verify actual oven temperature)
- Baking sheets (jelly-roll or half-sheet pans)(Use light-colored aluminum for even heating)
- Parchment paper or silicone baking mats(For non-stick, easy release and clean-up)
- Cooling rack(To prevent sogginess and promote even cooling)
- Silicone spatula and oven mitts(For handling hot pans safely)
- Timer or clock(To track bake times and prevent overbaking)
- Dried towels or potholders(Heat protection when removing pans)
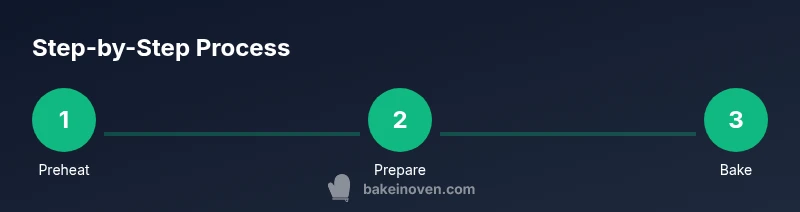
Steps
Estimated time: 40-50 minutes
- 1
Preheat to target temperature
Turn on the oven and select the recipe’s requested temperature. Allow the oven to reach that temperature before loading food, and verify with the center thermometer for accuracy. If you’re using convection, consider lowering the temperature slightly according to recipe guidance.
Tip: Use a thermometer in the middle of the rack to confirm accurate heat; do not rely solely on the dial. - 2
Prepare pans and dough
Line sheets with parchment or silicone mats. Portion dough evenly to ensure uniform baking and maintain consistent thickness across pieces. Keep dough refrigerated if necessary to help maintain shape.
Tip: Chill dough if it spreads too quickly; cold dough holds its shape better during bake. - 3
Load and space pans
Place pans on the center rack with adequate space between them for air flow. If baking multiple sheets, rotate them halfway through for even browning.
Tip: Avoid crowding the oven; air needs space to circulate for even heat distribution. - 4
Monitor doneness cues
Watch for recipe-specific cues: set edges, color, or internal texture. Use a timer as a baseline, but rely on visual cues to decide when to remove from heat.
Tip: Perform a quick test with a small piece to ensure proper doneness before removing the entire batch. - 5
Remove and cool
Take pans out with mitts, place on a cooling rack, and avoid stacking hot pans. Allow baked goods to cool fully, as they continue to set after leaving the oven.
Tip: Cooling is essential for texture; premature removal can lead to soggy or gummy interiors. - 6
Clean and reset
Wipe away spills after the oven cools, then recheck thermometer accuracy for future bakes. Keep a log of temperatures, times, and outcomes for ongoing improvement.
Tip: Record what worked and what didn’t to build a personalized baking profile.
Frequently Asked Questions
What is the best approach to preheating for reliable baking in an electric oven?
Preheat to the exact temperature called for by the recipe and verify with an oven thermometer placed in the center of the oven. Allow enough time for the oven to stabilize before loading food, which helps ensure consistent browning and bake development.
Preheat to the recipe temperature and check with a thermometer in the center of the oven. Wait until the oven stabilizes before loading food.
Should I use convection when baking cookies or bread?
If your oven has convection, start with a lower temperature or shorter time as guided by the recipe. Convection speeds up browning and can alter texture, so monitor closely and adjust as needed.
Use convection only if the recipe or guidelines suggest it, and watch for faster browning.
Why do cookies spread unevenly or bake unevenly?
Uneven results often come from hot spots, improper rack height, or crowded sheets. Rotate pans, use parchment, and maintain consistent dough sizes for uniform bake.
Uneven baking usually means hot spots or poor rack placement. Rotate and space pans evenly.
What safety precautions should I follow while baking?
Always use heat-resistant gloves, keep flammables away from the oven, and never leave the oven unattended while in use. Let the oven cool before cleaning.
Wear oven mitts, keep flammables away, and don’t leave the oven unattended.
How can I improve consistency across batches?
Maintain a consistent preheat, use the same pan type and size, rotate trays, and log outcomes with temperatures and times to refine your process over time.
Keep a consistent setup and record results to improve bake repeatability.
Watch Video
Key Takeaways
- Preheat accurately and verify with an oven thermometer
- Space pans evenly and rotate for even heat
- Rely on doneness cues, not just time
- Use parchment or mats for best results
- Document outcomes to refine your practice