Bake and Broil: A Practical Guide for Home Bakers
A practical guide to bake and broil: when to use each method, ideal temperatures, rack placement, finishing tips, and safety for cookies, vegetables, fish, and casseroles.

Master bake and broil with expert guidance on when to use each method, temperatures, rack placement, and finishing techniques to achieve perfect color, texture, and doneness in cookies, vegetables, fish, and casseroles. You’ll need a well-calibrated oven, a rimmed baking sheet, parchment, and an instant-read thermometer.
Why Bake and Broil Matter for Home Bakers
According to Bake In Oven, the ability to bake and broil with intention helps home bakers control crust color, moisture, and texture. Bake relies on steady heat radiating from the oven walls, creating soft interiors with evenly browned exteriors. Broiling uses intense radiant heat from above to speed browning and crispness on the surface. When used thoughtfully, these two methods let you achieve a perfect balance of moisture and crust across a wide range of dishes. This section covers why choosing the right method matters for consistency, flavor, and texture, and how climate, pan type, and oven performance influence results. By understanding the core difference between bake and broil, you’ll gain confidence to tackle everything from cookies and casseroles to fish and vegetables with predictable results.
-1 placeholder-
Tools & Materials
- Oven thermometer(Place away from vents to get an accurate reading; calibrate if needed)
- Rimmed baking sheets(Prevents spills; use dark or light pans depending on browning goals)
- Parchment paper(For easy release and cleanup; avoid direct contact with broiler elements)
- Aluminum foil(Useful for tenting or shielding foods from over-browning)
- Oven-safe rack(Elevates food for even heat circulation during bake)
- Tongs(For safe handling of hot trays and foods)
- Instant-read thermometer(Confirm internal doneness quickly; especially for proteins)
- Oven mitts(Heat-protective, essential during high-heat broiling)
- Cooling rack(Rest baked goods to stop carryover cooking)
- Silicone spatula(Gentle for turning delicate items)
Steps
Estimated time: 60-90 minutes
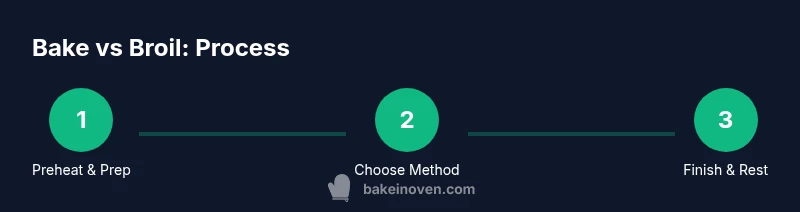
- 1
Preheat and prep
Begin by preheating the oven to the recipe’s bake temperature or setting the broil element at the top. While it heats, prepare pans with parchment or foil, line up ingredients, and confirm doneness cues. This step ensures consistent cooking and prevents soggy bottoms or uneven browning.
Tip: Preheating duration varies by oven; test with a thermometer to confirm the target temperature before loading food. - 2
Position racks for bake
Place the rack in a middle or lower position for even heat distribution during bake. Use a rimmed sheet and, if browning is a goal, rotate the sheet halfway through to avoid hot spots.
Tip: Avoid crowding the pan; allow space around for air to circulate. - 3
Choose method and load
Decide whether the dish benefits from bake’s steady heat or a broil finish for color. Load the pan so ingredients sit flat and in a single layer for even exposure.
Tip: If finishing with broil, have a timer ready to avoid burning the top layer. - 4
Monitor and adjust temperature
Keep an eye on internal temperatures with an instant-read thermometer and visually inspect color development. If color is lagging, raise the heat slightly or move closer to the heat source, depending on the method.
Tip: Avoid opening the oven door too often; it causes heat loss and uneven cooking. - 5
Switch to broil for finishing
When you want deep color or crispness, switch to the broil setting for a brief period, watching closely to prevent scorching. Remove from heat at the right moment for perfect carryover cooking.
Tip: Broil in 2–4 minute bursts, checking after each interval. - 6
Rest and serve
Allow baked or broiled foods to rest briefly. Resting helps redistribute juices and finish any residual cooking, ensuring a tender bite with a crisp exterior.
Tip: Use a cooling rack to avoid soggy bottoms after baking.
Frequently Asked Questions
What is the fundamental difference between bake and broil?
Bake uses steady, inside heat to cook food evenly, while broil uses intense top heat to brown and crisp surfaces quickly. Understanding this helps you control texture and color.
Baking cooks from all sides with even heat, while broiling browns from the top, giving a quicker finish.
Can I bake and broil the same dish?
Yes. Many dishes begin by baking to cook through, then finish with a brief broil for color. Watch closely to prevent burning.
Yes, you can bake and then broil to finish for color.
How do I know when to switch from bake to broil?
Switch when you want browning or crisping on the surface, typically after the food is through most of its internal cooking. Monitor closely.
Turn to broil when you want a browned top, and keep a close eye so you don’t burn it.
Why isn’t my food browning under broil?
Possible causes are distance from top heat, oven not hot enough, or food thickness too large. Adjust rack position and preheat more next time.
If you’re not browning, check how far the food is from the top heat and preheat properly.
Can convection affect bake and broil results?
Convection speeds heat distribution; you may need to lower bake temperature by about 20–25°F and reduce bake time slightly.
Yes, convection changes heat flow; adjust temps and times a bit.
What foods are best for broiling?
Thin cuts, fish fillets, cheese-tinished dishes, and vegetables with small pieces respond well to broiling for finishing color.
Broiling shines on thin cuts, seafood, and dishes needing a crisp top.
Watch Video
Key Takeaways
- Master bake and broil with intentional rack placement.
- Use thermometer-guided timing to avoid under/overcooking.
- Finish with broil in short bursts for color and crispness.
- Let foods rest briefly to seal in flavor and texture.