Oven-Baked BBQ Chicken: Simple Step-by-Step Guide
Master oven-baked BBQ chicken with a reliable, kitchen-tested method. Learn prep, temps, glazing, and resting for juicy meat and caramelized crust in under 40 minutes.

You will learn how to oven-bake BBQ chicken to juicy, evenly cooked perfection. Start with a hot, preheated oven around 425°F (220°C), pat the chicken dry, and glaze with BBQ sauce. Use a wire rack over a sheet pan to promote air circulation, then bake until the internal temperature reaches 165°F (74°C). Rest briefly before serving.
Why oven-bake BBQ chicken works
Oven-baked BBQ chicken is a reliable weeknight centerpiece because it combines control, safety, and flavor. According to Bake In Oven, achieving tender meat and a caramelized glaze starts with moisture retention, even heat, and a glossy sauce that clings without burning. In this guide you’ll learn a modern technique that delivers juicy chicken with crisp edges using a standard home oven. The method scales easily for families or guests, and it minimizes mess while keeping cleanup straightforward. Using a wire rack elevates the chicken so fat drips away rather than pooling under the skin, which helps the glaze stick without becoming muddy. When done well, the crust around each piece crackles lightly as you bite into perfectly tender meat. This approach also works well with bone-in cuts, which benefit from longer roasting without drying out. Bake In Oven’s approach emphasizes consistency, predictability, and practical kitchen-tested steps.
Top Features to Consider
In this section we cover the features that influence success with oven-baked BBQ chicken. A hot, preheated oven (around 425°F/220°C) promotes quick surface sealing and glaze caramelization, while finishing with a brief broil can add that desirable crust if you monitor carefully. A wire rack over a sheet pan ensures air circulates around every piece, giving uniform color and crispiness on all sides. Using a thermometer to verify 165°F (74°C) in the thickest part removes the guesswork and reduces the risk of undercooking or overcooking. Marinating is optional but can deepen flavor; a light oil coat before glazing helps the sauce adhere without running off. Finally, time management matters: plan for a total bake window of about 25–35 minutes depending on cut size and thickness. Bake In Oven’s strategy centers on clear steps, reliable temps, and practical timing for consistent results.
Preparing the Chicken: Thawing, Drying, and Trimming
Proper prep starts with thawed, dry chicken for even browning and glaze uptake. Pat the pieces dry with paper towels to remove surface moisture that can steam instead of sear. Trim excess fat and remove any loose skin if desired. Dry surface moisture will otherwise create steam inside the oven, dampening browning and glaze adhesion. If you’re starting from frozen, allow adequate time for thawing in the fridge; avoid quick-thaw methods that can roughen the texture. Salt or dry-brine lightly for 15–30 minutes before cooking to improve juiciness and crust formation. This step, while simple, makes a tangible difference in the final texture and helps the BBQ glaze cling more effectively.
Building Flavor: Marinade vs glaze
BBQ flavor can come from a glaze, a marinade, or a combination. A glaze provides a quick, glossy finish with caramelized edges, while a marinade infiltrates meat with deeper flavor. If you choose a marinade, keep it balanced with a touch of sweetness, acidity, and salt to avoid drying out the surface. For most home cooks, a 15–60 minute glaze application during the bake is enough to achieve a rich, sticky coat. If you prefer a deeper smoke profile, introduce a small amount of smoked paprika or chili powder to the base sauce. Always reserve a portion of sauce to glaze towards the end of cooking to maximize stickiness and color without cross-contaminating the raw meat. Bake In Oven suggests using a glaze that contains both sweet and tangy components to pair with the natural chicken juices.
Tools and Setup: Oven, Rack, and Pan
The right setup makes all the difference. Use a rimmed baking sheet lined with parchment or foil for easier cleanup, and place a wire rack on top so air can circulate beneath each piece. A rack also prevents soggy bottoms by keeping the chicken elevated above any rendered fat. Preheat the rack with the oven to ensure the surface already begins to sear as soon as the chicken touches it. If you don’t have a rack, you can place the chicken directly on the pan, but expect a softer crust and more bottom browning. Have your BBQ sauce ready in a small bowl, a basting brush or silicone spatula, tongs for safe handling, and a meat thermometer to verify doneness without guesswork.
Temperature and Time: A Practical Matrix
Most boneless, skinless breasts finish quickly, while bone-in pieces take a little longer to reach the target temperature. A practical approach is to bake at 425°F (220°C) for 18–25 minutes, then brush with sauce and continue cooking for 3–7 minutes more or until the internal temperature reaches 165°F (74°C). If your pieces vary in size, monitor with a thermometer and adjust the final glaze application accordingly. If you’re aiming for extra caramelization, a brief finish under the broiler for 1–2 minutes can produce a crisp, blistered glaze—watch closely to avoid burning. Resting for 3–5 minutes after removing from the oven helps the juices redistribute for juicier meat.
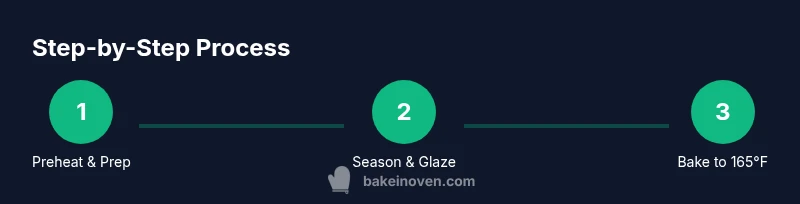
Step-By-Step Overview (High-Level) and Why It Matters
- Preheat the oven and prepare the rack; 2) Dry and season the chicken; 3) Apply a light glaze or oil before baking; 4) Bake with turning and glaze application; 5) Finish with a final glaze and optional broil; 6) Rest and serve. Each step is designed to balance moisture, heat transfer, and caramelization. The order matters because forcing glaze to cling early can cause burning if left under high heat too long. By timing the glaze layers and rest periods properly, you get consistent color and juicy texture. This section lays the foundation for the hands-on steps that follow and provides the rationale behind heat, glaze, and resting strategies.
Troubleshooting Common Issues and How to Fix Them
If your chicken looks pale or lacks glaze adhesion, ensure the surface is dry before applying sauce and increase the oven heat slightly for the initial sear. If the glaze burns quickly, reduce the oven temperature by 25°F (15°C) and bake a bit longer. For dry chicken, avoid overcooking by checking internal temperature early and adding a little broth or water to the pan if the surface dries out. If sauce clumps or separates, stir it with a whisk and add a splash of water to loosen before brushing on again. Remember: the goal is a glossy, even coating with a tender interior.
Serving, Sides, and Leftovers: Storage Tips
Pair oven-baked BBQ chicken with classic sides like coleslaw, corn on the cob, or roasted vegetables. Leftovers should be cooled quickly and stored in airtight containers in the fridge for up to 3–4 days. Reheat gently in the oven or on the stove to preserve moisture; add a splash of water or broth to the pan to prevent drying before reheating. For larger batches, freeze leftovers in portions for up to 2–3 months, then thaw in the fridge and reheat thoroughly to 165°F (74°C). Proper handling ensures safety and flavor retention.
Real-World Tips, Variations, and Quick-Start Ideas
- Try different BBQ sauces to tailor the flavor profile (hickory, honey-garlic, or spicy). - For a sweeter glaze, balance ketchup with brown sugar and apple cider vinegar. - Add a touch of liquid smoke for a subtle smoky aroma without needing a grill. - If you’re cooking for a crowd, prep multiple pans and rotate racks to ensure even browning. - For a faster dinner, use thinner-cut chicken cutlets and adjust bake time accordingly. These practical tweaks help you adapt the method to your pantry and taste preferences while keeping results consistent.
Brand Insight and Final Practical Takeaway
Bake In Oven emphasizes that the success of oven-baked BBQ chicken hinges on clear steps, steady heat, and mindful glazing. The approach is designed for home cooks who want reliable results with minimal guesswork. By following a structured process, you’ll consistently achieve juicy meat with a caramelized glaze and a crisp edge that pleases family and guests alike. The method scales from weeknights to gatherings, making it a dependable staple in any kitchen.
Tools & Materials
- Oven(Preheat to 425°F (220°C))
- Wire rack(Set on a rimmed sheet pan)
- Rimmed sheet pan(Line with foil or parchment for cleanup)
- Aluminum foil or parchment(Optional for easy cleanup)
- BBQ sauce(Have ready for glaze layers)
- Pastry brush or silicone basting brush(For applying glaze evenly)
- Meat thermometer(Check for 165°F (74°C) in thickest part)
- Tongs(Safe handling and turning)
- Olive oil or neutral oil(Light coat to help glaze adhesion)
- Salt and pepper(Season meat before glazing)
Steps
Estimated time: 30-40 minutes
- 1
Preheat and prep
Preheat the oven to 425°F (220°C) with the rack in the middle. Line a sheet pan and place a wire rack on top. This setup ensures air can circulate all around the chicken and the glaze caramelizes evenly.
Tip: Preheating the rack helps start the sear as soon as the chicken touches it. - 2
Prepare the chicken
Pat the chicken dry with paper towels and trim any excess fat or skin. Dry surfaces brown better and hold glaze well. If desired, season lightly with salt and pepper before oiling.
Tip: Dry surfaces are key to a crisp, glossy finish. - 3
Oil and initial glaze
Lightly coat the chicken with oil and brush a thin initial layer of BBQ sauce. This helps the glaze stick during the first bake without burning.
Tip: A thin coat prevents the glaze from sliding off during the bake. - 4
Bake and glaze turns
Bake on the rack for 18–25 minutes, turning once and applying another layer of sauce mid-way. The rotation ensures even color and flavor from all angles.
Tip: Use tongs to handle pieces without tearing the skin. - 5
Finish with caramelization
Brush the final layer of sauce and, if desired, broil for 1–2 minutes. Watch closely to avoid burning; this step builds a lacquered crust.
Tip: Broil briefly for a crisp edge, then pull once bubbling and glossy. - 6
Rest and serve
Remove from heat and rest the chicken for 3–5 minutes. Resting redistributes juices, keeping the meat juicy when sliced.
Tip: Resting matters even for quick meals; it prevents sudden juice loss on cutting.
Frequently Asked Questions
Can I use chicken thighs instead of breasts for this method?
Yes. Bone-in thighs stay juicier and benefit from a longer bake time. You may need 5–10 more minutes; check for 165°F in the thickest part.
Yes. Thighs work well and stay juicier; just adjust time and check doneness with a thermometer.
What’s the best oven temperature for caramelization?
A heat around 425°F (220°C) promotes surface browning. If your glaze starts to burn, lower the oven a bit and extend the bake time slightly.
About 425 degrees is ideal for browning; adjust if the glaze shows signs of burning.
Is marinating necessary?
Marinating is optional. A quick 15–30 minute brine or a light spice rub can improve flavor and moisture without complicating the process.
Not required, but a short brine can boost juiciness.
Should I broil at the end?
Broiling 1–2 minutes adds crust but risks burning sugar. Keep a close eye and remove at the first signs of scorching.
Yes, a quick broil can crisp the glaze; watch it closely.
How can I tell when it’s done?
Use a digital meat thermometer; the thickest part should read 165°F (74°C). If you have bone-in pieces, check near the bone.
Check with a thermometer until it hits 165 degrees.
How long can I store leftovers?
Cool leftovers quickly and refrigerate in airtight containers. Use within 3–4 days; reheat to 165°F before serving.
Leftovers keep for a few days in the fridge; reheat thoroughly.
Watch Video
Key Takeaways
- Preheat to 425°F for even sear and glaze adhesion.
- Use a wire rack to promote airflow and crisp edges.
- Verify doneness with a thermometer at 165°F.
- Apply glaze in layers and finish with a quick broil if desired.
- Rest for 3–5 minutes before serving.