How Long to Bake Sourdough Bread: A Home Baker's Guide
Discover how long to bake sourdough bread for a perfect crust and crumb. Learn about loaf size, oven setup, steam, doneness tests, and troubleshooting to bake reliable sourdough at home.

How long to bake sourdough bread depends on loaf size and oven, but a typical home bake uses around 450°F (230°C) for 25–40 minutes. Start with 20 minutes covered with steam, then uncover to finish until the crust is deeply golden and the internal temp hits about 200–210°F (93–99°C). Allow 15 minutes rest before slicing.
Why bake times matter for sourdough bread
The question of how long to bake sourdough bread is central to achieving a crusty exterior and a moist, open crumb. Bake time interacts with loaf size, hydration, oven strength, and whether you trap steam. According to Bake In Oven, understanding these variables helps home bakers predict doneness with confidence. The Bake In Oven team found that many beginners rely on a clock alone, which often leads to crusts that are pale or crumb that's gummy in the middle. Real mastery comes from observing the crust color, listening for a hollow sound when tapping the loaf, and verifying an appropriate internal temperature. This section lays out practical guidelines and common-sense tweaks so you can bake sourdough bread with consistency, even if your oven behaves differently from the one in a recipe.
- The loaf size (boule, batard, or baguette) drives bake time. Larger loaves require more time, smaller loaves less.
- Hydration (water content) affects steam needs and crumb structure, which in turn influence bake duration and temperature management.
- Oven performance varies by model and rack position; preheating and steam use can compensate for weaker heat in some ovens.
- Steam early in the bake helps crust development but can slow the initial rise if the dough is underproofed. Balance is key.
In short, your bake time is a function of science and observation. Start with a reliable baseline, then adapt using the signs of doneness and the loaf's appearance.
Variables that affect bake time
Bake time for sourdough is not a single number—it shifts with several factors. The biggest levers are loaf size, shape, and hydration; the presence or absence of a cloche/Dutch oven; and how you manage heat and steam in your oven. A larger boule typically needs 30–45 minutes at 450°F (230°C), while a smaller batard may finish closer to 25–35 minutes. Higher hydration loaves (70% to 85%) tend to stay moister inside longer and may require a slightly longer bake to set the crumb. If you use a baking stone, you’ll also rely more on the oven heat to migrate upward, which can lengthen bake times slightly compared with a heavily insulated Dutch oven method. Shape matters too: a loaf with a pronounced dome may take longer to reach an interior temperature of around 200–210°F (93–99°C) than a flatter, scored loaf. Finally, the dough’s fermentation stage dictates yeast activity; underproofed dough can seem done on the outside but be pale and dense inside, while overproofed dough may collapse or bake faster on the outside but fail to set properly inside. Mastery comes from balancing these variables and reading signs rather than sticking to a single timer.
Oven setup and preheating for reliable results
Preheating is non-negotiable for consistent sourdough results. A well-preheated oven ensures that the dough develops a strong initial oven spring and that the crust forms evenly. If you rely on a slow ramp, you risk a pale crust and uneven crumb. Bake In Oven analysis shows that many home bakers underestimate preheat time, especially when using a pizza stone or Dutch oven. Plan for at least 45 minutes of preheating at 450°F (230°C) with the stone or cloche inside. Introducing steam at the right moment is crucial: start with a steam environment for the first 15–20 minutes to allow expansion, then vent to promote crust formation. An oven thermometer placed in the oven helps you verify you’ve reached the target temperature. Position the loaf on a preheated stone or in a preheated Dutch oven to maximize even heat transfer. Remember: consistent heat and good steam yield reliable bake times and a crust that crackles when cooled.
Temperature targets and doneness signals
A common target for sourdough bread is an internal crumb temperature around 200–210°F (93–99°C). This temperature indicates starch gelatinization and crumb set without drying out the interior. The crust should be deeply caramelized and deeply colored, not burnt. In addition to temperature, you can gauge doneness by crust coloration, texture, and overall sound. A fully baked loaf often sounds hollow when tapped on the bottom and produces a crisp crackle when pressed gently with a finger. If you prefer a crustier exterior, bake a minute or two longer, watching the color closely to avoid scorching. Conversely, if the crust is cracking too early or the interior seems underdone, extend the bake time in small increments. Bake times vary by loaf size and oven; internal temperature remains the most reliable test when you have a reliable thermometer at hand.
How to test doneness without a thermometer
If you don’t have a reliable thermometer, use a combination of timing, color, and texture. The crust should be deeply golden to dark amber, and the loaf should sound hollow when tapped on the bottom. An overproofed loaf may feel soft and lines may indicate excess expansion; an underproofed loaf often feels dense and returns with a dull thud when tapped. The shake test—gently rotating the loaf for a brief moment—can reveal whether the interior is set; if it wobbles, give it a few more minutes and recheck. Keep in mind that steam affects the surface and can mimic doneness signs; use temperature as the primary indicator if you have it, but combine it with the other cues for best results.
For reliability, consider acquiring a simple instant-read thermometer. It makes doneness testing precise and repeatable across different ovens and loaf shapes.
Common mistakes that extend or reduce bake time
Several common mistakes skew bake time. Opening the oven door too soon reduces steam and heat, causing longer bake times and a denser crumb. Using a pan with too dark a surface can darken the crust quickly and mask doneness signals; always adjust times if you switch bakeware. Underproofed dough often needs less time to finish on the outside but remains underdone inside, while overproofed dough may appear done but have a pale interior and a gummy crumb. Not scoring deeply enough can restrict expansion, forcing the interior to bake longer and potentially leading to a tough crust. Finally, neglecting preheating or relying on a cold oven delays heat transfer, increasing total bake time and risking undercooked centers. By aligning proofing, shaping, and oven setup, you can stabilize bake time across loaf types.
Adapting bake time for different loaf shapes and sizes
Different loaf shapes require different bake times. A tall boule might need 5–15 minutes more than a flat batard, while a very large loaf can require 20–30 minutes longer. When adjusting, begin with a conservative increase and check for doneness using internal temperature or visual cues. If you bake multiple loaf sizes in one session, you can bake smaller loaves first and use their cues to guide the larger loaf’s bake time. Always observe the crust color and crumb structure; these are your best guides when adjusting times across shapes and sizes.
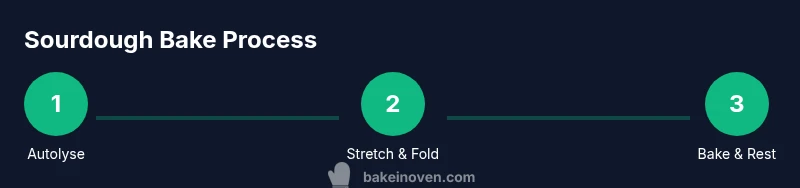
Step-by-step overview of the bake process
This overview highlights the key stages of the bake process. From autolyse to final bake, timing and technique create predictable outcomes for sourdough bread. Understanding the sequence helps you plan around your schedule and oven constraints, ensuring you get consistent results time after time. Practice, observation, and small adjustments will improve your ability to estimate bake times for any loaf you decide to bake.
Practical troubleshooting and tips
Bake time can be affected by even small changes in your kitchen, from humidity to vessel type. Use a thermometer for precision, take notes after each bake, and compare results. A few practical tips: keep a steady steam source during the initial bake, preheat thoroughly, and consider running your oven on the convection setting only if you understand how your oven behaves with it. Don’t be afraid to tweak times by 2–5 minutes when you switch from a bread stone to a Dutch oven, or when you alter hydration or loaf shape. With patience and careful observation, you’ll refine your own baseline bake time that reliably yields a perfect crust and crumb.
Tools & Materials
- Dutch oven or cloche(Preheated inside the oven for steam and even heat.)
- Baking stone or heavy baking sheet(Promotes bottom heat and crust development.)
- Proofing basket (banneton)(Floured to prevent sticking; helps shape and structure.)
- Parchment paper(For transferring dough and minimal stickage.)
- Sharp lame or knife(Score deeply to control expansion.)
- Kitchen scale(Precise hydration and portioning improve consistency.)
- Flour for dusting(Lightly dust for shaping and proofing without sticking.)
- Oven thermometer(Verify accurate oven temperature, helps reproducibility.)
- Water spray bottle or steam source(Create initial steam for crust development (optional with Dutch oven).)
Steps
Estimated time: 3 hours total
- 1
Autolyse and hydrate
Combine flour and water until no dry patches remain. Rest 20–60 minutes to hydrate starches and develop extensibility in the dough.
Tip: A longer autolyse (about 60 minutes) improves dough extensibility and gluten development. - 2
Add starter and salt, mix
Incorporate levain (starter) and salt after autolyse. Mix until fully integrated, achieving a cohesive but not stiff dough.
Tip: Room-temperature starter should feel lively but not overly stiff; adjust water if needed. - 3
Stretch and fold
Perform a series of stretch-and-folds every 15–30 minutes during the first hour to strengthen gluten.
Tip: Target 4–6 folds for a typical loaf; not too aggressive to avoid tearing the dough. - 4
Bulk fermentation
Let the dough rise until it is domed and roughly 1.5x its original size; perform extra folds if needed.
Tip: Watch for a visible increase in volume and a slightly jiggly surface before shaping. - 5
Pre-shaped shaping
Lightly degas and pre-shape into a loose round; rest 15–20 minutes to relax.
Tip: Keep surface tension minimal to preserve open crumb later. - 6
Final shaping and proof
Shape into final loaf form and proof until ready to bake; proofing time varies by temperature.
Tip: Cold fermentation can improve flavor; extend proof in a cooler spot if needed. - 7
Preheat oven and prepare steam
Preheat to 450°F (230°C) with stone/cloche inside; prepare steam if not using a Dutch oven.
Tip: Steam helps dough expand fully; omit steam only if you’re confident your vessel retains moisture. - 8
Score and bake
Score deeply, load into oven, and bake with steam for 15–20 minutes; then finish without steam until done.
Tip: Use a confident, single stroke with the blade to guide expansion.
Frequently Asked Questions
What is the ideal hydration for sourdough bread?
Hydration varies by recipe, but many home bakers work in the 65–75% range to balance structure and openness. Higher hydration can yield a more open crumb but requires careful handling.
Most home bakers aim for around sixty-five to seventy-five percent hydration to balance crumb and strength. Higher hydration yields open crumbs but is trickier to handle.
Can I bake without a Dutch oven?
Yes. Use a preheated stone or sheet, and create steam by adding a pan of hot water or spraying water in the oven early in the bake. Expect a slightly different crust compared with a Dutch oven.
You can bake on a hot stone or sheet with steam, but the crust may differ a bit from the Dutch oven method.
How do I know when the bread is done without a thermometer?
Look for a deep golden crust and a hollow sound when tapping the bottom. The crumb should be set and the loaf should feel light and airy inside.
Check the crust color and listen for a hollow sound when you tap the loaf. If unsure, use a quick thermometer if available.
How should I store baked sourdough?
Cool completely, then store in a cloth bag at room temperature for 2–3 days. For longer storage, freeze slices or the whole loaf.
Cool it fully, wrap in a cloth bag, and keep at room temperature for a few days, or freeze for longer storage.
How long should I proof the dough?
Proofing times vary with temperature. Room temp usually 1–3 hours; cold fermentation can extend up to 12–16 hours for flavor.
Proofing times depend on temperature; one to three hours at room temp, longer cold-fermentation yields more flavor.
Watch Video
Key Takeaways
- Understand how loaf size and hydration affect bake time
- Preheat thoroughly and use steam for best crust
- Use temperature as the primary donor of doneness
- Adjust time based on loaf shape and oven behavior
- Practice and record results for consistent outcomes