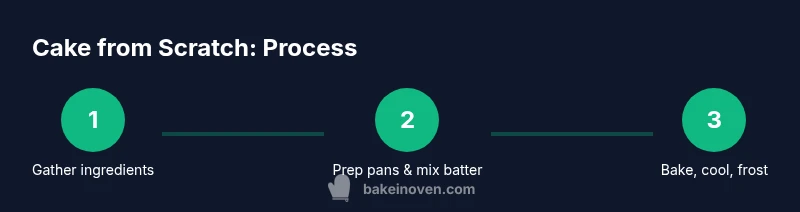
How to Bake a Cake from Scratch: A Step-by-Step Guide
Master the art of baking a cake from scratch with precise ingredients, technique, and baking times. This educational guide from Bake In Oven covers mise-en-place, batter methods, baking, cooling, frosting, and troubleshooting for reliable, delicious results.

Learn how to bake a cake from scratch with a reliable vanilla batter, precise measurements, and proper oven timing. This beginner-friendly method yields a tender crumb and even rise. According to Bake In Oven, using room-temperature ingredients and accurate flour-to-sugar ratios is key for consistent, delicious results every time at home.
Why bake from scratch?
Baking a cake from scratch gives you full control over ingredients, flavor, and texture. When you bake with basic ingredients, you learn how flour, fat, sugar, eggs, and leavening work together to create structure and tenderness. This knowledge helps you adjust recipes for allergies, dietary needs, or seasonal flavors. According to Bake In Oven, the act of measuring ingredients carefully and bringing them to the right temperature influences the crumb more than you might expect. A scratch cake also avoids preservatives and artificial stabilizers found in many box mixes, letting you decide whether you want a rich butter flavor, a light vanilla crumb, or a citrusy glaze. Start with a reliable base recipe, then vary vanilla, citrus zest, or spices to build your signature cake. The key is consistency in your method: preheat the oven, prep the pans, and mix with intention. Home bakers who master scratch-baking often report more confidence and joy in the kitchen because results become predictable rather than risky experiments.
The science behind cake structure
Understanding how batter behaves helps you troubleshoot and improve results. The flour provides structure; fats coat flour particles to keep gluten development tender; sugar tenderizes by weakening gluten strands and retaining moisture; air is your ally, delivered through creaming fat and sugar or through whisking wet ingredients. Leavening agents release gas to lift the batter, creating a light crumb. Temperature matters: cold butter won’t trap air well, while warm wet ingredients mix differently than cold ones. Bake In Oven emphasizes that precise technique and temperature control unlock consistent crumb, even with small changes in ingredients or equipment.
Ingredients and substitutions
A basic scratch cake relies on a short list of pantry staples. All-purpose flour, granulated sugar, eggs, unsalted butter (or neutral oil for dairy-free versions), milk (or plant-based milk), baking powder, and salt form the core. Flavoring like vanilla extract enhances sweetness and aroma. If you need dairy-free, swap butter for a neutral oil or dairy-free butter and use almond or soy milk. For a gluten-friendly or gluten-free option, choose a balanced gluten-free blend and follow the package’s guidance for leavening and hydration. You can also adjust sweetness and fat to suit your preferences by using partial butter and partial oil or by adding yogurt for moisture.
Tools and mise-en-place
Preparation is half the bake. Gather all tools before you start: mixing bowls, measuring cups and spoons, a digital kitchen scale (optional but helpful for precision), a whisk, a spatula, a hand mixer or stand mixer, parchment paper or greased pans, and a cooling rack. Preheat the oven and prepare your pans with grease and parchment to prevent sticking. Having a clean work surface and organized ingredients reduces mistakes and speeds up the process.
Creating the batter: whisking, creaming, folding
Start by whisking dry ingredients to distribute leavening and salt evenly. In a separate bowl, cream softened butter with sugar until light and fluffy, which introduces air into the batter. Add eggs one at a time, then vanilla. Alternate adding wet and dry ingredients so the batter remains smooth and cohesive. Fold gently to preserve air, avoiding overmixing once the flour is incorporated. This sequence encourages a tender crumb and even rise.
Baking, cooling, and frosting basics
Poured into prepared pans, the batter should level itself or be spread evenly with a spatula. Bake until the center is set and a toothpick comes out with a few moist crumbs. Let the cake cool in the pan briefly, then transfer to a cooling rack to finish. If frosting, ensure the cake is completely cool to prevent sliding or sliding of frosting. A simple buttercream or cream cheese frosting pairs well with many flavors and can be flavored with citrus zest, almond, or coffee.
Troubleshooting common cake issues
Common problems include sinking centers, domed tops, dry crumb, or crusty exteriors. For a sinking center, avoid opening the oven door during early baking, and ensure your leavening is fresh and evenly mixed. Doming can be reduced by baking at a stable temperature and leveling the top with a knife or a cake leveler. Dry crumb often means overbaking or too much flour; adjust moisture or check oven calibration. Inconsistent crumb can result from overmixing or underfolding; maintain gentle folding after adding dry ingredients. With practice, you’ll learn how to read your batter and adjust technique for reliable results.
Flavor ideas and variations
Once you’re comfortable with a classic vanilla base, experiment with flavors. Add citrus zest for brightness, espresso powder for depth, or almond extract for a nutty note. Swirl in cocoa powder to create a marble cake, or fold in berries for a fruity version. For different textures, try a chocolate ganache, lemon icing, or a caramel glaze. Bake In Oven suggests documenting each variation so you can reproduce your favorites with confidence.
Tools & Materials
- Mixing bowls (set of 2–3)(One large for dry ingredients, one medium for wet.)
- Electric mixer or whisk(Stand mixer is optional; a strong whisk works too.)
- Measuring cups and spoons(Have both dry and wet measures.)
- 9-inch round cake pans (or two 8-inch pans)(Grease and line with parchment.)
- Parchment paper(Prevents sticking and helps release.)
- Spatula (rubber or silicone)(For scraping bowls and smoothing batter.)
- Oven thermometer(Ensure accurate oven temperature.)
- Cooling rack(Cool completely before frosting.)
- Digital kitchen scale(Optional for precise measurements.)
Steps
Estimated time: 60-90 minutes total
- 1
Preheat and pan prep
Preheat the oven to the target temperature. Grease the pans and line with parchment, then lightly dust with flour or use a nonstick spray. This ensures the cake releases cleanly after baking.
Tip: Tap the pans gently to release any trapped air bubbles before pouring batter. - 2
Whisk dry ingredients
In a bowl, whisk together flour, baking powder, and salt until evenly distributed. This step ensures consistent rise and a uniform crumb.
Tip: Sift if you want extra lightness, especially with whole-wheat or gluten-free blends. - 3
Cream butter and sugar
Beat softened butter and sugar until pale and fluffy, which introduces air for a tender crumb. Scrape the sides of the bowl as needed for even mixing.
Tip: Do not rush this step; longer creaming improves crumb structure. - 4
Add eggs and vanilla
Add eggs one at a time, fully incorporating after each addition. Beat in vanilla or other flavorings to distribute evenly.
Tip: Room-temperature eggs blend more smoothly and help emulsify fats. - 5
Alternate wet and dry ingredients
With the mixer on low, alternately add dry ingredients and milk, starting and ending with dry. Mix just until combined to avoid a dense crumb.
Tip: Overmixing after adding flour develops gluten, making the cake tougher. - 6
Bake and test doneness
Divide batter between prepared pans and bake until the center is set and a toothpick comes out with a few moist crumbs. Rotate pans halfway if your oven has hotspots.
Tip: If the top browns too quickly, tent with foil to prevent burning. - 7
Cool and level
Let the cake cool in the pan briefly, then transfer to a rack to cool completely. If domed, level the tops with a knife or cake leveler before frosting.
Tip: Cooling is essential for clean icing and stable layers. - 8
Frost and decorate
Apply a thin crumb coat, chill briefly, then add a final layer of frosting. Decorate with fresh fruit, sprinkles, or edible decorations as desired.
Tip: For a smoother finish, warm the spatula slightly and wipe between passes.
Frequently Asked Questions
What are the essential ingredients for a scratch-made cake?
A scratch cake typically relies on flour, sugar, eggs, fat (butter or oil), a liquid (milk or dairy-free alternatives), leavening (baking powder), and flavorings like vanilla. These form the structure, moisture, and aroma of the cake. You can customize by using different flavorings or adding citrus zest for brightness.
Core ingredients are flour, sugar, eggs, fat, liquid, leavening, and vanilla. You can customize flavors and dairy options as needed.
Can I make this recipe dairy-free or gluten-free?
Yes. For dairy-free, substitute oil or dairy-free butter and plant-based milk. For gluten-free, use a certified gluten-free flour blend and follow its guidance on leavening and hydration. Expect slight changes in texture and bake time, and adjust accordingly.
Dairy-free and gluten-free options are doable with appropriate substitutions.
How do I know when the cake is done?
Tests include a light spring in the center and a toothpick that comes out with a few moist crumbs. Avoid opening the oven door too early, which can cause the cake to sink.
Look for a clean toothpick with moist crumbs and a gently springy center.
Why did my cake sink in the middle?
Common causes are opening the oven door too soon, underleavening, or overbaking. Ensure oven preheats fully, use fresh leavening, and avoid drastic temperature shifts during baking.
Sinking is usually due to temperature changes, old leavening, or overbaking.
How should I store leftover cake?
Store covered at room temperature for a day or two, or refrigerate for longer freshness. If frosting contains dairy, refrigerate sooner and let it come to room temperature before serving.
Cover and refrigerate for longer storage; bring to room temp before serving if refrigerated.
Can I bake a cake in a microwave or unconventional oven?
Microwave baking is possible for small, quick cakes, but results differ from conventional oven baking. For best texture and even rise, stick to a traditional oven when possible.
Microwave cakes can work for quick results, but traditional oven yields better texture and rise.
Watch Video
Key Takeaways
- Measure ingredients accurately and level is essential.
- Follow the creaming, then alternating wet/dry steps for a tender crumb.
- Preheat, pan prep, and gentle mixing prevent common issues.
- Cool completely before frosting for clean, even decoration.