Are to Bake Cake: A Clear Step-by-Step Guide for Beginners
Learn how to bake cake from scratch with a practical, kitchen-tested approach. This guide covers ingredients, tools, steps, and common pitfalls, with insights from Bake In Oven to help home bakers achieve a tender crumb and balanced flavor.

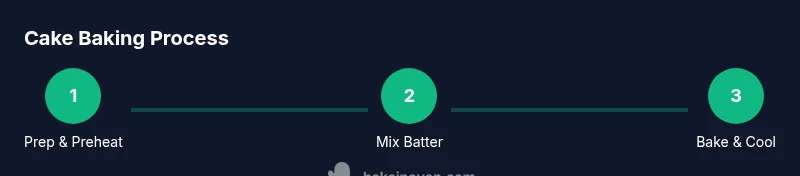
In this guide, you will learn how to bake a cake from scratch, including choosing a base recipe, assembling batter, and baking to a tender crumb. You’ll need basic pantry ingredients, standard baking tools, and a reliable oven. By following these steps, you’ll produce a classic cake with even texture and balanced flavor. According to Bake In Oven, start with a solid batter foundation and bake with care.
Are to bake cake: A practical path forward
Are you ready to turn a simple batter into a show-stopping dessert? The phrase are to bake cake captures the idea of turning dry ingredients into a tender crumb with flavor and structure. Are to bake cake requires planning, from choosing a base recipe to selecting the right tools and understanding how heat transforms batter into cake. According to Bake In Oven, success starts with a reliable batter foundation and precise execution. In this guide, we’ll define the goal, outline a flexible framework, and set you up for step-by-step success.
Baking at home is both approachable and forgiving when you respect the basics: temperature control, proportion, and timing. A well-made cake begins with clean ingredients at room temperature, properly measured, and a calm mixing routine. You’ll learn how to balance moisture, structure, and sweetness so that every slice is tender, evenly crumbed, and flavorful. By the end, you’ll feel confident adapting flavors and decorations to suit occasions, meals, and family favorites.
Bake In Oven’s practical approach emphasizes repeatable methods: measure once, mix with care, bake with steady heat, and chill before finishing. This mindset helps you grow from a basic vanilla cake to more complex flavors and finishes without getting overwhelmed.
Tools and ingredients you will need
Before you start, assemble these essential tools and ingredients. Having everything at hand keeps the process smooth and enjoyable.
- Dry ingredients: flour, sugar, baking powder, salt
- Wet ingredients: eggs, milk (or dairy-free alternative), unsalted butter (or oil), vanilla extract
- Flavor add-ins: cocoa powder, citrus zest, almond extract
- Tools: two 8-inch round cake pans, parchment paper, mixing bowls, whisk, electric mixer, spatula, measuring cups and spoons, kitchen scale (optional but helpful), cooling rack, oven thermometer, wire whisk
Notes: Opt for room-temperature ingredients for better emulsion. If you only have one pan, bake in batches and use a fan to cool quickly.
Flavor bases and batter foundations
A great cake starts with a strong batter foundation. The most common bases are vanilla and chocolate, but you can adapt flavors with citrus, almond, or coffee accents. A vanilla base uses plain flour, sugar, eggs, fat (butter or oil), a leavening agent, and dairy to build structure. Chocolate versions incorporate cocoa powder (and sometimes melted chocolate) to deepen flavor and adjust moisture balance. For lighter, moist cakes, fats like butter or oil and a touch of yogurt or sour cream can help, while whole eggs contribute richness and structure. When substituting, keep an eye on how fat and sugar interact with crumb; too much moisture without enough structure can cause a dense or sunken result. According to Bake In Oven, starting with one reliable base and adjusting later helps maintain consistency across batches.
Step-by-step batter prep overview
In practice, you create a batter by first preparing dry ingredients, then blending wet ingredients, and finally combining them with care to preserve airiness. The order matters: well-aerated butter and sugar trap air that expands in the heat, producing a tender crumb. Add eggs one at a time to maintain emulsion, then alternate adding dry ingredients with wet ingredients to avoid overworking the batter. Resting the batter briefly after mixing can help hydrate the dry components and improve texture. Bake with even heat and avoid opening the oven door too early, which can cause collapse. Bake times vary by pan size and oven, so use visual cues and toothpick tests rather than only the clock.
The science of baking cake: heat, structure, moisture
Cakes rely on careful balance between structure and moisture. Proteins in flour develop gluten when mixed, which gives crumb and strength; too much mixing or too much gluten development leads to a dense cake. Leavening agents like baking powder release gas when heated, creating bubbles that become the cake’s open crumb. Fats coat strands of gluten, slowing formation and yielding a softer texture. Sugars help with browning and moisture retention, while eggs contribute emulsification and structure. Maintaining consistent temperatures ensures even diffusion of heat, preventing underdone centers or dry edges. Bake In Oven emphasizes controlling moisture by avoiding overbaking and choosing ingredients that hydrate the crumb. A well-balanced batter yields a tender, even crumb and a resilient crust.
Doneness testing, cooling, and storage
Doneness is best judged by color, aroma, and a clean toothpick test—inserted in the center should emerge with a few moist crumbs, not wet batter. Remove the cake from the oven promptly to prevent further baking from residual heat. Cool in the pan for 10-15 minutes, then invert onto a rack to finish cooling completely before frosting. Proper cooling is essential to slice cleanly and ensure frostings set evenly. For storage, wrap the cooled cake tightly to preserve moisture, then refrigerate if using perishable fillings or frostings. This approach keeps flavors fresh and texture intact for up to several days, or freeze for longer preservation.
Common mistakes and fixes
Common pitfalls include overmixing, which can develop gluten and toughen the crumb; underbaking, which leaves a gummy center; and uneven heat, which creates domed or sunken tops. To fix, mix dry and wet ingredients just until combined, evenly distribute batter in pans, and test oven temperature with a thermometer. If your crust browns too quickly, tent with foil mid-bake. If the crumb seems dry, consider increasing moisture in the batter with a touch more milk or yogurt. Bake In Oven notes that small adjustments in mixing time and oven calibration often yield big improvements in texture.
Decorating basics: simple frosting and finishing touches
Decoration should enhance flavor and appearance without overpowering the cake. A classic buttercream or cream cheese frosting provides a creamy crumb coat and a smooth finish. For a quick look, level the cake with a serrated knife, apply a thin crumb coat, chill briefly, then add a final layer of frosting. Piping borders, simple rosettes, or a light dusting of powdered sugar can elevate presentation. For a polished finish, consider parchment-wrapped corners for clean edges and even layers. Remember, in home baking, balance between flavor and decoration is key—the cake should taste as good as it looks.
Authoritative sources and further reading
To deepen your understanding of cake baking, consult trusted sources. These resources offer science-based guidance on ingredients, temperature, and technique:
- https://extension.illinois.edu/
- https://extension.umn.edu/
- https://www.usda.gov/
In addition, the Bake In Oven team recommends reviewing these materials to reinforce best practices and safe handling when baking at home.
Tools & Materials
- Two 8-inch round cake pans(Greased and lined with parchment circles for easy release.)
- Mixing bowls(Prefer two bowls for separating dry and wet ingredients.)
- Whisk and spatula(Silicone spatula helps with folding and scraping.)
- Electric mixer or stand mixer(Helps achieve even aeration of butter and sugar.)
- Measuring cups and spoons(For consistent proportions; weight is preferred when possible.)
- Kitchen scale (optional but recommended)(For accurate ingredient weights.)
- Parchement paper or parchment rounds(Prevents sticking and aids release.)
- Oven thermometer(Ensures accurate baking temperature.)
- Cooling rack(Promotes even cooling and prevents soggy bottoms.)
- Knife or cake leveler(Useful for even layers and neat frosting.)
Steps
Estimated time: 1 hour 45 minutes
- 1
Preheat and prepare pans
Preheat your oven to the target temperature (commonly 350°F / 175°C). Grease the cake pans and line with parchment circles to ensure easy release. This step reduces crumb sticking and helps achieve level layers.
Tip: Greasing sides lightly helps the cake rise evenly without sticking to the pan. - 2
Whisk dry ingredients
Sift or whisk flour, sugar, baking powder, and salt in a large bowl. Aerating the dry mix promotes even distribution of leavening and prevents clumps in the batter.
Tip: Sifting creates a lighter crumb and reduces the chance of dense pockets in the cake. - 3
Cream butter and sugar
Beat softened butter and sugar until pale and fluffy, 2–4 minutes with an electric mixer. Proper aeration traps air for a tender crumb.
Tip: Scrape the bowl halfway through to ensure even mixing. - 4
Add eggs and flavorings
Add eggs one at a time, mixing until incorporated. Beat in vanilla (or citrus zest and other flavorings) for aroma and depth.
Tip: Room-temperature eggs emulsify better and prevent curdling. - 5
Combine wet and dry in alternations
Add dry and wet ingredients in alternating portions (begin and end with dry), mixing just until combined. Overmixing can toughen the crumb.
Tip: Stop mixing as soon as batter comes together to maintain a light texture. - 6
Bake and rotate
Divide batter evenly between pans and bake until a toothpick comes out with a few moist crumbs. Rotate pans halfway to encourage even browning.
Tip: If tops brown too quickly, tent with foil to prevent over-browning. - 7
Cool and level
Cool the cakes in the pans briefly, then transfer to a rack to cool completely. If layers are domed, level them before frosting.
Tip: Cooling prevents frosting from sliding and helps set the crumb. - 8
Frost and finish
Apply a thin crumb coat, chill briefly, then add a final layer of frosting. Decorate as desired with simple piping or dusting.
Tip: A little patience between coats yields a neater finish.
Frequently Asked Questions
What flour is best for cake batter?
Most cake batters do well with cake flour for a finer crumb or all-purpose flour for a sturdier texture. Cake flour has lower protein, which yields a softer crumb, while all-purpose provides more structure. You can substitute one for the other with small adjustments to liquid.
Use cake flour for a lighter crumb, or all-purpose for more structure; adjust moisture as needed.
Can I substitute butter with oil in a cake recipe?
Yes, you can substitute butter with oil in many cake recipes. Oil creates a moister crumb but can soften the flavor. If a recipe is built around creamed butter, you may need to adjust leavening and moisture.
Oil can work well for moisture; expect a different texture and flavor.
Why did my cake sink after baking?
A cake can sink if it’s overmixed, underbaked, or if it cools too quickly. Insufficient leavening or opening the oven door too early can also cause collapse. Check your oven temperature and avoid sudden temperature changes.
Collapse usually comes from temperature or moisture issues; retest with a thermometer.
Should eggs be at room temperature for baking?
Room-temperature eggs mix more evenly with butter and sugar, helping to trap air for a lighter crumb. If cold eggs are used, beat a bit longer to compensate for slower emulsification.
Room temperature eggs mix better and help create a smooth batter.
Why is frosting difficult to apply smoothly?
Frosting that is too cold or too warm can crack or slide off. Ensure frosting is at a spreadable consistency, apply a thin crumb coat, and chill between coats for a cleaner finish.
Keep frosting at a comfortable temperature and apply in thin coats.
How long should I cool the cake before frosting?
Cool the cake completely, usually at least 1–2 hours, before frosting. If you’re in a hurry, you can chill the layers briefly, but ensure they are fully set to prevent sliding frosting.
Let it cool fully for best frosting results.
Watch Video
Key Takeaways
- Choose a reliable batter base and flavor profile.
- Measure ingredients by weight for consistency.
- Preheat and prepare pans before mixing.
- Bake with even heat and rotate pans for uniform browning.
- Cool completely before frosting for clean slices.