Bake Pork Spare Ribs: An Oven Method for Tender, Juicy Ribs
Learn to bake pork spare ribs in the oven for juicy, fall-off-the-bone ribs. This step-by-step guide covers prep, rubs, wrapping, glaze options, and resting tips, with practical guidance from Bake In Oven.

In this guide you’ll learn how to bake pork spare ribs to tender, juicy perfection using a simple oven method. You’ll need a rack or sheet pan, aluminum foil, a reliable thermometer, and a basic dry rub or marinade. We cover prep, seasoning, wrapping, bake times, optional glaze, and resting for best flavor and texture.
Why Bake Pork Spare Ribs Make Sense
For many home cooks, to bake pork spare ribs is a reliable path to juicy, deeply flavored ribs without needing a smoker. According to Bake In Oven, oven-baking can deliver consistently tender results when you control heat, moisture, and time. The method highlights slow, dry-heat cooking that breaks down connective tissue, producing ribs with a gentle bite and a satisfying glaze. This approach suits busy weeknights, weekend cooks, and beginners who want predictable results. The best ribs start with high-quality meat, proper prep, and a plan for moisture retention. In this guide, you’ll see how the oven method compares with smoking and slow-roasting, and why the most reliable ribs begin with thoughtful preparation.
Bake In Oven analysis emphasizes consistency: a well-prepped rib set, balanced seasonings, and controlled oven heat can yield restaurant-like results in your home kitchen.
Choosing the Right Ribs and Prep
The journey to perfect rib texture begins with selecting the right cut. Look for a full rack with marbling along the bone and pinkish meat under the surface. Trim excess fat if it feels overly thick, but preserve a small fat cap to baste during cooking. Peel away the membrane on the bone-side to improve rub penetration and tenderness. Pat the ribs dry with paper towels before applying any seasoning. Space the ribs on a rack or sheet pan so air can circulate, which helps even cooking and moisture retention. If you’re short on time, you can cut the rack into individual rib portions, but keep the bones intact for even cooking.
Seasoning Essentials: Rubs, Marinades, and Dry-Brines
Seasoning is where the flavor starts. A simple dry rub of salt, black pepper, and a hint of paprika or chili powder provides a savory baseline. For deeper flavor, add brown sugar or maple for a touch of caramelization, garlic powder, onion powder, and a pinch of cumin. A light marinade can also work, but it’s often best to apply rubs just before cooking to avoid soaking too long, which can alter texture. For a dry-brine, apply the rub, then let the meat rest uncovered in the fridge for 1–4 hours. This step helps the surface dry slightly, creating a better crust during baking.
Equipment and Setup for Oven-Baked Ribs
Your oven setup matters as much as the rub. Preheat to a moderate temperature, typically 250–275°F (120–135°C). Use a wire rack inside a rimmed sheet pan to elevate the ribs and promote airflow, or position a shallow pan beneath the rack to catch drips. Keep the ribs bone-side down when possible for uniform heat transfer. Foil tenting or wrapping can help retain moisture if you’re aiming for very tender ribs, while leaving them exposed for a crusty exterior. Have a meat thermometer on hand and an oven-safe brush for any glaze application.
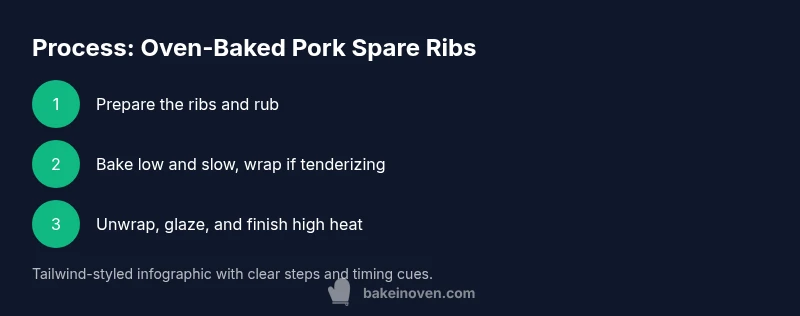
The Oven Method: Step-By-Step Conceptual Overview
The oven method begins with prep and rub, followed by controlled cooking at a low temperature. Plan for a total bake time around 2.5–3 hours, depending on rib thickness and your oven. After the initial bake, many cooks wrap the ribs in foil with a splash of liquid to create steam and tenderness, then continue cooking until they’re tender. Finally, glaze if desired and finish with a brief high-heat blast to set the glaze and form a caramelized crust. Rest the ribs briefly before slicing and serving. This approach emphasizes patience, even heat, and moisture management for optimal texture.
Wrapping, Glazing, and Caramelization Techniques
Wrapping (the Texas Crutch) traps moisture, helping break down connective tissue for tender meat. If you wrap, add a small amount of liquid such as apple juice or stock to create steam inside the packet. After unwrapping, apply a glaze—barbecue sauce, honey, or a maple glaze are popular choices—and return to the oven for 10–15 minutes at a higher temperature to set the glaze. For the best crust, finish under a broiler or at 500°F for a few minutes, watching closely to prevent burning. Keep glaze light to avoid oversweetening; a thin layer often yields the best balance of crust and juiciness.
Resting and Serving: The Final Touch
Resting is essential for letting juices redistribute and the meat reabsorb moisture. After removing from the oven, tent the ribs loosely with foil and rest for 10–15 minutes. This pause makes slicing easier and enhances tenderness. Slice between the bones and serve with your favorite sides—coleslaw, baked beans, or corn on the cob all pair beautifully with oven-baked spare ribs. Consider offering extra glaze on the side for guests who want more sweetness or tang.
Troubleshooting Common Issues and Adjustments
If the ribs seem dry, you may have cooked too long at too high a temperature or not used enough moisture. Try lowering the oven to 250°F and increase the resting time to 15 minutes. If the meat isn’t tender enough after the initial bake, you can wrap and return to the oven for another 30–60 minutes. For overly fatty ribs, trim excess fat before cooking and start with a shorter wrap period to prevent a soggy texture. Remember to pat meat dry before applying rubs for better crust formation.
Tools & Materials
- Rib rack or rimmed baking sheet(Elevates ribs for even air circulation in the oven)
- Aluminum foil(For tenting and optional wrapping during the bake)
- Meat thermometer(Target internal temp around tender range; avoid overcooking)
- Knife and cutting board(Trim fat and membrane; prepare rib portions if needed)
- Mixing bowls and measuring spoons(For rubs and marinades; scale seasonings accurately)
- Basting brush(For applying glaze if chosen)
- Parchment paper (optional)(Line sheet pan to ease cleanup)
Steps
Estimated time: 2 hours 45 minutes
- 1
Prepare the ribs
Pat ribs dry, remove the membrane from the bone-side, and trim excess fat. This improves rub penetration and texture. Gather all prep items so you can work efficiently.
Tip: Removing the membrane helps rubs penetrate more fully and improves tenderness. - 2
Apply rub or marinate
Combine salt, pepper, paprika, and optional sugars or spices. Rub evenly over both sides, then let rest 15–30 minutes to let flavors begin to adhere.
Tip: A light press with the palm helps the rub stick without tearing the surface. - 3
Preheat and set up
Preheat the oven to 250–275°F (120–135°C). Place a rack over a rimmed sheet pan and arrange ribs bone-side down. This setup promotes even cooking.
Tip: Using a rack improves air circulation and prevents soggy bottoms. - 4
Bake uncovered for initial tenderness
Bake for about 2.5–3 hours, checking for a gentle bend when lifted with tongs. The meat should look smoky and be pliable but not falling apart.
Tip: If your ribs look dry, a light spray of water or broth can help maintain moisture. - 5
Optional wrap for extra tenderness
If you want ultra-tender ribs, wrap the ribs tightly in foil with a splash of liquid and bake another 30–60 minutes. This traps moisture and speeds collagen breakdown.
Tip: Do not skip the wrap if you prefer very tender ribs; it’s the traditional Texas Crutch step. - 6
Glaze and finish
Unwrap, brush with glaze, and return to the oven for 10–15 minutes at a higher temp to set the glaze and caramelize.
Tip: Apply a thin glaze to avoid a sticky mess; thicker coats can burn. - 7
Rest and serve
Let the ribs rest 10–15 minutes before slicing between bones. Serve with sides and extra glaze on the side.
Tip: Resting allows juices to redistribute for juicier slices. - 8
Clean up and store
Cool leftovers, wrap tightly, and refrigerate promptly. Reheat gently to maintain moisture and texture.
Tip: Reheat in the oven or on low heat to avoid drying out.
Frequently Asked Questions
What is the best oven temperature for ribs?
A common, reliable range is 250–275°F (120–135°C). This low-and-slow approach helps tenderize the meat without drying it out.
Set your oven to about 250 to 275 degrees and cook slowly for tender ribs.
Should I remove the membrane from spare ribs?
Yes. Removing the membrane helps seasonings penetrate and yields more even texture across the rack.
Yes, removing the membrane helps flavor soak in and tenderize the meat.
Do I need to wrap the ribs during baking?
Wrapping, often called the Texas Crutch, traps moisture and accelerates tenderness. It’s optional but recommended for very tender results.
Wrapping helps the ribs stay moist and become extra tender.
Can I cook from frozen ribs?
It’s best to thaw ribs fully for even seasoning and predictable texture. Cooking from frozen can lead to uneven doneness.
It’s better to thaw first for even cooking.
What should the internal temp be for tender ribs?
Aim for a tender range around 190–203°F (88–95°C) where collagen breaks down for that desirable pull-apart bite.
Target about 190 to 203 degrees for tender ribs.
Watch Video
Key Takeaways
- Bake pork spare ribs with a low, steady oven temperature for even tenderness
- Use a dry rub or light marinade to build flavor without oversaucing the meat
- Wrapping mid-cook enhances tenderness by trapping moisture
- Finish with a glaze only after the meat is nearly tender to avoid burning
- Allow a short rest before slicing to preserve juiciness