Juicy Bake Turkey Recipe: Your Step-by-Step Roast Guide
Learn a comprehensive bake turkey recipe with prep, brining options, herb butter, precise roasting, safe temperatures, and resting tips from Bake In Oven. Step-by-step instructions, pro tips, and troubleshooting for a fail-safe holiday roast.

Goal: Bake a turkey roast that is juicy, evenly cooked, and safe to eat. This quick answer previews thawing, brining (optional), prep, roasting, temperature checks, and resting. You’ll learn essential tools, timing strategies, and common mistakes to avoid for a fail-safe turkey roast. It also covers technique nuance, from patting skin dry to tenting for browning, and explains why internal temperature matters more than time.
Selecting the Right Turkey and Prep Foundations
Selecting a turkey size that fits your crowd and planning for proper thawing are the first steps toward a successful bake. According to Bake In Oven, start with a fully thawed bird and dry skin for crisp, evenly browned skin. After thawing, pat the turkey completely dry to remove surface moisture, which can steam the skin if left intact. Consider your guest list and planned leftovers when choosing a weight; a common approach is to estimate about one person per pound, with a little extra for seconds. Prepping space in the fridge for thawing ahead of time reduces last-minute stress and helps you maintain safe temperatures during the process. Understanding these foundations sets the stage for even heat distribution and juicy meat.
Ingredients and Substitutions
For a classic roast, assemble a turkey (thawed), unsalted butter, olive oil, kosher salt, freshly ground black pepper, and a bright bouquet of aromatics (garlic, thyme, sage, lemon). Fresh herbs boost aroma and flavor, while lemon adds a mild brightness that complements poultry. If you’re dairy-free, swap butter for olive oil or a neutral oil blend, and adjust salt to taste. Brining is optional but can improve moisture and flavor; if you choose to brine, plan time carefully and rinse well before seasoning to avoid over-salting. A simple seasoning blend—salt, pepper, and herb mix—forms the backbone, with a generous smear of herb butter under the skin for moisture and crispness.
Equipment and Prep Essentials
A sturdy roasting pan with a rack is essential for elevating the turkey and promoting even browning. An instant-read meat thermometer is your best friend for accuracy, helping you avoid under- or overcooking. Have a sharp carving knife, a large cutting board, and paper towels on hand for clean handling and safe carving. Optional but helpful: kitchen twine for trussing, a basting brush for fat distribution, and heavy-duty foil to tent the breast if browning outpaces heat. Finally, gather aromatics to stuff the cavity and baste the bird with a flavorful butter or oil mixture.
Temperature and Doneness Strategy
The core principle is to roast the turkey until the thickest part—typically the thigh—reaches a safe internal temperature of 165°F (74°C). Rely on a thermometer rather than a fixed clock, as oven performance and turkey size can vary. Start checking the temperature as the turkey nears doneness and plan to tent with foil if the skin browns too quickly while the interior catches up. This strategy minimizes risk of dry meat and ensures even cooking from center to skin.
Resting, Carving, and Serving
Resting is essential to reabsorb juices and keep slices moist. After removing the turkey from the oven, transfer it to a cutting board and loosely tent with foil for twenty to thirty minutes before carving. Carving along the natural seams—first the breast, then the legs—produces clean portions and preserves juiciness. When ready to serve, drizzle a little pan juices over slices or offer a simple gravy to enhance flavor without masking the turkey’s natural profile. This approach yields a visually appealing roast with consistent texture throughout.
Troubleshooting and Common Mistakes
Common pitfalls include opening the oven door too often, under-seasoning, or roasting at too high heat, which can dry the breast while the thighs finish. Ensure the turkey skin is truly dry before roasting, and use a rack to promote even heat circulation. If the skin browns too quickly, tent with foil to prevent scorching while the interior continues to cook. Finally, avoid stuffing the turkey unless you’re prepared to adjust cooking time and ensure stuffing reaches a safe temperature; otherwise, gentle roasting with a separate stuffing is often more dependable.
Tools & Materials
- Roasting pan with rack(Supports even heat and crisp skin)
- Meat thermometer (instant-read)(Inserted into the inner thigh without touching bone)
- Carving knife(Sharp blade for clean slices)
- Large cutting board(Stable surface for carving)
- Aluminum foil(Tent the turkey if browning too fast)
- Butter or olive oil(For flavor and moisture)
- Fresh herbs and aromatics(Thyme, sage, garlic, lemon)
- Kitchen towels(Dry surfaces and handle hot pan)
- Kitchen twine(Optional for trussing)
- Measuring spoons(For precise seasoning)
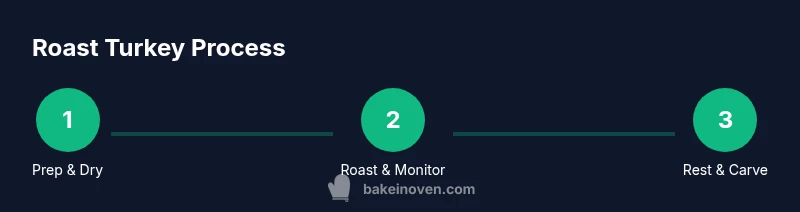
Steps
Estimated time: Total time: about two hours to three hours, depending on turkey size and oven performance
- 1
Thaw and prep the turkey
If needed, thaw the turkey in the refrigerator or in cold water, changing the water regularly. Pat dry once thawed to remove surface moisture, preventing steam and limp skin during roasting. This step reduces the risk of uneven doneness and helps the skin crisp.
Tip: Dry skin is the key to a crisp, brown exterior. - 2
Optional brining
Prepare a simple brine if you want extra moisture; dissolve salt (and optional sugar) in water and submerge the turkey fully. Brine timings depend on weight, but avoid over-brining to prevent overly salty meat. Rinse and pat dry after brining to remove surface salt before seasoning.
Tip: If you brine, plan ahead and pat dry thoroughly. - 3
Prepare herb butter
Combine softened butter with minced garlic, chopped herbs, and zest. This compound butter will under-skin and on the skin for flavor and moisture, helping the skin brown evenly.
Tip: Keep butter slightly chilled for easy handling. - 4
Season the cavity and skin
Gently loosen the skin over the breast and rub some butter under it. Season the cavity with salt and pepper and scatter aromatics like onion and lemon inside to perfume the meat from the inside out.
Tip: Seasoning under the skin boosts flavor without oversalting the surface. - 5
Preheat and truss if desired
Preheat your oven to a moderate temperature and, if you prefer, tie the legs with kitchen twine for stable roasting and even heat distribution.
Tip: Trussing helps the bird maintain shape and close the cavity gaps. - 6
Roast and monitor
Place the turkey on the rack, breast side up, and roast. Begin checking the internal temperature as the thigh approaches doneness to avoid overcooking and ensure even heat penetration.
Tip: Avoid opening the oven door frequently to maintain steady heat. - 7
Rest before carving
Transfer the turkey to a carving board and tent loosely with foil. Let it rest at least twenty minutes so juices redistribute and slices stay juicy.
Tip: Resting time can dramatically improve juiciness. - 8
Carve and serve
Slice breast meat against the grain, then remove legs and thighs. Serve with pan drippings or a simple gravy for extra richness without masking turkey flavor.
Tip: Carve in clean, single strokes for neat portions.
Frequently Asked Questions
What size turkey should I bake for a family gathering?
Plan about 1 to 1.5 pounds per guest, adjusting for leftovers. Start with a thawed turkey of appropriate size and check capacity of your oven.
For a family gathering, estimate about one to one and a half pounds per guest and check your oven space.
Should I brine the turkey?
Brining adds moisture but requires time and planning. If you brine, rinse well and pat dry before seasoning, and avoid over-salting.
Brining adds moisture but requires planning; rinse and pat dry after brining.
Is it safe to stuff the turkey?
Stuffing inside raw turkey can delay doneness; if you choose to stuff, ensure stuffing reaches safe temperature and adjust cooking time accordingly.
Stuffing inside turkey can affect doneness; ensure both turkey and stuffing reach safe temps.
How do I know when the turkey is done?
Check the thigh meat with a thermometer; 165°F (74°C) in the thickest part indicates safe doneness. Do not rely on color alone.
Use a thermometer; 165°F in the thickest part indicates safe doneness.
Should I baste during roasting?
Basting is not required if you use butter under the skin and a good rack; frequent opening of the oven can extend cooking time.
Basting isn’t required if you use butter under the skin; avoid opening the oven too often.
How long should the turkey rest?
Rest for 20–30 minutes after roasting to reabsorb juices and ease carving.
Let the turkey rest for twenty to thirty minutes before carving.
Watch Video
Key Takeaways
- Choose a thawed turkey and pat dry for crisp skin
- Rely on a meat thermometer to reach 165°F
- Rest 20–30 minutes before carving
- Brining is optional but effective for moisture
- Carve along natural seams for clean portions