How to Bake a 7-Pound Chicken: Time, Temp, and Doneness
Learn precisely how long to bake a 7-pound chicken, plus temps, doneness checks, resting tips, and a practical step-by-step roasting method from Bake In Oven.

Goal: roast a 7-pound whole chicken until the center reaches 165°F, delivering juicy meat and crispy skin. Expect the bake time to fall in a broad range around 2 to 2.5 hours at 325–350°F, depending on stuffing and pan setup. Use a reliable thermometer and let the chicken rest before carving.
How to think about the question: how long to bake 7 pound chicken
In this guide, we address how long to bake 7 pound chicken and why timing matters for both safety and juiciness. From Bake In Oven’s perspective, large birds rely on steady heat, even air circulation, and a proper resting period to maximize tenderness. The exact time can vary based on how your oven behaves, whether the bird is stuffed, and how you position it in the pan. The core principle is simple: aim for doneness at an internal temperature of 165°F in the thickest part of the breast or thigh, and account for carryover heat as the meat rests. The Bake In Oven team emphasizes that a reliable thermometer is your best tool for consistency across different ovens and days.
Temperature range and doneness benchmarks
The general guidance for a roasting chicken sits around moderate oven temperatures. A common approach is to roast at 325–350°F, which yields a golden skin without crowding the interior with excessive heat. For a seven-pound bird, this temperature range tends to balance time and texture, producing evenly cooked meat from breast to thigh. When you ask how long to bake 7 pound chicken, remember that timing is a function of weight, bone-in vs. boneless segments, and whether the chicken is stuffed. Stuffed birds require additional minutes and careful temperature checks to ensure the center of the stuffing also reaches 165°F. Always confirm doneness with a digital thermometer inserted into the thickest portion of the thigh without touching bone.
Preparing the chicken for roasting
Preparation starts with safety and moisture management. Remove any giblets from the cavity, pat the chicken dry with paper towels, and let it come to room temperature for 15–30 minutes if time allows. This increases heat transfer and helps the skin crisp nicely. Season generously with salt, pepper, and optional aromatics like garlic, herbs, and lemon wedges. Trussing the legs and tucking the wings helps the bird roast more evenly and reduces exposed areas that can burn or dry out. The exact time to bake 7 pound chicken begins with a well-seasoned, properly prepared bird, which sets the stage for even cooking and a crisp, flavorful finish.
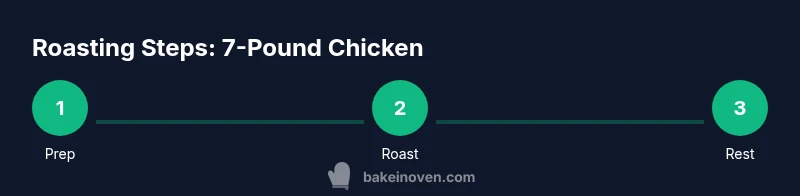
Step-by-step roasting method explained
A well-structured roasting method reduces guesswork. Place the chicken on a rack in a sturdy roasting pan to promote air circulation around the bird. Set your oven to a stable 325–350°F. If you start at a higher temperature (e.g., 425°F) to brown the skin, you should reduce the heat toward the end to avoid overcooking the interior. The roasting time will vary; a reasonable expectation is roughly 2 to 2.5 hours for a 7-pound bird, with the thermometer guiding final doneness. After cooking, let the chicken rest for 15–20 minutes before carving; this rest period allows juices to redistribute for a juicier slice.
Troubleshooting, safety, and common mistakes
Common mistakes include overcrowding the oven, using too high heat, or not using a thermometer. Certain issues, like undercooked thighs or dry breast, are typically linked to uneven heat distribution or insufficient resting. Ensure you check the internal temperature in the thickest parts and account for carryover heat after removing from the oven. If the skin isn’t as browned as you’d like, a brief final blast of high heat (around 450°F) for 5–7 minutes can help, but watch closely to prevent burning. Safety-wise, never rely on visual cues alone; always measure the center if you want reliable doneness.
Resting, carving, and serving tips
Resting is essential. After you pull the chicken, cover loosely with foil and rest for 15–20 minutes. This step lets the juices redistribute, resulting in a moister final product. When carving, work from the breast toward the legs to maintain slices with all the meat’s moisture preserved. Serve with pan juices or a simple herb butter for extra richness, and pair with roasted vegetables for a balanced meal. Remember: the goal is a juicy interior and a crisp, flavorful skin that invites you to savor each bite.
Tools & Materials
- Roasting pan with rack(Elevates the bird to promote even browning and air circulation)
- Instant-read meat thermometer(Check multiple spots (breast and thigh) for safe doneness)
- Oven-safe carving board or large cutting board(Stable surface for resting and carving)
- Kitchen shears or sharp chef’s knife(For clean carving without tearing meat)
- Measuring spoons and kitchen twine(For seasoning and trussing as needed)
- Carving knife and fork(Smooth, precise slices)
- Paper towels(Pat dry and absorb moisture for crisp skin)
- Aluminum foil(Tent the bird if resting longer or browning is uneven)
Steps
Estimated time: 2 hours 30 minutes
- 1
Preheat and prep the oven
Preheat your oven to 325–350°F and place a rack in the middle. Remove giblets, pat the bird dry, and let it rest briefly if possible to promote even cooking. This initial setup ensures the heat can penetrate evenly and skin can start to crisp without steaming.
Tip: Drying the skin thoroughly and starting with room-temperature meat improves browning and juiciness. - 2
Season and truss the chicken
Generously season inside the cavity and the exterior with salt, pepper, and aromatics. Truss the legs and tuck the wings to promote uniform cooking and to prevent the tips from burning. A well-seasoned, tied bird roasts more evenly and browns consistently.
Tip: If you’re new to trussing, keep it simple with kitchen twine around the legs and a loose hold on the wings. - 3
Roast on a rack
Place the chicken breast-side up on a rack in a sturdy pan. Roast at 325–350°F, checking the internal temperature after about 1.5 hours and again every 15–20 minutes after that. Rotate the pan if your oven heats unevenly to ensure even browning.
Tip: Using a rack ensures air flows around the bird and yields crisper skin on all sides. - 4
Monitor doneness
Insert the thermometer into the thickest part of the thigh, avoiding the bone. Remove the bird when the temperature reaches 165°F at the meat’s core. Don’t rely on color alone; thermometers give you reliable doneness.
Tip: Carryover cooking will raise the temperature a few degrees after removal; plan to pull slightly before 165°F if you’re a few minutes away. - 5
Rest and baste if needed
Let the chicken rest loosely tented with foil for 15–20 minutes. This period lets juices redistribute and the final texture set. If you want extra juice, spoon some pan juices over the carved meat just before serving.
Tip: Resting is as important as roasting; skipping it will yield tougher slices. - 6
Carve and serve
Carve along natural seams, starting with the breast in even slices, then separate legs and thighs. Serve with any pan drippings and a simple accomplice like roasted vegetables or a light gravy.
Tip: Let meat rest after slicing for better mouthfeel and moisture perception.
Frequently Asked Questions
Should I rinse the chicken before roasting?
Rinsing poultry is not recommended as it can spread bacteria via splashes. Pat the chicken dry thoroughly and proceed with seasoning for a crisp skin and even browning.
Rinse the chicken? It’s not recommended. Pat dry and season instead.
Is it okay to roast a stuffed chicken?
Stuffing a chicken requires additional cooking time and careful temperature checks. Check both the thickest part of the meat and the center of the stuffing to reach 165°F.
Yes, you can roast a stuffed chicken, but check both meat and stuffing to 165°F.
What oven temperature is best for a large chicken?
A moderate oven of 325–350°F is generally recommended for even cooking and good browning without drying the meat.
Maintain 325 to 350 degrees for even cooking and browning.
How can I tell if the chicken is done without a thermometer?
Visual cues such as clear juices and fully opaque meat help, but a thermometer provides the most reliable confirmation of 165°F.
Visual cues help, but a thermometer confirms safety.
Can I roast a frozen 7-pound chicken?
Roasting from frozen is not recommended for large birds, as it leads to uneven cooking. Thaw completely before roasting for best results.
Don’t roast from frozen—thaw fully first.
Watch Video
Key Takeaways
- Plan on 2–2.5 hours at 325–350°F for a 7-pound chicken.
- Always verify doneness with a thermometer to reach 165°F.
- Rest the bird 15–20 minutes before carving for maximum juiciness.
- Use a rack to promote even browning and air circulation.
- Stuffing alters time; adjust and check stuffing’s center to 165°F.