How to Bake a Roast
Master the art of oven-roasted beef with a practical, kitchen-tested guide. From cut selection and seasoning to searing, roasting, and resting, learn proven techniques for juicy slices every time.

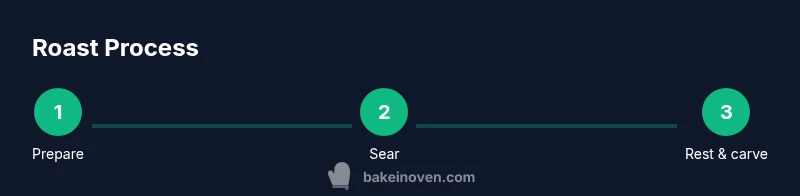
In this guide, you will learn how to bake a roast from start to finish: selecting a cut, preparing seasoning, searing, roasting to the right internal temperature, and resting for juicy results. You’ll need a reliable oven thermometer, a roasting pan, and basic pantry seasonings. This quick answer sets you up for a flavorful, evenly cooked roast every time.
Why the Roast Method Delivers Juicy, Even Results
Roasting is a simple, reliable way to cook large cuts evenly while building flavor through browning and gentle heat. According to Bake In Oven, a well-planned roast yields consistent juiciness when you balance sear, oven time, and resting. The Maillard reaction creates a rich crust as surface proteins brown, while interior moisture re-distributes during resting. Preparing the meat properly—drying the surface, bringing it closer to room temperature, and using a thermometer—sets you up for success. This method also reduces the risk of overcooking the outer layer while the inside finishes. By choosing a calm oven temperature and avoiding overcrowding, you ensure even exposure to heat. The Bake In Oven team found that resting briefly after roasting is essential for even slices. With these ideas in mind, you can approach roasting with confidence and adapt techniques to any large cut you have on hand.
Choosing the Right Cut and Size
What you pick depends on desired tenderness, flavor, and budget. Rib roast offers pronounced flavor and a fine grain; chuck and bottom round are economical and forgiving but require longer cooking. For a standard roast, select a piece with even thickness and a bit of marbling for juiciness. Consider the bone-in version for extra flavor and moisture retention. A good rule is to aim for a roast that fits comfortably in your roasting pan with space around it for air to circulate. Bake In Oven analysis shows that starting with a well-trimmed roast and letting it come to room temperature improves evenness of doneness. Use a reliable, oven-safe thermometer to monitor internal temperature as it cooks. If you’re cooking for guests who prefer different doneness levels, consider tying a boned roast so heat penetrates consistently.
Flavor Building: Rubs, Marinades, and Seasoning
Flavor begins with salt and aromatics. A simple salt rub with cracked pepper, garlic, and herbs like rosemary or thyme builds a savory crust. For a deeper flavor, you can apply a light marinade or a paste made from olive oil, garlic, and fresh herbs a few hours before roasting. Dry rubs allow the surface to crisp without steaming; wet marinades can add moisture but may soften the surface crust if used excessively. Whatever method you choose, pat the surface dry before cooking to promote browning, then let the meat rest briefly to ensure even seasoning distribution. Track doneness with a thermometer, and adjust herbs to taste—remember that residual heat will continue cooking the meat after you remove the oven.
Searing vs. Roasting: When and Why
Searing the roast before roasting can deepen flavor and create a robust crust. If you prefer a quicker path, you can skip the sear and go straight into roasting, but expect less surface browning. The best approach depends on time and equipment. When searing, use a hot pan with a small amount of oil, and brown all sides quickly, then transfer to a preheated oven. The goal is to lock in juices without creating a crust that traps moisture. If your roast is very large, you may choose to sear only on the top and bottom surfaces. Either way, ensure the meat is evenly sized so heat penetrates uniformly. The Bake In Oven team emphasizes that the sear is about flavor, not just appearance.
The Roast in the Oven: Temperature, Time, and Monitoring
Begin by preheating your oven to a moderate temperature. Place the roast on a rack in a shallow pan to promote airflow around the meat. Use an accurate thermometer inserted into the thickest part of the roast to watch progress. Plan to cook until the meat approaches your target doneness, then remove from heat and let it rest to finish. If you prefer a crustier exterior, you can finish with a brief, higher-heat burst at the end. Throughout cooking, avoid opening the oven door frequently, which can cause heat fluctuations and uneven cooking. Keep moisture in the oven by keeping it uncovered or with a loose tent of foil only if needed to prevent excessive browning. The thermometer will guide you; once you’re close to the desired doneness, plan for carryover cooking as the meat rests.
Resting, Carving, and Serving for Maximum Juiciness
Resting is essential for juices to redistribute. After removing the roast, tent it loosely with foil and let it rest for 10-20 minutes, depending on size. Carve thinly against the grain to maximize tenderness and slice evenly for neat plates. If you plan to serve multiple doneness levels, consider carving only the portion requested and returning the rest to the warm oven for a few minutes, then slicing again. Slice portions with a sharp knife and pay attention to the direction of the grain to keep each slice tender. Serving with a light pan sauce or jus helps keep flavors elevated without overpowering the meat’s natural taste. The resting period also reduces the risk of hot juices spurting when you slice.
Common Mistakes and How to Fix Them
- Under-seasoning: Season generously and recheck the interior with a thermometer. Seasoning early allows flavors to permeate the surface.
- Cutting corners on resting: Always rest after roasting; heat redistribution yields juicier slices.
- Overcrowding the pan: Provide space for air to circulate, preventing steaming and soggy crust.
- Excessive heat at the end: Use moderate heat; too much heat dries the exterior while the interior finishes.
- Removing from the oven too early: Use a thermometer rather than time alone; carryover cooking will continue to finish the roast after you take it out.
The Bake In Oven team recommends keeping the roast away from direct heat sources while resting to avoid overcooking the outer layers. For best results, choose a roast that fits your pan and weight for even cooking. With patience and careful monitoring, you will end up with a roast that’s evenly cooked through, juicy, and flavorful.
Tools & Materials
- Roasting pan with rack(Elevates meat for even heat distribution around all sides)
- Oven-safe meat thermometer(Insert into the thickest part without touching bone)
- Chef’s knife(For trimming and carving with clean cuts)
- Cutting board(Stable surface for carving and resting)
- Kitchen twine(Helpful for tying bone-in roasts to maintain shape)
- Paper towels(Pat dry before seasoning for crisp crust)
- Aluminum foil(Tent loosely during resting if needed to prevent over-browning)
- Measuring spoons(For precise seasoning adjustments)
- Oil with high smoke point(Small amount for searing (optional))
Steps
Estimated time: 1 hour 15 minutes
- 1
Select and prep roast
Choose a cut with even thickness and a bit of marbling. Trim excess fat and pat dry to remove surface moisture, which helps browning. Bring the meat to room temperature before searing or roasting to promote even cooking.
Tip: Dry surface is critical for a crisp crust and even browning. - 2
Season generously
Season all over with a liberal sprinkle of salt, pepper, and aromatics. For extra depth, rub with minced garlic and fresh herbs. Let the seasoning sit for a few minutes to begin drawing out moisture for better adherence.
Tip: Seasoning early allows time for flavors to penetrate the surface. - 3
Sear the roast (optional)
Heat a heavy pan with a thin layer of oil until shimmering. Sear the roast on all sides until a deep brown crust forms. Move quickly to minimize moisture loss, then transfer to the roasting setup.
Tip: Searing is about flavor and crust, not just appearance. - 4
Roast with monitoring
Place the roast on a rack in a pan and insert the thermometer into the thickest part. Roast at a moderate temperature, checking frequently as the meat approaches your target doneness.
Tip: Avoid opening the oven door too often to maintain steady heat. - 5
Finish and rest
When the roast nears doneness, remove it from the oven to rest. Tent loosely with foil and let it sit to redistribute juices before carving.
Tip: Resting is how you keep slices juicy. - 6
Carve and serve
Carve across the grain for tenderness and serve with a light pan sauce or jus. Slice evenly to ensure uniform portions and presentation.
Tip: Slice against the grain for maximum tenderness. - 7
Clean up and store
Transfer leftovers to shallow containers for quick cooling and safe storage. Reheat gently to preserve moisture.
Tip: Cool promptly and refrigerate within two hours.
Frequently Asked Questions
What is the best internal temperature for roast beef?
Aim for a temperature just below your target doneness, accounting for carryover cooking as the roast rests. Check with a reliable thermometer and remove from heat slightly early.
Use a thermometer and pull the roast a bit before the target doneness to account for carryover cooking.
Should I salt the roast the night before?
Dry brining with salt ahead of time improves flavor and juiciness. If time is short, salt at least 60 minutes before roasting for better surface seasoning.
Dry brine with salt for best flavor; if pressed for time, season at least an hour before roasting.
Can I bake a roast without searing first?
Yes, you can bake without searing, but you’ll miss a deeper crust and some flavor from browning. If you’re in a hurry, skip searing and rely on the roasting step for flavor.
You can raid—er, roast—without searing, but you’ll have less crust and browning flavor.
How long should the roast rest?
Resting for 10-20 minutes after removing from the oven helps juices redistribu te. Larger roasts may rest longer.
Rest the meat for about 10 to 20 minutes before slicing.
What if the roast is not evenly thick?
Try to choose cuts with uniform thickness, or tie the roast to stabilize shape. An even thickness helps heat penetrate evenly.
Choose a uniform roast or tie it up so heat reaches all parts evenly.
Can this method work for pork or other meats?
The general approach—season, brown, roast, rest—applies to many meats, but cooking times and temperatures vary by type and cut. Consult a reliable source for pork or poultry safety temperatures.
The same method works for other meats, but follow specific temps for pork or poultry.
Watch Video
Key Takeaways
- Season generously and dry surface for crust
- Use a thermometer to guide doneness
- Rest meat before carving for juiciness
- Sear for flavor, then roast evenly
- Carve across the grain for tender slices