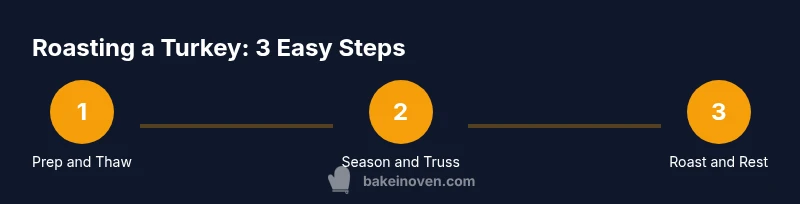
Oven-Baked Turkey: A Complete Step-by-Step Guide
Master the art of oven-baked turkey with a complete, safe, and practical guide. From thawing to resting, learn temperatures, timing, and flavor-building tips for juicy meat and crackling skin in 2026.

This guide shows you how to oven bake a turkey safely and evenly, from thawing to resting, with a simple roasting plan, thermometer-guided doneness, and flavor-building tips. You’ll preheat, season, roast with a rack, monitor internal temps, and rest before carving for juicy meat and crisp skin.
Understanding the Roast: Why oven-baked turkey shines
Cooking a turkey in the oven is a reliable way to achieve even browning, juicy breast meat, and crisp skin when you control heat, moisture, and time. In 2026, Bake In Oven analysis shows that the core to success is starting with a properly thawed bird, patting it dry, and following a disciplined roasting schedule. The oven’s dry heat helps render fat and color the skin without soaking the meat in juices. That means you’ll want a well-positioned rack, a sturdy roasting pan, and a reliable thermometer. As you work through this guide, you’ll see how small adjustments—like butter under the skin or a brief rest—make a big difference in texture and flavor. Stay mindful of safe handling and cleaning practices, and you’ll enjoy a memorable centerpiece with minimal guesswork.
Planning and Safety: Thawing, Timing, and Food Safety
Before you touch the turkey, confirm it’s fully thawed and safe to roast. A partially frozen bird can cook unevenly, leaving a cold center. Plan your timeline around the bird’s weight, allowing for thawing if needed and a rest period after roasting. Use a clean, sanitized workspace, wash hands frequently, and avoid cross-contamination by keeping raw poultry separate from other ingredients. Check the turkey’s cavity for giblets and neck, remove them if present, and pat the bird dry to promote even browning. Following these safety steps reduces the risk of bacterial growth and helps you achieve a safe, delicious result that aligns with Bake In Oven’s kitchen-tested guidance.
Choosing Size, Buying, and Prep: From Bird to Board
Select a turkey that fits your crowd and roasting dish. For a standard 12–16 pound turkey, you’ll typically plan for a longer roasting window than a smaller bird, so ensure your pan can accommodate it without crowding. If you’re short on time, choose a smaller turkey or brine to enhance moisture retention. Remove packaging, rinse if you prefer (though careful patting dry is usually sufficient), and truss if you want compact, even shaping. The goal is a uniform shape so the heat penetrates consistently and the entire bird roasts at a similar rate. This section emphasizes practical prep that sets up successful roasting.
Flavor Foundations: Brine, Butter Under the Skin, and Seasonings
Flavor is built before the oven door opens. You can opt for a dry-brine (salt and spices), a butter or herb butter under the skin, and a classic exterior rub. Butter under the skin helps moisturize the breast and contributes to browning, while seasonings on the outer surface create a savory crust. If you prefer a lighter finish, use a simple salt-and-pepper seasoning with a drizzle of olive oil. For those who like extra aroma, add garlic, thyme, rosemary, and citrus zest to the cavity for subtle, layered flavor. Each technique has its merits, and the choice depends on your taste and time constraints. Bake In Oven recommends testing flavor combinations on smaller roasts before a big holiday meal.
Preparing the Oven and Roasting Setup: Rack position, pan choice, and humidity
Preheat the oven to a steady roasting temperature (usually 325–350°F). Position a rack in the center of a sturdy roasting pan, then place the turkey breast-side up. Elevate the turkey on the rack to ensure heat circulates around the entire bird and the bottom isn’t stewing in its own juices. If you want crisper skin, pat the bird dry, avoid stuffing a hot cavity, and consider salting or buttering the skin to improve browning. Keep a few tablespoons of water or chicken stock in the pan to maintain moisture during the long roast. These setup choices influence the final texture and ensure even cooking throughout the bird.
The Roasting Timeline: Temperature, Time, and Positioning
Plan for a conventional unstuffed turkey to roast at 325–350°F, depending on size and whether you’ve brined. A general guideline is to roast until the internal temperature reaches safe targets (breast around 165°F, thigh around 175°F). Begin checking for doneness with a meat thermometer toward the latter third of the estimated time. If your oven runs hot in spots, rotate the pan midway or tent lightly with foil to prevent over-browning. The goal is a uniformly cooked turkey with a golden crust, not a burnt exterior. Keep in mind that carryover cooking will continue after you remove the meat from the oven, so plan the exit temperature a few degrees below final target.
Doneness, Temperature Targets, and Carryover Cooking
Use a reliable digital thermometer to verify internal temperatures. For safety, the USDA recommends reaching 165°F in the breast and 175°F in the thigh, but many cooks finish around 162–165°F in the breast with resting to achieve juicy meat. Factor in carryover cooking during the resting period; the meat will climb a few more degrees once out of the oven. To avoid overcooking, aim to remove the turkey from the oven a few degrees before reaching final target, then let it rest covered loosely with foil for 20–30 minutes. Resting allows juices to redistribute, resulting in more even slices and tenderness.
Resting, Carving, and Serving: The finishing touch
Resting is essential for juicy meat. Tent the turkey lightly with foil after removal, and let it rest for 20–30 minutes before carving. When ready to carve, slice across the grain to maximize tenderness and arrange slices on a warm platter. Cleanly carving reduces meat loss and ensures you present a neat, professional-looking centerpiece. A simple pan gravy made from the drippings complements roasted turkey beautifully. Serving ideas include herb-mashed potatoes, roasted vegetables, and a light gravy that highlights the turkey’s natural flavors.
Troubleshooting Common Roasting Issues: Dry breast, uneven browning, undercooked spots
If the breast dries out, lower the heat slightly and baste or tent with foil earlier in the roast to protect moisture. Uneven browning often results from an uneven oven or a pan that’s too small. Rotate the pan or add a shallow amount of liquid to the pan to promote heat distribution. If you notice undercooked areas, increase the oven temperature slightly toward the end or remove the turkey earlier and allow carryover cooking to finish. Remember that inconsistent results are common when you’re still learning the roast; adjust timing based on your oven’s quirks and the bird’s exact weight. Bake In Oven’s kitchen-tested approach helps you fine-tune these variables for reliable outcomes.
Leftovers and Storage: Safe handling and quick repurposing
Leftover turkey should be cooled quickly and stored in shallow containers in the refrigerator within two hours of cooking, then used within 3–4 days or frozen for longer storage. Reheat leftovers gently to preserve moisture, using a microwave with a covered dish or a low-temperature oven. Use turkey for sandwiches, casseroles, soups, or salads to minimize waste and maximize flavor. Proper storage and creative reuse turn a big meal into several delicious options without compromising safety or quality.
Variations for Different Ovens and Accessories: Convection, parchment, and pre-brining options
If you have a convection oven, you can lower the temperature by about 25°F and watch for crisper skin. Parchment paper can help prevent sticking for certain roasts, though it’s not necessary for a traditional turkey. Pre-brining or dry-brining can elevate moisture retention and flavor, especially for larger birds. For very large birds, consider splitting the roasting into sections or loosening the skin for better fat distribution. Tailor your technique to your oven’s behavior and the bird’s size to achieve consistent results in any kitchen.
Tools & Materials
- Roasting pan with rack(Heavy gauge, wide enough to fit your turkey with space around it)
- Meat thermometer(Probe inserted into the thickest part of the breast (not touching bone))
- Basting brush(For optional butter or pan juice application)
- Aluminum foil(For tenting if browning too quickly)
- Kitchen twine(For tying legs and wings for even cooking)
- Carving knife and board(Sharp blade; large cutting board for serving)
- Mixing bowls(For brine or butter mixtures)
- Paper towels(Pat dry the turkey thoroughly before roasting)
- Measuring cups/spoons(Accurate seasoning and brine ratios)
Steps
Estimated time: 3-4 hours total (roasting plus resting)
- 1
Thaw and Inspect
Ensure the turkey is fully thawed and inspect the cavity for giblets or neck. Remove giblets and neck if present, then pat the bird completely dry with paper towels. A dry surface promotes crisp skin and even browning in the oven.
Tip: If thawing in the fridge, plan roughly 24 hours per 4-5 pounds; adjust based on your schedule. - 2
Set Up Your Workspace
Clear your prep area and gather all tools. Place a roasting pan, rack, thermometer, and seasonings within easy reach. A clean, organized space reduces surprises on roast day and speeds up prep.
Tip: Have a basin of hot water handy to pre-warm your thermometer for faster reading. - 3
Preheat the Oven
Preheat to 325–350°F depending on your recipe and whether you brined. A steady temperature helps maintain moisture and consistent browning. If you’re new to roasting, start at 325°F for a forgiving process.
Tip: If you use convection, reduce by 25°F to maintain moist breast meat. - 4
Prepare the Turkey for Roasting
Pat dry again if needed, then season the cavity if desired with aromatics. If using butter or oil, brush the exterior lightly for even browning. For extra moisture, place a small amount of stock or water in the pan.
Tip: Avoid washing the cavity with water to minimize cross-contamination; moisture is usually enough when dry-brined. - 5
Season Under the Skin
Gently loosen the skin over the breast with a gloved hand or dull knife and insert softened butter or an herb paste beneath the skin. This direct fat contact helps keep the breast juicy while the skin browns.
Tip: Use a light hand; you don’t want to tear the skin, which can release juices during roasting. - 6
Season the Exterior
Apply salt, pepper, and any dry rub to the outside of the turkey. A light coat of oil or melted butter will help promote crispy skin. Tie the legs and tuck the wings to ensure even heat distribution.
Tip: Salt the skin evenly to create a seasoned crust without over-salting. - 7
Roast on a Rack
Place the turkey breast-side up on a rack in the roasting pan. Center it in the oven and avoid crowding. Elevating the turkey allows heat to reach all sides and prevent soggy bottoms.
Tip: Rotate the pan halfway through if your oven heats unevenly. - 8
Monitor Doneness
Check internal temperature with a thermometer toward the tail end of roasting. Remove when breast reaches about 165°F and thighs reach around 175°F for safety and carryover cooking.
Tip: Remember carryover cooking will raise temps by a few degrees after roasting. - 9
Rest Before Carving
Let the turkey rest loosely tented for 20–30 minutes to redistribute juices. Resting helps ensure juicy slices and easier carving.
Tip: Maintain some tented foil to keep warmth without steaming the skin. - 10
Carve and Serve
Carve across the grain for tender slices and arrange on a warm platter. Serve with pan gravy and sides that complement the savory pan drippings.
Tip: Slice only what you’ll serve to minimize waste and maintain quality. - 11
Handle Leftovers
Cool leftovers quickly and refrigerate in shallow containers within two hours. Use or freeze leftovers within 3–4 days (or longer if frozen).
Tip: Label with dates to track freshness and prevent spoilage. - 12
Safety Recap
Always verify temperatures with a reliable thermometer and follow safe handling practices. The goal is a safe, delicious meal that everyone can enjoy.
Tip: If in doubt, rely on a certified food-safety resource for target temperatures.
Frequently Asked Questions
What is the recommended oven temperature for roasting a turkey?
Roast most turkeys at 325–350°F (163–177°C) for even cooking. Convection ovens require reducing the temperature by about 25°F. Individual results vary by bird size and whether you brined.
Roast at 325 to 350 degrees, lowering a bit for convection ovens.
Should I rinse a turkey before roasting?
Rinsing raw turkey isn’t recommended because it can spread bacteria around the kitchen. Pat the bird dry and proceed with seasoning.
Avoid rinsing; pat dry and season instead.
How long does it take to roast a turkey?
Roast times depend on weight and whether you stuff. Use a thermometer to guide doneness and plan for roughly 13–15 minutes per pound (unstuffed) at 325°F, then rest before carving.
Timing varies by weight; check with a thermometer rather than a clock.
Can I stuff the turkey?
Cooking stuffing inside the turkey can extend cooking time and increase risk of undercooked pockets. It’s safer to cook stuffing separately and still season the turkey for flavor.
Safer to cook stuffing separately and roast the bird as usual.
What temperatures indicate doneness?
Breast should reach about 165°F and thighs about 175°F for safety. Remove from heat a little early to account for carryover cooking during resting.
Use a thermometer; aim for 165°F in breast and 175°F in thigh.
How should leftovers be stored?
Cool leftovers quickly and refrigerate in shallow containers within two hours. Consume within 3–4 days or freeze for longer storage.
Cool quickly and store in shallow containers in the fridge or freezer.
Watch Video
Key Takeaways
- Roast unstuffed for even heat distribution
- Use a reliable thermometer to guide doneness
- Rest the turkey to lock in juiciness
- Protect breast with moisture or skin during roasting
- Slice against the grain for tender portions