Bake or Broil Chicken: A Practical Comparison for Home Bakers
Compare baking and broiling chicken with practical, kitchen-tested guidance. Learn when to bake or broil, safety tips, timing tips, and a clear pros/cons verdict.

Choosing between baking and broiling changes texture, juiciness, and timing. Baking yields even doneness with steady heat, while broiling finishes with a crisp top and rapid browning. This quick preview weighs speed, surface texture, interior moisture, and control to help home cooks decide when to bake or broil chicken for reliable results.
Why bake or broil chicken matters
According to Bake In Oven, the practical choice between bake or broil chicken hinges on texture, time, and dish outcome. Baking relies on steady oven heat to cook meat evenly from edge to center, promoting uniform doneness and gentle moisture retention. Broiling uses intense radiant heat from the top element to brown the surface quickly, creating a crisp exterior and a contrasting interior if timed well. For home cooks, understanding these mechanics means you can plan for thickness, skin presence, and finishing texture before you even season. Bake In Oven’s team emphasizes that the right method is less about a universal rule and more about your target result and schedule. As you read on, you’ll see how to match each method to common cuts, marinades, and weeknight timelines, so you can bake or broil chicken with confidence, every time.
Key differences between baking and broiling for chicken
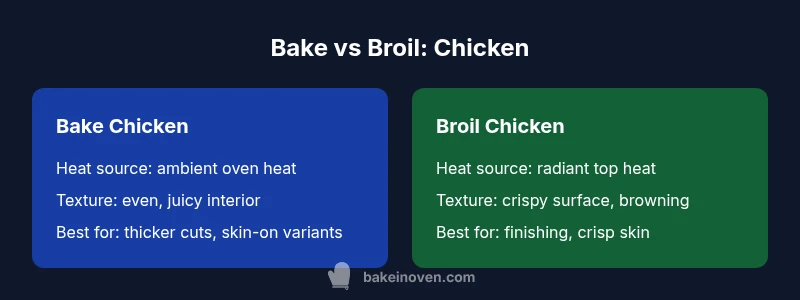
Baking and broiling differ primarily in heat source and exposure. Baking employs ambient heat within the oven to cook meat gradually, which helps maintain moisture in thicker cuts and skin-on pieces. Broiling relies on direct, high-intensity heat from above, speeding surface browning and crust formation but risking drier interiors if mismanaged. The result is a contrast in texture: bake yields even texture with gentle browning, while broil delivers a crisp, caramelized exterior. Another difference is control: oven-assisted baking lets you set a target internal temperature and rely on carryover cooking, whereas broiling requires careful monitoring, quick movements, and often finishing with a hot, short stint to achieve the desired surface.
Practical guidelines for choosing method by cut and goal
Your decision should hinge on cut, skin, and the texture you want. For boneless chicken breasts or thin cutlets, baking is forgiving and ensures safe, even cooking without scorching. For bone-in thighs or skin-on pieces, baking at a moderate temperature yields juicy meat with browning, then a quick broil finish can crisp the skin. If you crave a dramatic crust or a fast finish, broil can deliver that top browning in minutes, but you must watch closely. In contrast, if you’re aiming for even color throughout and a tender bite, bake is often the safer default. Remember to pat dry, season well, and use a thermometer to track progress, regardless of method.
Temperature and timing guidelines you can trust
A reliable approach is to treat 165°F as the safe internal temperature target for all chicken: it ensures the meat is fully cooked without relying on guesswork. For baking, a common range is 350–425°F depending on cut and thickness. Thinner pieces cook faster but risk drying if overcooked, so start checking earlier. When broiling, you’ll use high heat and shorter times; plan for 5–10 minute windows for small pieces, with frequent checks to prevent burning. Resting afterward is essential: tent with foil for 5–10 minutes to redistribute juices. For accuracy, use an instant-read thermometer and remove the meat once it reaches the target range, allowing carryover heat to finish within a safe margin.
Bake: step-by-step preparation
- Preheat the oven to 375–425°F, depending on the cut and desired browning. 2. Pat dry and season generously; a light brushing of oil helps with even browning. 3. Arrange pieces on a parchment-lined sheet to prevent sticking and promote even heat. 4. Bake until the thickest part reaches 160–165°F, then rest to 165°F. 5. If skin needs extra color, switch to a quick additional bake or a brief broil finish. 6. Let rest before serving to retain moisture and juiciness.
Broil: step-by-step preparation
- Preheat the broiler with the rack in the top third of the oven. 2. Pat dry and season; lightly oil for shine and browning. 3. Place chicken on a foil-lined pan or a sheet on a rack for airflow. 4. Broil in short bursts, flipping as needed to develop even browning without scorching. 5. Monitor closely and remove once the center hits 165°F; rest briefly before serving.
Finishing touches: browning, sauces, and resting
After cooking, a brief rest (5–10 minutes) helps juices redistribute. For extra browning, finish under the broiler for 1–2 minutes, watching closely. Consider a glaze, herb butter, or a light pan sauce to boost flavor without adding fat. If you used skin-on pieces, crisping with a final broil can amplify texture. The key is balance: you want a crisp exterior without sacrificing a juicy interior. Serving with fresh herbs, a squeeze of lemon, or a splash of olive oil can brighten the dish without masking the meat’s natural flavors.
Common mistakes and how to avoid them
- Overcrowding the pan leads to steaming rather than browning. Give space for heat to circulate. - Not using a thermometer invites dry or undercooked meat. Invest in a reliable instant-read thermometer and check at the thickest point. - Skipping rest time results in a loss of juiciness; always let meat rest under lightly tented foil. - High heat without monitoring can burn surface while the interior remains underdone; use shorter broil bursts and flip pieces regularly.
Safety considerations and storage
Always prioritize safe handling of raw poultry: wash hands, sanitize surfaces, and prevent cross-contamination. External browning should not substitute for internal doneness; the thermometer is your best guide. After cooking, cool chicken promptly and refrigerate within two hours. Reheat leftovers to at least 165°F to ensure safety. For large batches, portion and freeze with airtight packaging to preserve texture and moisture. Consult USDA guidelines for safe handling and storage to minimize foodborne risk.
Flavor pairings and variations: herbs, marinades, rubs
Marinades with acid (lemon, vinegar) help tenderize and flavor the meat before baking or broiling. Dry rubs featuring paprika, garlic, and cumin provide a crusty exterior, especially when broiled. Fresh herbs (thyme, rosemary) brighten the dish after cooking. Butter basting during baking adds richness and helps with browning. If you’re avoiding oil, consider air-circulated parchment under the chicken to reduce sticking and promote even browning.
Quick-start checklist for busy weeknights
- Thaw safely or prep from frozen using extended bake times. - Pat dry and season generously; a touch of oil improves browning. - Preheat oven or broiler before you start. - Use parchment or a wire rack for even heat exposure. - Have a thermometer handy and rest meat before serving.
Comparison
| Feature | Bake chicken | Broil chicken |
|---|---|---|
| Heat source | Ambient oven heat for even cooking | Direct radiant heat from the top element for quick browning |
| Cooking speed | Generally slower; suited to thicker pieces | Faster surface browning; interior can finish quickly |
| Texture and doneness | Even texture throughout; moist interior when timed well | Crispy surface with potential for drier interior if overcooked |
| Best uses | Thick breasts, thighs, skin-on pieces needing even doneness | Finishing touch for skin, crust, or browning on thinner pieces |
| Control and predictability | Good carryover cooking control; consistent results with thermometer | Requires close watching; better for finishing rather than bulk cooking |
Benefits
- Promotes even doneness and moisture retention in thicker cuts
- Less risk of surface scorching; forgiving with proper timing
- Good for bulk cooking and predictable results with oven temperature control
- Versatile for skin-on or skinless pieces when paired with finishing steps
Negatives
- Longer overall cooking time compared with broiling for a crisp finish
- Broiling requires attentive monitoring to avoid burning or overcooking
- Potential to dry out thinner cuts if not watched closely
Bake is the default choice for most chicken dishes, with broiling as a finishing option to add browning.
Choose baking for even doneness, moisture retention, and low risk of scorching. Use broil sparingly to create a crisp, browned surface or crust, especially on skin-on or thinner pieces. The best approach often combines both methods: bake to cook through, then broil briefly to finish with color.
Frequently Asked Questions
Is bake or broil better for chicken breast?
For chicken breast, baking is generally more forgiving and helps prevent drying. Broiling can finish with a crisp surface but requires close attention to prevent dryness. Use bake as the default and reserve broil for the final browning if desired.
For chicken breasts, bake is usually safer for even doneness; broil works for a quick browning finish if you watch it closely.
Can you bake frozen chicken?
Yes, you can bake frozen chicken, but it will take longer and you should use a thermometer to ensure it reaches 165°F internally. Expect 1.5x–2x the cooking time of thawed chicken and plan for a gradual rise in temp.
You can bake from frozen, but it takes longer—plan more time and use a thermometer to reach 165°F.
What temperature should I bake chicken at?
A practical range is 375–425°F, depending on cut and thickness. Chicken should reach 165°F internally. If you want extra browning, finish with a brief broil at the end.
Bake at 375–425°F and cook to 165°F for safe, juicy results.
How can I prevent dryness when broiling chicken?
Marinate or brine beforehand, keep an eye on time, flip halfway, and avoid prolonged exposure to direct heat. A short, monitored broil finish often yields the best balance of texture and moisture.
Brine or marinate, monitor closely, flip as needed, and rest after broiling.
Is broiled chicken safe to eat?
Yes. Ensure the internal temperature reaches 165°F. Use a thermometer and avoid undercooking just to achieve browning.
Yes, as long as it hits 165°F inside.
How do I prevent burning when broiling?
Place the rack closer to the top only for short bursts, flip pieces, and monitor constantly. Use foil to catch drips and prevent flare-ups.
Watch it closely, flip often, and keep the heat in short bursts.
Key Takeaways
- Choose bake for even doneness and moisture retention
- Use broil to add browning or crust in a finishing step
- Always check internal temperature with a thermometer
- Rest cooked chicken to maximize juiciness and flavor
- Parchment paper or a wire rack improves browning and cleanup