How Long to Bake Steak in Oven: A Practical Guide
Learn how long to bake steak in oven with heat, timing, and resting guidelines. This Bake In Oven guide covers doneness targets, searing, and safety for juicy results.

To answer how long to bake steak in oven, start with a hot pan sear, then finish in a 425–450°F oven. Time depends on thickness and desired doneness: about 4–6 minutes per side after sear for a 1-inch steak to medium-rare, and up to 10–14 minutes total for thicker cuts. Always rest before slicing.
Understanding Doneness and Oven Timing
If you’re wondering how long to bake steak in oven, you want to balance thickness, doneness level, and rest. The oven method is reliable for home cooks because it minimizes hot spots and uneven heat when you finish with a precise finish. Understanding doneness levels helps you set clear targets and avoid overcooking. For a typical 1-inch steak, the goal is a warm center with a browned crust. Internal temperature is the most reliable guide, not guessing by time alone. Let the steak sit at room temperature for about 20–30 minutes before cooking so heat distributes evenly. The Bake In Oven team emphasizes planning a brief rest after cooking, which redistributes juices and boosts tenderness. With practice, you’ll translate thickness, starting temperature, and oven accuracy into consistent outcomes.
Key Variables That Impact Bake Time
Bake time is not a fixed number; it shifts with several variables. Thickness is the biggest driver: thicker steaks need more oven time, but a thicker crust may require longer sear to develop color. Starting temperature matters—room-temperature steaks cook more evenly than when they’re cold from the fridge. Oven performance varies by model, so an oven thermometer helps you stay on target. The cut matters too: well-marbled ribeye might finish with more crust and juiciness than a lean sirloin. Finally, resting after removal from heat is essential to let juices redistribute and finish cooking gently. Bake In Oven guidance integrates these factors to help home cooks predict doneness with confidence.
Searing for Flavor: Crust and Color
A good crust is the foundation of flavor in oven-baked steak. Start with a hot, heavy skillet (preferably cast iron) and a thin layer of high-heat oil. Pat the steak dry to remove surface moisture, then season generously with salt and pepper. Sear without moving for 1–2 minutes until a deep brown crust forms, then flip and sear the other side. Searing locks in moisture and develops Maillard reaction flavors that you want when you finish in the oven. If you’re using extra fat (butter or oil), keep the heat steady to avoid burning. A well-seared crust makes the oven finish more predictable and delicious.
Finishing in the Oven: Temperature Guidelines and Timing
Finish time depends on thickness and doneness target. A common approach is 425–450°F for the oven finish. For a 1-inch steak after a quick sear, plan about 4–6 minutes per side in the pan, then 6–8 minutes in the oven for medium-rare. For thicker cuts (1.25–1.5 inches), expect 6–8 minutes of oven time after searing to reach medium-rare, with longer times for more done levels. Internal temperature is your best guide: aim for about 120–125°F for rare, 130–135°F for medium-rare, 135–145°F for medium, 145–155°F for medium-well, and 155°F+ for well-done. Remove the steak a few degrees below the final target, because carryover cooking will finish the job during resting.
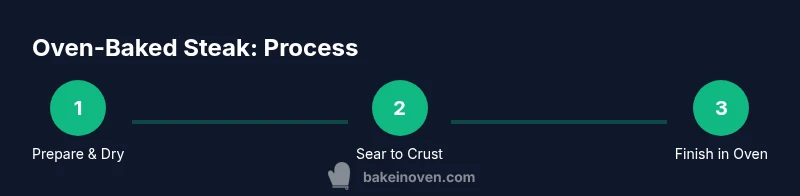
Step-By-Step Oven-Baked Steak Method (Overview)
This overview lays out the core approach without diving into the step-by-step details. The method pairs a quick sear with a controlled oven finish to produce a crusty exterior and succulent interior. Start with dry, seasoned steak, sear in a hot skillet to color, then move to a preheated oven to finish to your target internal temperature. Let the steak rest before slicing to maximize juiciness. This approach is versatile for various cuts and allows precise doneness control when you use a thermometer.
Doneness Targets and Temperature Guide
Doneness is defined by internal temperature. Here are practical targets: rare 120–125°F, medium-rare 130–135°F, medium 135–145°F, medium-well 145–155°F, well-done 155°F+. Because heat continues after removal, pull the steak 2–5°F before the target. Use an instant-read thermometer inserted into the center for accuracy. Remember that carryover cooking is real, particularly for thicker steaks. Resting for 5–10 minutes after removal helps juices redistribute and keeps slices tender.
Flavor Enhancers: Rest, Butter Baste, and Sauces
Rest time is when juices reabsorb into the muscle fibers, improving juiciness and slicing ease. A 5–10 minute rest is typical for most cuts. For extra richness, baste the steak with melted butter, crushed garlic, and fresh herbs during the final minutes of searing or immediately after searing. You can finish with a simple pan sauce made from the fond, deglazed with a splash of wine or stock. These finishing touches amplify the crust, aroma, and overall flavor without overpowering the beef.
Safety, Storage, and Cleaning After Cooking
Always handle raw meat with clean hands and sanitized surfaces. After cooking, store leftovers in shallow containers in the refrigerator within two hours to avoid bacterial growth. Reheat gently to a safe reheating temperature rather than microwaving aggressively, which can dry the steak. When cleaning, soak the pan to remove burnt bits and scrub with non-abrasive pads to protect seasoning on cast iron. Proper handling protects both flavor and safety.
Practical Tips for Consistency
Keep a consistent process: dry surface, proper seasoning, hot pan, crisp sear, precise oven finish, accurate thermometer use, and rest. Small adjustments—like a minute or two more in the oven for thicker steaks—yield noticeable improvements in doneness accuracy. Document your results for the cut and thickness you use most often so you can repeat successful outcomes.
How to Adapt for Different Cuts and Thicknesses
Ribeye, sirloin, strip, or filet each respond a bit differently. In general, thicker cuts require longer oven time after searing, while leaner cuts benefit from a slightly longer sear to compensate for moisture loss. For very thick steaks (1.75 inches or more), consider finishing with a lower oven temperature (400°F) and extending time by a few minutes, monitoring internal temperature closely to avoid overcooking.
Tools & Materials
- Cast-iron skillet(Prefer 12-inch for even sear; can go larger if needed)
- Oven-safe skillet (optional)(Useful if you don’t want to transfer to a pan after sear)
- Tongs(Good grip for flipping without piercing meat)
- Instant-read thermometer(Essential for accurate doneness)
- Wire rack(Elevates steak for even air circulation if finishing on a sheet)
- Baking sheet(Helpful for rest on a rack or to catch juices)
- Paper towels(Pat dry thoroughly before searing)
- Salt(Coarse salt works best for seasoning)
- Ground black pepper(Freshly ground for aroma)
- Olive oil or high-heat oil(High smoke point helps browning)
- Butter (optional)(Use for finishing and flavor if desired)
- Garlic cloves (optional)(For finishing butter baste)
Steps
Estimated time: Total time: 25-40 minutes
- 1
Prepare and pat dry the steak
Pat the steak completely dry with paper towels. Moisture on the surface inhibits browning, so dry thoroughly. If desired, bring to room temperature for 20–30 minutes to promote even cooking. Salt generously and let sit for 10–15 minutes to draw out surface moisture for a crisper crust.
Tip: Dry surface = better sear. Salt early to help flavor penetration. - 2
Season generously
Season on all sides with salt and pepper. You can add optional herbs or a light coating of oil to improve even browning. For thicker cuts, consider a light rub of garlic powder or paprika for extra depth.
Tip: Season ahead of time for deeper flavor without overpowering the beef. - 3
Preheat oven and pan
Preheat your oven to 425–450°F. While it heats, place a heavy skillet on the stove and let it get very hot. A hot pan creates a good crust and helps set the surface quickly before the oven finish.
Tip: Use a cast-iron skillet for superior crust development. - 4
Sear the steak
Sear the steak in the hot pan without moving for 1–2 minutes, until a deep brown crust forms. Flip and sear the other side for 1–2 minutes. If using butter, add toward the end to baste and promote additional browning.
Tip: Short, hot sears prevent steam-drying the interior. - 5
Finish in the oven
Transfer to the oven or keep in the oven-safe pan and bake until the thermometer reads your target doneness. For 1-inch steaks, this is typically 6–8 minutes for medium-rare after sear. Thicker cuts need more time—watch the internal temp closely.
Tip: Check temperature early and often to avoid overshoot. - 6
Rest before slicing
Remove from heat when you’re 2–5°F from your target, and rest the steak on a rack or plate for 5–10 minutes. Resting redistributes juices and finishes cooking gently through carryover heat.
Tip: Even a short rest dramatically improves juiciness. - 7
Slice and serve
Slice against the grain for tenderness. Pair with a finishing sauce or butter if desired, and serve promptly to enjoy the crust and warm center.
Tip: Resting slightly longer can help if you’re serving multiple steaks at once.
Frequently Asked Questions
What is the best oven temperature for baking steak?
A common approach is to finish in a hot oven at 425–450°F after a quick sear. This provides a crusty exterior while keeping the interior juicy. Adjust slightly for thickness and desired doneness.
Finish the steak in a hot 425 to 450 degree oven after a quick sear to get a crusty exterior and juicy center.
Should I bring steak to room temperature before cooking?
Yes. Letting the steak rest at room temperature for about 20–30 minutes helps it cook more evenly and reduces the chance of a cool center.
Yes, bring the steak to room temperature for about 20 to 30 minutes before cooking.
How can I tell when steak is done without a thermometer?
A thermometer is the most reliable. If you must, use the finger test and approximate time based on thickness, but invest in a quick thermometer for best results.
The thermometer is your best tool; if you don’t have one, use the finger test combined with time guidance, but I recommend getting a thermometer.
What cuts are best for oven-baked steak?
Ribeye, New York strip, and sirloin are well-suited for oven finishing with a sear. Filet can work, but it’s leaner and cooks quickly, so adjust time carefully.
Ribeye, strip, and sirloin work well; filet can work but cooks quickly, so monitor doneness closely.
What rest time is ideal after baking?
Rest the steak for 5–10 minutes to allow juices to redistribute and finish carrying over cooking.
Rest for 5 to 10 minutes so juices settle and flavors rebound.
Can I reuse pan drippings to make a sauce?
Yes. Deglaze the pan with broth or wine, scrape up the fond, and reduce to concentrate flavor for a simple pan sauce.
Definitely. Deglaze the pan with liquid, scrape up the browned bits, and reduce for a quick sauce.
Watch Video
Key Takeaways
- Sear before oven finish for best crust and flavor
- Thickness and doneness targets drive bake time
- Thermometer is your most reliable guide
- Resting improves juiciness and slices