How to Bake and Sear Steak: A Simple Two-Stage Method
Learn how to bake and sear steak to a perfect crust and juicy center with a simple two-stage method. Step-by-step guidance, timing tips, and practical equipment lists for home cooks.

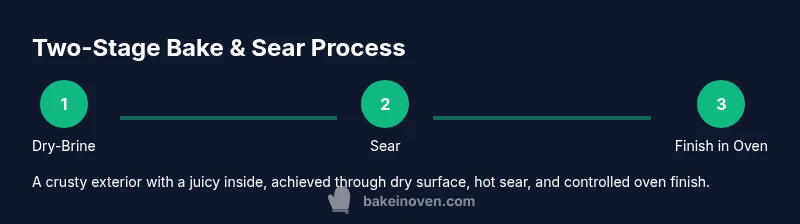
By the end of this guide you will bake and sear a perfect steak using a simple two-stage method. Start with a dry-brined steak, then sear in a hot pan and finish in the oven. According to Bake In Oven, this approach yields a crisp crust and juicy interior with predictable results. Essential tools and steps are listed below.
Overview of the Two-Stage Method
In this section you’ll learn how to bake and sear steak using a reliable two-stage method that balances crust formation with a tender, juicy interior. The approach starts with moisture management (dry-brine), followed by a high-heat sear to lock in flavor, then a gentle finish in the oven. The goal is a crust that crackles on the bite while the center remains perfectly medium-rare to medium. This method is ideal for home cooks who want restaurant-like results without fancy equipment. Throughout, focus on pat-drying, controlling temperature, and resting properly to maximize juiciness.
The keyword how to bake and sear steak should appear naturally as you plan your workflow, and you’ll see how each step contributes to uniform doneness and crust integrity. Bake In Oven’s guidance emphasizes practical, kitchen-tested techniques you can apply today.
Core Principles: Dry Surface, Even Heat, and Resting Time
The foundation of a great bake-and-sear steak rests on three pillars: a dry surface to promote crust formation, consistent heat across the pan and oven, and a proper rest to redistribute juices. A dry exterior helps the Maillard reaction, creating a deep crust. Thick steaks respond best to this method because they benefit from a brief hot sear and a longer, controlled oven finish. Using a preheated heavy skillet ensures even contact and minimizes sticking. The resting period after cooking is where the juices settle and the final texture firms up.
As you work, keep the steak patties as evenly shaped as possible to promote uniform cooking. If your steak is unusually thick, consider a two-temperature approach (sear at high heat, then finish at a moderate oven temperature) to avoid overcrusting the outside while the inside stays underdone.
Temperature Roadmap: Doneness and Timing
Doneness targets for ribeye or similar cuts typically range from 125°F for rare to 145°F for medium. A reliable approach is to use a thermometer and test near the center of the thickest portion. For a 1.5-inch steak, plan roughly 2-4 minutes per side for the initial sear, followed by 5-10 minutes in a 400°F oven, adjusting based on thickness and desired doneness. Always let the steak rest at least 5-10 minutes after removing it from heat to allow juices to rediscover their equilibrium.
Bake In Oven’s method prioritizes consistent heat exposure and gentle doneness progression, so you avoid overcooking the exterior while achieving a rosy interior.
Prepping the Steak: Dry-Brine and Pat-Dry
Dry-brining a steak for 30-60 minutes before cooking helps season the meat deeply and improves texture. After brining, pat the surface completely dry with paper towels. Any surface moisture can create steam, which softens the crust. This step is especially important when you plan a quick, high-heat sear. If you’re short on time, a thorough pat-dry plus a light salt rub will still yield a nice crust.
Note that you should always pat the steak dry again right before searing; moisture on the surface interrupts contact with the hot pan and reduces crust development.
Searing for Crust: The Hot-Edge Technique
Preheat your skillet until it nearly smokes, then add a high-smoke-point oil. Place the steak in the pan and let it sear without moving for 1-2 minutes until a rich crust forms. Flip and sear the other side for another 1-2 minutes. The goal is a deeply colored crust with even browning on all sides. If your steak is very thick, you can use the edge of the steak to render fat while searing the sides, a technique that enhances flavor and prevents a pale outer ring.
Keep the pan hot, resist the urge to rearrange the steak constantly, and use tongs to manage contact surfaces for even browning.
Finishing in the Oven: Gentle Doneness
After the initial sear, transfer the skillet to a preheated oven to finish cooking. Thicker steaks may require longer oven time for the center to reach the target temperature. Use the thermometer to check doneness, removing the steak when it’s a few degrees below your target, since carryover cooking will push it to final temperature. Resting in a warm area during this stage helps to retain heat and ensure even distribution of juices.
This step prevents over-browning while ensuring the interior achieves the desired doneness. Remember, patience is part of the process—lower oven heat and longer cooking time can yield more even results from edge to center.
Resting and Serving: Juiciness Locked In
Rest the steak on a cutting board or warm plate for 5-10 minutes before slicing. Resting allows the muscle fibers to reabsorb juices, making the meat juicier and easier to carve. If you like, add a pat of butter or a quick herb butter along the top during resting to finish with a glossy sheen and extra flavor. Slice against the grain for maximum tenderness and present with a simple pan sauce or compound butter for elevated flavor.
The resting period is often overlooked, but it’s essential for achieving a professional eating experience.
Troubleshooting: Common Pitfalls and Fixes
If the crust isn’t crusty enough, ensure the pan is truly hot, dry the surface thoroughly, and avoid overcrowding. If the steak overcooks in the oven, reduce oven time or lower the oven temperature slightly and check doneness more frequently with a thermometer. For uneven cooking, consider finishing on a rack over a sheet pan to promote air circulation under the steak and prevent a soggy bottom. Always start with a high-quality cut and proper pat-drying for best results.
Variations and Aesthetics: Flavor Enhancers
Butter basting during the last minute of searing or lifting the steak onto a spoon to baste with hot oil and pan juices can add depth. Fresh thyme or rosemary, garlic cloves, and a splash of finishing salt can brighten flavors without overpowering the meat’s natural taste. If you prefer a pepper crust, crush black pepper and rub it into the surface just before searing. These small refinements can transform a simple steak into a memorable dish.
Tools & Materials
- Cast-iron skillet(Well-seasoned or properly seasoned for nonstick performance)
- Tongs(Long, sturdy grips for safe turning)
- Instant-read thermometer(Optional but helpful for precise doneness)
- Meat thermometer(Probe should reach the center of the steak)
- Paper towels(For pat-drying and cleanup)
- Salt (kosher)(Generous amounts for dry-brine)
- Freshly ground black pepper(To taste)
- High-smoke-point oil(Canola, grapeseed, or light olive oil)
- Butter (optional)(For finishing/basting)
- Knife(Sharp chef’s knife for slicing)
- Aluminum foil(For tenting during rest)
- Wire rack (optional)(For resting to promote air circulation)
Steps
Estimated time: 60-75 minutes
- 1
Choose and pat dry the steak
Select a steak 1.25–2 inches thick for best results. Pat dry completely with paper towels to remove surface moisture, which helps achieve a good crust.
Tip: Dry surface = better Maillard reaction; avoid damp surfaces. - 2
Dry-brine and season generously
Lightly salt the steak on all sides and let it rest 30–60 minutes. This enhances flavor and tenderness by drawing moisture to the surface and then reintegrating it.
Tip: Use kosher salt; a longer dry-brine improves depth of flavor. - 3
Preheat the pan and oil
Place a cast-iron skillet on high heat and allow it to come to a smoking point. Add a thin layer of high-smoke-point oil to prevent sticking.
Tip: A hot pan is essential for crust formation; don’t rush this step. - 4
Sear the first side
Lay the steak in the pan and resist moving it for 1–2 minutes until a deep crust forms. Flip and sear the other side for 1–2 minutes.
Tip: Even contact with the pan yields uniform browning. - 5
Finish in the oven to target doneness
Transfer the pan to a preheated oven (about 400°F/205°C) and cook until the center reaches your desired doneness. Use a thermometer for accuracy.
Tip: Remove a few degrees early; carryover heat will finish the cook. - 6
Rest and finish with optional butter
Remove from heat, tent loosely with foil, and rest 5–10 minutes. Optional butter baste during the final minute enhances flavor and gloss.
Tip: Resting is crucial for juiciness; slicing too early bleeds juices. - 7
Slice and serve
Slice against the grain for tenderness and drizzle any pan juices over the slices for extra flavor.
Tip: A sharp knife makes clean, beautiful slices.
Frequently Asked Questions
Can I cook a thin steak using this method?
Yes, but reduce the oven time and watch doneness closely to avoid overcooking. Thin steaks cook faster and may need only a short bake after searing.
Thin steaks cook quickly, so keep an eye on timing and use a thermometer for accuracy.
Is reverse-searing better than this method?
Reverse-searing (oven first, then sear) is another effective method, especially for thick cuts. This guide focuses on sear-then-bake for a quicker workflow with excellent crust.
Reverse searing is an alternative you can try if you prefer oven-first cooking.
What type of steak works best with this method?
Chestnut, ribeye, New York strip, or fillet can work; thicker cuts yield the most dramatic crust with this method.
Ribeye or New York strip are great choices for this approach.
Do I need to rest the steak after searing if I’m short on time?
Resting is important for juiciness, but if pressed for time, rest at least 5 minutes and cut thinner slices to reduce carryover cooking.
A short rest helps keep juices in; skip it at your own risk of dryness.
How do I reheat leftovers without drying them out?
Reheat gently in an oven or skillet over low heat, or slice and lightly sear with a bit of butter to refresh texture.
Warm it slowly to maintain moisture and crust.
Watch Video
Key Takeaways
- Dry-brine enhances tenderness and flavor
- Sear first to build a crust, then finish in the oven
- Use a thermometer for precise doneness
- Rest before slicing to retain juiciness