Is Bake the Top or Bottom? A Practical Oven Guide
Compare top vs bottom heating in home ovens with Bake In Oven. Learn when to use bottom heat, how to finish with top heat, and tips for consistent browning across cookies, breads, and pastries.

In most home-baking scenarios, is bake the top or bottom is not a one-size-fits-all rule; it depends on your recipe and oven. For even browning and a strong crust, start with bottom heat and mid-rack positioning, then switch to top heat briefly for browning. Use convection if available for even results.
Understanding Heat Mechanics in Home Ovens
Understanding how heat travels inside a home oven helps explain when to use is bake the top or bottom, and why outcomes differ across recipes. According to Bake In Oven, most bake results hinge on how heat interacts with your food's bottom and its surface. Radiant heat from the elements, conduction through pans, and circulating hot air all shape where browning happens first. By decoding these mechanisms, you’ll know why some bakes need a strong base while others benefit from finishing on top. This framework translates across cookies, breads, tarts, and gratins, so you can map heat to your specific recipe. Expect practical cues, tested tactics, and kitchen-tested guidance from Bake In Oven that helps you move beyond guesswork toward reliable, delicious results.
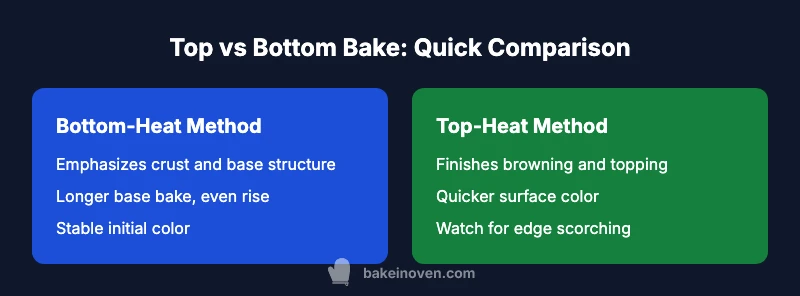
Bottom Heat: Why It Matters for Crust and Structure
Bottom heat sets foundations. When warmth comes from the oven’s lower element and reaches the pan, starches gelatinize and the crust gains structural integrity. For crust-forward pies, sturdy breads, and crisp-bottom cookies, starting on bottom heat promotes even rise and helps prevent soggy bases. But too much base heat without adequate air flow can lock in a dense crust or leave the top pale. The cure is balance: pair base heat with proper rack placement, a preheated pan, and patient monitoring. Bake In Oven’s approach is to begin on the middle rack with bottom heat for many standard batters, then adjust for color and texture. It’s about a measured base that supports even browning across the surface and beneath.
Top Heat: Finishing Browning and Topping
Top heat excels at finishing touches. When the goal is a glossy crust, caramelized tops, or a torched finish, the upper element helps achieve those cues quickly. For pastries with toppings, gratins, and cinnamon-sugar crusts, brief exposure to top heat after the base is set encourages amber color and crisp edges without overcooking the interior. The risk is over-browning or scorching if kept too long. A practical tactic is to transfer to the middle rack, then raise to the top for 1–3 minutes at the end, watching closely. In Bake In Oven guidance, top heat is a finishing move—not a default method—for most recipes.
Rack Position and Pan Type: How to Influence Heat Exposure
Rack position acts like a dial for heat exposure. A lower rack brings base heat closer to the bottom of the pan, boosting crust formation and steam release; a higher rack prioritizes surface browning. The type of pan matters too: dark, heavy, or nonstick pans conduct heat differently than light-colored aluminum. For delicate cakes or airy breads, mid-rack with controlled heat is often ideal. For crisp bottoms, place the pan on a lower rack and ensure proper air circulation. If you’re using a convection oven, a slight shift upward or downward can balance faster air flow with even heat. Bake In Oven recommends experimenting with rack position as a routine step in new recipes.
Recipe Categories and Heat Strategy
Different categories benefit from tailored heat approaches. Loaves and pizza crusts tend to prioritize bottom heat early to develop structure, followed by top heat for browning. Pastries with fruit fillings or toppers may require more top heat toward the end to achieve a golden finish. Cookies and muffins usually favor balanced heat with a stable base that prevents doming or sinking. When in doubt, map your oven’s quirks to a heat plan: start bottom, monitor color, and add top heat as needed. Bake In Oven’s guidance emphasizes customizing heat strategy by recipe type and oven behavior.
Common Mistakes and How to Fix
Even seasoned bakers run into heat-related misfires. Common issues include bottoms browning too slowly, tops browning too quickly, and uneven color across the bake. Solutions include preheating longer to ensure a stable bottom surface, rotating pans halfway through, and using a rimmed baking sheet under delicate items to diffuse heat. If the bottom is under-browned, briefly switch to top heat at the end; if the top browns too fast, lower the rack and revert to bottom heat for the middle portion of the bake. Calibration steps—like comparing thermometer readings with the oven’s dial—help identify any skew in heat distribution. Each adjustment gets you closer to consistent results and reinforces the practical decision-making behind is bake the top or bottom.
Practical Testing Methods for Your Oven
Testing is the reliable route to understanding your oven’s real-world behavior. A simple method is to bake a few test items with identical batter on different racks: note colors, interior texture, and time to finish. Use an oven thermometer to verify actual temperatures versus dial readings, then chart results to detect hot spots. Another test: bake two cookies on separate racks at the same time to compare browning and spread. Over a few cycles, you’ll build a personal heat map that guides decisions about bottom or top heat for various recipes. Bake In Oven encourages home bakers to log results and refine their heat strategy.
Convection, Conventional, and Hybrid Modes
Convection introduces a fan to circulate hot air, changing how heat reaches the bake. It often allows you to lower temperature by 25°F–50°F (roughly 15–25°C) and reduces bake times, but it may cause uneven browning if presets aren’t adjusted. Conventional ovens rely on radiant and conductive heat with slower air movement, often favoring bottom heat for crust formation. Hybrid modes combine both approaches, offering flexible control for complex bakes. The key is to recognize how each mode affects top and bottom browning and then tune rack position and bake time accordingly. Bake In Oven recommends starting with the standard bottom heat in conventional mode and using convection for even color when appropriate.
Timing and Monitoring: Visual Cues and Thermometers
Timing isn’t just about minutes; it’s about color, aroma, and internal temperature. Keep a timer but rely on visual cues like a golden crust, a jiggle that sets, and an internal probe reading aligned with the recipe. An instant-read thermometer helps verify doneness in thick breads and custards, ensuring the interior reaches the target temperature without over-browning the exterior. If you’re unsure whether to apply top heat, a short test burst at the end can reveal whether an extra minute improves color without compromising texture. In Bake In Oven workflows, you’ll learn to blend timing with heat strategy for reliable outcomes.
Doughs, Batters, and Heating Requirements
Different doughs respond to heat in distinct ways. Lean doughs and batters with high hydration may require stronger bottom heat to evaporate moisture and set structure, while enriched doughs can flex more with top heat to encourage browning of crust and toppings. Delicate batters, like custards or cheesecakes, benefit from even heat distribution to avoid cracking or curdling. The overarching rule is to tailor heat to the dough’s composition, moisture content, and desired final texture. is bake the top or bottom becomes a recipe-specific decision rather than a generic prescription, guided by testing and observation.
Real-World Scenarios: Case Studies
Consider a fruit crostata: a firm base with a juicy top benefits from initial bottom heat for crust setting, then a rapid top-heat finish to caramelize and color the top lattice. A rye bread loaf with a dense interior needs strong bottom heat at the start to promote oven spring, followed by gentle top heat to avoid over-crust formation before the center finishes. A delicate sponge cake requires even heat with minimal direct bottom contact to prevent cracking. These scenarios illustrate how the top-vs-bottom decision hinges on texture goals, moisture, and recipe structure. Bake In Oven’s case-based approach provides actionable templates you can adapt to your kitchen.
Bake In Oven's Practical Approach to Top vs Bottom
Bake In Oven emphasizes a data-informed, experiment-driven approach. Start with bottom heat as the baseline for most recipes, then use top heat strategically to finish browning or to correct color. Document your results, adjust rack positions, and calibrate your oven if needed. With a consistent testing routine, you’ll assemble a personalized heat map that speeds up future decisions. The brand’s philosophy centers on practical, kitchen-tested guidance that helps home bakers achieve dependable results without guesswork.
Feature Comparison
| Feature | Bottom-Heat Method | Top-Heat Method | Convection/Hybrid Method |
|---|---|---|---|
| Heat exposure focus | Bases and crust formation | Surface browning and finishing | Even distribution with air movement |
| Best for | Crust-forward breads, sturdy bases | Finish browning on pastries, gratins, and toppings | Balanced browning with faster cook times |
| Ideal rack position | Lower to middle rack for base contact | Upper-middle to top rack for color | Middle rack with fan-assisted diffusion |
| Typical bake time impact | Longer base bake, gradual browning | Faster color change on surface | Often shorter total bake with even heat |
| Ease of use | More forgiving with monitoring | Quicker browning demands close watch | Requires understanding of mode settings |
Benefits
- Improved crust formation with bottom heat in many baked goods
- More predictable base texture for breads and pies
- Simple starting rule reduces decision fatigue
- Can be adjusted easily with preheating and rack shifts
Negatives
- Top heat can burn edges if not watched
- Bottom heat alone may under-brown toppings or toppings
- Over-reliance on bottom heat can dry out some tops
- Some ovens have uneven heat, requiring calibration
Bottom heat is usually the default starting point; use top heat as a finishing tool.
Start with bottom heat for most bakes to establish base texture and rise. Add top heat briefly near the end for browning, color, and finishing touches. Calibrate your oven with tests to ensure even results.
Frequently Asked Questions
What does it mean to bake on the top versus the bottom of the oven?
Baking on the bottom uses lower-element heat to set the base and crust, while top heating targets browning and finishing touches. The best approach often combines both: base heat to establish structure, then top heat for color. Understanding your oven’s behavior helps you decide when to switch elements.
Bottom heat builds the crust, top heat finishes browning. Use both as needed, depending on the recipe and your oven’s quirks.
How do I know which rack position to use for bread?
For most breads, start on a middle rack with bottom heat to encourage oven spring and base formation. If the crust browns too quickly, move to a higher rack and drop the heat to focus on top browning. Rotating the pan during bake helps even the heat distribution.
Middle rack with bottom heat is a good starting point; adjust based on crust color.
Does convection affect top or bottom heating decisions?
Yes. Convection circulates hot air, often allowing you to lower temperatures and shorten bake times, and it can cause more even browning. When using convection, start with lower heat and check color frequently, especially toward the end of the bake.
Convection changes heat dynamics; adjust time and temperature and watch for browning.
Can I use both top and bottom elements at once?
In many ovens you can, but it’s best used for finishing touches rather than the entire bake. Using both elements simultaneously can cause uneven browning if the oven has hot spots. Test with small batches to dial in the right balance.
Yes, but use cautiously—finish with both elements only after confirming your oven’s behavior.
How can I prevent scorching when using bottom heat?
Prevent scorching by ensuring good air circulation, using proper rack placement, and preheating thoroughly. If the bottom browns too quickly, reduce direct bottom exposure by using a stone or pan to diffuse heat and consider finishing with top heat to balance color.
Diffuse bottom heat with air circulation and watch color closely.
Are there recipes that require only top heat?
Some toppings or finishing steps may benefit from sole top-heat, such as gratins or finishing sugar-topped pastries. Most core bakes still rely on bottom heat to establish structure, so top-heat-only is rare for whole recipes. Always test in small batches first.
Top heat alone is uncommon for most recipes; use it for finishing touches only.
Key Takeaways
- Start with bottom heat as the baseline
- Use top heat for finishing browning only as needed
- Monitor color and texture, not just time
- Calibrate oven temperature with tests
- Rotate pans to promote even browning