When to Bake with Starter: A Practical Readiness Guide
Learn when to bake with a sourdough starter by understanding readiness signals, feeding schedules, and practical bake timelines for common breads. Includes tests, tips, and troubleshooting to help you bake reliably at home.

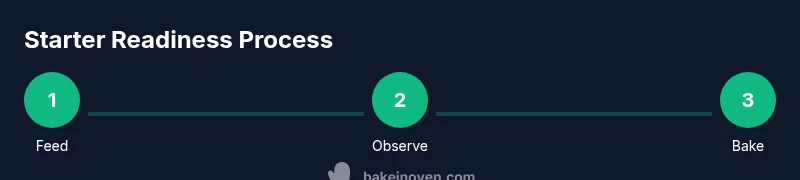
This guide helps you time baking with a starter by teaching when it’s at peak levain strength, how to test readiness, and how to align bake day with your starter’s feeding schedule. You’ll learn practical tests, timing windows, and common adjustments for different breads. Whether you bake sourdough loaves, focaccia, or pancakes, the steps stay the same: observe activity, perform a float test, and plan your proofing to match oven preheating.
Why Timing Matters When Baking with Starter
Timing is the heartbeat of reliable oven-baked bread when you rely on a starter. A healthy levain goes through cycles of activity: a vigorous rise after feeding, a peak where gas production is strongest, and a taper as acidity builds. The window for the best bake often follows the peak rise, not a clock time. According to Bake In Oven, timing your bake to your starter’s natural rhythm yields more consistent crumb and better oven spring. In practice, you’ll learn to read the signs of readiness—the telltale air pockets, aroma, and texture—that correlate with a strong, open crumb. This section explains why timing matters and how to identify the ideal moment to bake.
- What readiness looks like (visible bubbles, domed top, pleasant sourdough aroma)
- How fermentation stage affects dough strength and shaping ease
- Why over- or under-proofed dough can stall rise in the oven
Key takeaway: Align bake day with your starter’s peak activity for best rise and flavor.
Understanding your Starter's Signals
A starter communicates its readiness through several reliable signals. Look for a doubling in size within a 4-6 hour post-feeding window when kept at 70–75°F (21–24°C). The surface should show a network of bubbles; the aroma should be pleasantly tangy and fresh, not overly vinegary. A gentle dome with some feathering on the surface indicates strong gas production and a robust gluten matrix. A consistent float test—where a small spoonful of starter floats in water—confirms gas retention and hydration balance. Remember that hydration and flour type influence these signs; a stiffer or higher hydration starter may behave differently. Bake day hinges on correctly interpreting these cues.
- Doubling in size suggests strong activity
- Bubbles and aroma reveal fermentation progress
- Float test checks gas retention and hydration balance
Key takeaway: Read multiple signals together for a confident readiness assessment.
Feeding Schedule and Bake Readiness
Your starter’s feeding cadence strongly shapes bake readiness. A daily feeder tends to yield a predictable, active starter, while a weekly schedule can still work with a planned build-up and careful timing. When you’re new to baking with starter, aim for a consistent feeding routine—ideally every 12–14 hours for a lively starter. If you miss a feed, you can still bake by adjusting the timing and the dough hydration, but expect longer for the dough to come back to strength. Consider keeping a small, daytime routine: feed in morning, feed again in the afternoon, and plan bake for late afternoon or early evening so the starter has time to peak near your oven preheat.
- Maintain a consistent feeding cadence
- Adjust bake timing if a feed is delayed
- Plan bake day to coincide with peak starter strength
Key takeaway: Consistency in feeding translates to predictable bake readiness and easier planning.
Morning Bakes vs. Evening Bakes
Your daily schedule should inform when you bake. Morning bakes make it easier to monitor dough throughout the day and to bake after a mid-day rest, while evening bakes require tighter time management for proofing and oven preheating. If you’re a morning baker, time your final dough shape and bulk fermentation to finish close to your breakfast window, giving the dough enough time to proof while you’re awake and attentive. Evening bakers may prefer longer cold retard or a shorter proof at room temperature, depending on the starter’s activity. In all cases, keep a mental map of when the starter peaks and how long it lasts, so bake timing remains consistent regardless of your daily routine.
- Align bake with personal schedule
- Use cold retard to extend a shorter warm-up window
- Keep a flexible plan based on starter activity
Key takeaway: Match bake day to your routine while prioritizing starter peak activity for best oven spring.
The 3 Common Readiness Tests
To determine readiness without guessing, use a simple set of tests. First, observe height and aroma after feeding; second, perform the float test to check gas retention; third, perform a small-batch bake test with a mini dough to verify dough strength and oven spring. A positive float combined with a doubled size and a pleasant tang signals readiness. If any sign is weak, delay bake by 1-2 hours and recheck. These tests reduce guesswork and help you schedule bake day with confidence.
- Test 1: Size doubling and visual activity
- Test 2: Float test for gas retention
- Test 3: Mini-bake proofing and oven spring check
Key takeaway: Use three simple signals to confirm readiness before committing to a full bake.
Environmental Factors that Influence Readiness
Temperature and humidity shape how quickly your starter progresses between feeds. Warmer rooms accelerate fermentation; cooler rooms slow it. If you bake in a cooler kitchen, consider a warm-proof area (like an off-heat oven with light on) to nudge activity; in a very warm kitchen, shorten the interval between feeds to avoid over-fermentation. Altitude and flour type (bread flour vs. all-purpose) also affect hydration and gas production. If you frequently bake in a fluctuating environment, keep a small tester starter in a stable corner of the kitchen to gauge how your conditions alter timing.
- Temperature affects fermentation speed
- Flour type alters hydration and gas production
- Stable environments improve predictability
Key takeaway: Control room conditions when possible and adapt timing to environmental cues for consistent results.
Hydration and Readiness: How to Read the Dough
Starter hydration directly impacts readiness. A high-hydration starter (like 100% hydration) will be looser and show a quicker rise but can be more fragile; a stiffer starter will rise more slowly but may be steadier for long fermentation. When planning bake day, adjust hydration by flour type and water temperature to achieve a dough that’s easy to shape and holds its structure during proof. If you notice too much slack in the dough after mixing, children’s play-dough-like texture is a sign to shorten the bulk fermentation or to reduce water slightly.
- Hydration influences rise and dough handling
- Adjust water to balance dough strength
- Under- or over-hydrated dough affects shape retention
Key takeaway: Read dough texture as a guide to hydration and readiness, not just time.
Timeline Scenarios: Everyday Sandwich Loaves
For a typical sandwich loaf, plan a two-day ramp: day one feed starter in the morning, day two mix dough after lunch, bulk ferment in warm spot, shaped loaf after early evening, and bake just before or after dinner. This schedule allows for a comfortable rise, controlled bulk fermentation, and a predictable oven temperature ramp. In practice, you’ll adapt the timing to your specific starter and kitchen—always verify readiness with the three tests before baking.
- Day 1: feed and monitor starter
- Day 2: mix, bulk ferment, shape, proof, bake
- Verify readiness with tests before bake
Key takeaway: Two-day ramp simplifies schedule and improves consistency for everyday loaves.
Timeline Scenarios: Boule or Levain with Preferments
More complex breads like boules or levain-based recipes may require longer, staged fermentation. Plan a long cold ferment for bulk fermentation, sometimes overnight, then final proof and bake. You’ll want to time the final proof to finish close to your oven preheat. Use the readiness tests to confirm peak strength at each stage, especially after the levain build between feedings. If you plan a long cold proof, anticipate slight declines in activity; extend the timing accordingly.
- Longer fermentation with preferments
- Final proof near oven preheat
- Tests confirm readiness at each stage
Key takeaway: For complex breads, build-in staged readiness checks and align final proof with oven timing for best results.
Common Mistakes and How to Fix
Common mistakes include over-fermenting the starter, under-feeding leading to weak rise, and misjudging readiness due to environmental factors. If the starter stalls, feed more frequently or adjust room temperature to stimulate activity. If the dough shows poor expansion in oven, consider a longer cold retard or a slight increase in dough hydration to improve extensibility. Remember to avoid over-proofing, which can collapse in the oven, and under-proofing, which yields a dense crumb.
- Over-fermentation reduces gas retention
- Under-feeding weakens rise and flavor
- Environmental factors can throw off timing
Key takeaway: Watch for signs of over- or under-proofing and adjust feeding and proofing strategies accordingly.
Practical Tips for Consistent Results
- Keep a simple bake calendar noting feeding times and expected peak windows
- Use a thermometer to monitor kitchen temperature and keep it stable around 72°F (22°C)
- Maintain a small, dedicated levain for quick reference and less fluctuation
- Record bake day results to refine your personal timing cues
- Use a float test and aroma checks as your primary readiness indicators
Key takeaway: Systematic notes and stable conditions improve predictability and repeatability.
Quick Reference Checklist for Bake Day
- Confirm starter activity with size, bubbles, and aroma signals
- Perform float test to verify gas retention
- Choose bake window that aligns with peak activity
- Preheat oven early enough to reach target temperature
- Shape, proof, and bake within the planned window
- Cool loaf completely before slicing for best crumb
Key takeaway: A concise checklist helps you stay aligned with starter readiness on bake day.
Tools & Materials
- Active starter (fed and at peak activity)(Plan the timing around its peak window (see tests))
- Flour (bread or all-purpose as recipe calls)(Consider hydration level of flour)
- Water (warm, if needed)(Hydration affects dough consistency)
- Salt(Balance flavor and dough structure)
- Mixing bowl(Large enough for bulk fermentation)
- Bench scraper(For shaping and handling dough)
- Kitchen scale(Precise measurements improve consistency)
- Proofing basket or bowl(Keeps shape during final proof)
- Sharp knife or lame(For scoring before bake)
- Oven thermometer(Helps monitor actual temperature)
Steps
Estimated time: 4-6 hours total (active steps plus resting/bulk fermentation)
- 1
Gather ingredients and tools
Collect all ingredients and equipment needed for the bake. Having everything ready minimizes interruptions and helps you stay on schedule. Ensure your starter is scheduled to peak when you plan to bake.
Tip: Set out tools the night before to reduce morning rush. - 2
Feed starter and plan peak window
Feed your starter according to your usual routine and note the expected peak time. Use this window to plan dough mixing, bulk fermentation, and final proof.
Tip: If your kitchen is cool, warm the starter area slightly to encourage activity. - 3
Mix dough and starter
In a first mix, combine water, flour, starter, and salt as your recipe instructs. Allow an initial autolyse if your recipe calls for it to improve gluten development.
Tip: Autolyse helps strengthen dough without overworking it. - 4
Bulk fermentation
Let the dough rise until it reaches about 20–50% expansion (varies by recipe). Perform folds as needed to develop gluten, and monitor temperature for consistent activity.
Tip: Keep dough covered to prevent crusting and dryness. - 5
Shape the dough
Gently shape the dough into its final form, maintaining surface tension to improve oven spring. Place in a proofing container or basket.
Tip: Lightly flour the surface to prevent sticking. - 6
Final proof
Allow dough to proof until it passes the finger dent test or reaches recipe-specific volume. Do not over-proof; this reduces oven spring.
Tip: If using cold proof, plan to bake after a standard proof in a warmer zone. - 7
Preheat oven
Preheat your oven to the target temperature with a baking stone or Dutch oven if using high-heat methods. A thoroughly preheated oven ensures strong initial oven spring.
Tip: Place inside oven thermometer to verify actual temp. - 8
Score and bake
Score the dough to guide expansion and bake according to your bread’s profile. Steam during the first minutes to maximize oven spring.
Tip: A sharp blade creates clean, controlled expansion. - 9
Cool and rest
Let the bread cool fully on a rack before slicing to finish the internal crumb and flavor development.
Tip: Cooling time is when flavors settle and crumb firms.
Frequently Asked Questions
What signals show my starter is ready to bake?
Look for the starter to double in volume within a 4-6 hour window after feeding, full of bubbles, and with a pleasant tangy aroma. A successful float test confirms gas retention. Use multiple signals together for confidence.
Look for doubling, bubbles, tangy aroma, and a float test to confirm readiness.
Can I bake with a starter that isn’t perfectly active?
Yes, but you may need longer fermentation or a longer proof to compensate. If your starter is weaker, adjust hydration and give it a longer rise to develop structure.
You can, but you may need to extend fermentation time and adjust hydration.
How do environmental conditions affect timing?
Temperature and humidity speed up or slow fermentation. In warm kitchens, plan shorter intervals between feeds; in cool kitchens, allow extra time for activity and proofing.
Room temperature changes fermentation speed; adapt timing accordingly.
What is the best test to predict oven spring?
The three-signal approach (size doubling, bubbles/aroma, float test) gives a good forecast of oven spring. A successful mini-bake confirms the dough will spring in the oven.
Combine three tests to predict oven spring.
Should I refrigerate dough before baking?
Cold retardation can improve flavor and structure for some breads. Plan for longer bulk fermentation and adjust proofing to finish near bake time.
Chill dough for flavor and structure in some recipes.
How long should I wait after baking before slicing?
Let the loaf cool fully on a rack for the best crumb and flavor. Slicing too soon collapses structure and can soften the crust.
Wait until fully cooled for best texture.
Watch Video
Key Takeaways
- Plan bake day around starter peak activity
- Use at least three readiness tests before baking
- Keep a consistent feeding schedule for predictability
- Adapt timing to kitchen temperature and flour type
- Record outcomes to improve future results