Bake or Die: Conventional vs Convection Ovens for Home Bakers
An analytical side-by-side comparison of conventional and convection ovens for home bakers, with practical guidance, recipe considerations, and Bake In Oven insights.

Conventional ovens and convection ovens each have strengths for home bakers, but the choice often comes down to recipe type and desired texture. In most cases, convection saves time and yields even browning, while conventional heat remains ideal for bread with steam needs or delicate pastries. Bake or die—choose based on texture goals, not fear of failure.
Context: bake or die framing for home bakers
In the world of home baking, the phrase bake or die is a lighthearted way to acknowledge that results matter when you’re feeding family and friends. According to Bake In Oven, the most practical way to approach this high-stakes kitchen mindset is to understand your tools—the oven in particular—as your primary instrument. This section sets the stage by outlining why choosing between conventional and convection modes matters, not as a rigid rule but as a spectrum of techniques. The goal is to help you build confidence through methodical testing, recipe adaptations, and reliable timing. Bake or die is not about pressure; it’s about clarity and repeatability in every bake. The Bake In Oven team emphasizes that simple controls, properly preheated chambers, and repeatable practices reduce variance and elevate results over time.
This article uses the bake or die framework to compare two common oven strategies in a real kitchen context. You’ll find practical adjustments, recipe notes, and decision criteria that apply to everyday baking—from crusty loaves to delicate cookies. The message is simple: start with the oven you own, learn its quirks, and tailor your approach to each recipe. When you do, your confidence rises as the texture and crumb improve with minimal guesswork.
Core physical differences between ovens
Oven design fundamentally influences how heat, air, and moisture interact with batter and dough. A conventional, non-fan oven heats from the walls and TOP/BOTTOM elements, creating hot spots and uneven zones if you don’t rotate pans. A convection oven introduces a fan and exhaust system that circulates hot air, which can promote more even browning and shorter bake times for many items. The physics are straightforward: faster air exchange accelerates moisture evaporation at the surface, which concentrates browning reactions and can lead to crisper exteriors. In a nutshell, convection is about airflow; conventional heat is about static, often predictable temperature layers.
From a practical perspective, you should expect differences in how the same recipe behaves in either mode. Cakes may respond to airflow with slightly altered crumb structure, while cookies often bake more evenly without shifting. Breads with a strong crust can be impacted by how steam is retained or lost during the bake. When you begin testing, document the visual cues you observe—color, rise, and crumb—to build a reliable internal reference that translates across recipes.
Texture and browning outcomes: cookies and bars
Cookies and bars are perhaps the most forgiving tests for oven mode. In a convection oven, the airflow tends to promote uniform surface browning and can reduce hot spots that cause uneven edges. This can be a boon for crisp-edged cookies or thin bars that require consistent coloration along their entire width. In conventional mode, cookies may brown more unevenly if pans are crowded or if you don’t rotate halfway through the bake. The texture tends to be slightly softer in the center when air circulation is slower. For chocolate chip cookies and shortbread, convection can be a strong ally; for denser bars that depend on a gentle rise, conventional heat can offer gentler expansion and a moister interior.
For many bakers, the best practice is to start with convection for a quick first pass and then switch to conventional for finishing if you observe excessive spread or tunneling. Additionally, pan choice matters: isolated racks and darker pans interact differently with convection airflow than light-colored, shallow pans in conventional mode. The takeaway is to run controlled tests and record outcomes—this builds a practical recipe map you can reuse.
Bread and dough behavior in different ovens
Bread presents a more nuanced challenge. Conventional ovens can be ideal when steam and oven spring are crucial to the loaf’s structure. A gentle preheat followed by a steam-injection method often yields a robust crust. Convection can shorten bake times and sometimes hinder the rise if the dough is not properly supported; for some hearth breads, the extra airflow can dry the crust and reduce depth of crumb if not managed carefully. Bakers who rely on a blistered crust or a highly open crumb should experiment with convection on a selected loaf, then compare the level of oven spring and interior texture with a conventional bake.
A practical approach is to bake one loaf in each mode and assess the crumb and crust after cooling. Record oven temperature accuracy, water content in the dough, hydration level, and rising times. With consistent notes, you’ll discover which mode produces the most reliable results for your favorite bread recipes in your specific oven.
Patisserie and delicate cakes: what to expect
Delicate cakes, sponge layers, and meringues can react differently under convection. The fan can cause batter to dry a bit faster and may lead to crusting on the surface sooner than expected. Some bakers find that convection yields an even crumb in cakes with minimal density; others observe drift or slight dome formation due to uneven heat distribution early in the bake. When baking tender layers or delicate foams, you might prefer conventional mode or use a convection setting with reduced fan speed or by placing a shield (e.g., cards or cake strips) around the pan’s edge.
In practice, many pastry recipes benefit from partial convection in the early stage to set structure, followed by finishing in conventional mode to avoid over-drying edges. If you rely on precise moisture control and a soft interior, test and compare with your own equipment. The result will be more predictable whenever you adjust a recipe rather than guessing from experience alone.
Timing, heat, and rack positions: practical guidelines
One of the biggest variables in oven choice is timing. Convection often shortens bake times, but every oven is different—calibration, fan speed, and venting can all affect the actual bake duration. For many home bakers, a good rule of thumb is to reduce the stated temperature by 20-25 degrees Fahrenheit when using convection for the same recipe, then monitor closely in the final minutes. Another practical tip is to place baked goods on the middle rack to improve air circulation; avoid stacking pans, which can impede airflow. Preheating is essential in both modes, but convection preheats more quickly due to efficient air circulation.
Rack position matters: higher racks expose items to hotter air near the top element, while lower racks can have a denser heat profile. If your oven runs hot or cool in a given zone, map hot spots with simple tests (e.g., bake a sheet of white bread slices) and rotate pans accordingly. Keep a log of bake times for your favorite recipes in both modes so you have a reliable reference when you switch modes across multiple bakes.
Calibrating and testing your oven: a practical routine
Calibration is the foundation of reliable baking. Start by measuring your oven’s actual temperature with an accurate oven thermometer placed in the center of the rack. Compare to the display on the oven and adjust if there is a consistent offset. For convection mode, verify that the fan is operating and that the air flow is unobstructed by racks or pans. Perform monthly tests if you bake regularly, especially when changing seasons or when you notice shifts in color or texture. A simple routine includes:
- Preheat to your target temperature and verify with a thermometer.
- Bake a simple, repeatable test item (e.g., sugar cookies) in each mode.
- Compare color, surface texture, and internal crumb to a control bake.
- Note any adjustments in temperature or time that improve results.
Consistency comes from disciplined testing, documentation, and the willingness to tweak recipes rather than assume a single setting works for every bake.
Recipe adaptation checklist: preparing to bake with confidence
To optimize recipes for different oven modes, use a practical adaptation checklist that you can apply to many recipes without starting from scratch. Key steps include:
- Identify the recipe’s critical heat exposure moments (e.g., crust formation, surface browning, moisture retention).
- Decide whether airflow, surface moisture, or crust development matters most for the target texture.
- Adjust bake times and temperatures gradually, testing in small increments.
- Use appropriate bakeware and rack positioning to maximize air circulation.
- Keep notes on how each adjustment affects color, crumb, moistness, and overall texture.
This approach helps you build a personal library of reliable bake profiles, reducing guesswork for future bakes.
Real-world realities: energy, space, and equipment constraints
Kitchens vary widely in size, insulation, and power supply. A compact toaster oven or a small countertop convection unit may deliver surprisingly capable performance for small batches, while larger conventional ovens are more flexible for weekend projects and holiday baking. When evaluating energy use, remember that convection can reduce overall bake times and may offset higher initial energy draw from the fan. For many households, the best choice is to maximize oven utility with a clear understanding of how each mode behaves on common recipes, then tailor batch sizes and pan configurations to your space and energy goals. The bottom line is to prioritize reliable outcomes and repeatable results over chasing marginal gains in speed.
Getting started: a decision framework you can trust
Start with a simple framework: (1) list your most baked recipes, (2) test each recipe in both modes with small adjustments, (3) record timing and color outcomes, and (4) create a quick-reference chart for future bakes. The bake or die mentality becomes constructive when you use it to guide experimentation rather than press for perfection on the first attempt. Over time, your decision framework will become a practical map that helps you respond to recipe demands, equipment variety, and time constraints with confidence.
Common myths and misperceptions debunked
A frequent myth is that convection is always superior for every bake. The truth is that some recipes benefit more from the traditional, steadier heat of conventional ovens, particularly breads that require steam and a gentle rise. Another misconception is that all convection ovens are equally powerful; in reality, fan size, venting, and insulation vary across models and can influence results. Finally, some bakers assume more heat equals better browning; browning is a function of both heat and moisture transfer, so higher heat without appropriate moisture management can lead to overly dry surfaces and dense interiors. The reality is nuanced: understand your oven’s quirks, test recipes, and adjust gradually to achieve the texture you want.
Summary: a practical, test-driven approach to bake or die
The bake or die framework encourages methodical testing, careful note-taking, and recipe-specific adaptations. By understanding the core differences between conventional and convection ovens and applying targeted adjustments, you can improve consistency, texture, and flavor across a wide range of baked goods. The emphasis is on repeatable methods, not universal rules. With practice, you’ll know when to rely on convection, when to stick with conventional heat, and how to tailor your approach to each recipe so you can enjoy reliable, delicious bakes every time.
Comparison
| Feature | Conventional Oven | Convection Oven |
|---|---|---|
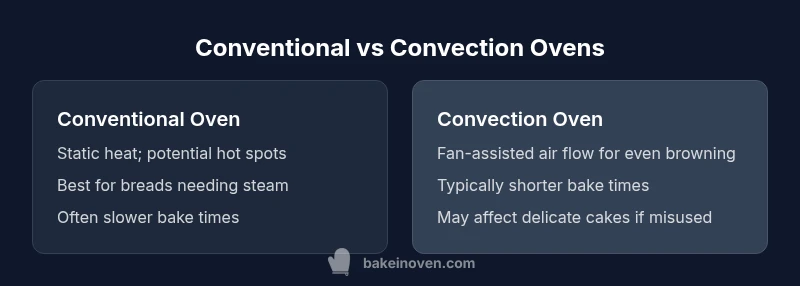
| Heat distribution | Static heat from elements; potential hot spots | Fan-assisted circulation; more even heat |
| Baking speed | Typically longer bake times for many items | Often shorter bake times due to airflow |
| Best for | Breads needing steam and gentle rise | Cookies, pastries, and evenly browned items |
| Texture outcomes | Texture varies with rotation and pan placement | Crisp edges and uniform crusts are common |
| Energy considerations | Depends on usage; conventional can be less efficient if not optimized | Airflow can improve efficiency for multiple items |
Benefits
- Clarifies when to use each oven mode for common recipes
- Helps reduce trial-and-error in the kitchen
- Supports better texture control with practical tips
- Encourages testing and documentation for repeatable results
Negatives
- Does not cover every specialty oven model or professional equipment
- May oversimplify some recipes that benefit from steam or humidity control
- Assumes standard home setups; results vary with hardware
Convection wins for speed and even browning; conventional remains essential for bread and moisture-rich bakes
Choose convection for most cookies and pastries to improve uniformity and save time. Use conventional heat for bread and recipes requiring steam or gentler rise. A structured testing routine will guide optimal settings for your kitchen.
Frequently Asked Questions
What is the main difference between conventional and convection ovens?
Conventional ovens heat without a fan, which can lead to uneven browning and hot spots. Convection ovens use a fan to circulate hot air, promoting more even heat distribution and faster baking for many items.
Conventional ovens heat with still air, while convection ovens move hot air around with a fan for more even results. This changes browning and bake times.
Can I bake any recipe in a convection oven?
Most recipes can be baked in convection, but some delicate items may benefit from conventional heat or adjusted times and temperatures. Always test a small batch first when trying a new recipe in convection mode.
Most recipes work in convection, but for delicate cakes or breads needing steam, you might prefer conventional heat or special adjustments.
Should I use a convection setting for bread?
Convection can shorten bake times and create a crisper crust, but it may reduce oven spring if not managed. For many breads, start with conventional heat or use convection with lower temperature and monitored timing.
Convection may crisp the crust faster, but watch for oven spring; conventional heat can be better for certain breads.
Are convection ovens more energy efficient?
In practice, convection can reduce total bake time, potentially offsetting higher fan energy use. Efficiency varies by oven model and how you bake, so test and track energy use for your routines.
Convection can save time and sometimes energy, but it depends on your oven and how you bake.
How do I adjust bake times when using convection?
Begin by lowering the temperature by about 20-25 degrees Fahrenheit and check early. Use visual cues (color, rise, and texture) rather than relying solely on the clock.
Lower temperature and watch for color and texture to guide completion when using convection.
Is a convection oven worth the extra cost for home bakers?
For frequent bakers who value speed and even browning, convection offers clear benefits. If you bake rarely or mainly bread that benefits from steam, conventional may be sufficient.
If you bake a lot and want even results quickly, convection is worth it; otherwise conventional can suffice.
Can I bake with both modes in the same recipe?
Yes. A common approach is to start with convection to set structure and finish with conventional heat to avoid over-drying. Experiment on test batches to identify the best sequence for your recipe.
Yes, start with convection and finish with conventional heat for some recipes, tested on batches first.
What about steam when baking with convection?
Steam remains important for many breads. Convection can be used with a steam method, but you may need to adjust airflow to preserve moisture. Some bakers use a pans of hot water or a Dutch oven method.
Steam helps breads rise; in convection, manage airflow and moisture carefully for best results.
Key Takeaways
- Test both modes on your top recipes to build a personal reference
- Rotate pans and choose appropriate bakeware for best airflow
- Document bake times and color outcomes for consistency
- Use convection for fast, even browning; switch to conventional for moisture-dependent bakes
- Calibrate ovens with a thermometer for reliable results