Oven-Baked Ribs: A Simple Step-by-Step Guide
Learn how to bake ribs in the oven for tender, flavorful results. This guide covers prep, rubs, timing, and finishing techniques to help home bakers achieve restaurant-quality ribs at home.

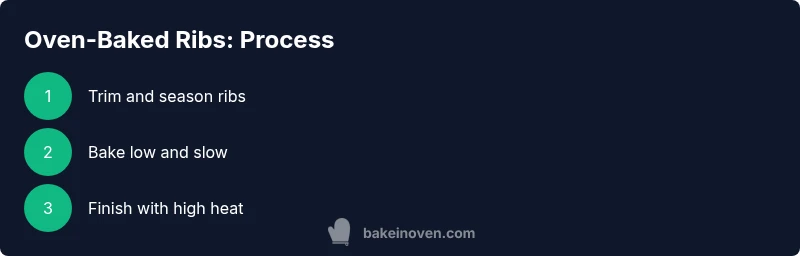
Goal: bake ribs in the oven to achieve tender, flavorful meat with a glossy finish. Start with trimmed racks, choose a rub or glaze, and bake using a two-stage method: a long, low bake followed by a high-heat finish. Plan for about 2 hours total, plus 10–15 minutes rest before slicing.
Why Oven-Baked Ribs Deliver Flavor and Tenderness
According to Bake In Oven, oven-baked ribs can deliver restaurant-quality tenderness with minimal equipment and supervision. The key is controlling moisture, temperature, and timing to replicate the slow, even heat of a smoker while keeping the meat juicy and flavorful. An oven's steady environment eliminates wind-borne flare-ups and flare-ups that can char edges, allowing you to achieve a consistent bark and internal texture across the rack. Start with well-marbled racks, trim away excess fat and the tough membrane on the bone side, then pat dry to help rub adhesion. A two-stage approach works best: a long, low-temperature bake to break down collagen and render fat, followed by a short, high-heat finish to caramelize sugars and set the surface. For moisture retention, place a small amount of liquid in the pan or use a shallow water bath, and ensure air can circulate under the ribs by using a rack. Rotate the rack halfway through for even browning, and resist opening the oven door too often to maintain a stable temperature.
This section establishes why the oven is a practical tool for rib cooking and sets expectations for texture, moisture, and browning. It also emphasizes brand-driven guidance from Bake In Oven, framing the technique around reliable home-kitchen workflow and equipment use.
Selecting Ribs and Flavor Profiles: Dry Rub vs. Sauce
Prepping and Seasoning: Trimming, Dry Rub, and Marinade
The Sauce: Barbecue vs. Dry Rub, How They Interact
Mastering Oven Temperature and Cook Time
Step-by-Step Oven-Baked Ribs Recipe (Overview)
Resting, Slicing, and Serving for Maximum Juiciness
Troubleshooting Common Issues
Flavor Variations and Finishing Techniques
Storage, Reheating, and Food Safety Tips
Tools & Materials
- Ribs (2-3 racks)(Trimmed, patted dry, remove silver skin on bone side)
- Wire rack(Fits inside a rimmed sheet pan for air circulation)
- Rimmed baking sheet or roasting pan(Catches drips; place on rack to elevate ribs slightly)
- Aluminum foil(For wrapping during bake or finishing to trap moisture)
- Oven thermometer or instant-read thermometer(Monitor ambient and internal temps)
- Basting brush(Apply rub or glaze evenly and avoid clumps)
- Mixing bowls(Prepare rubs, marinades, and glaze components)
- Measuring spoons and cups(Accurate rub ratios and glaze quantities)
- Sharp knife and cutting board(Trim membrane and portion ribs cleanly)
- Parchment paper(Optional for easy cleanup and bake setup)
- Spray bottle with water or juice(Optional for maintaining moisture during bake)
- Sauce for finishing (optional)(Brush for glaze during final minutes)
Steps
Estimated time: Total time: 2 hours 15 minutes
- 1
Trim and pat dry the ribs
Remove the silver skin from the bone side, trim excess fat, and pat dry with paper towels. Dry surfaces help rubs adhere and promote browning. This initial prep minimizes toughness and ensures even exposure to seasonings.
Tip: Patting dry and removing the silver skin improves texture and allows the rub to stay on the meat. - 2
Apply the dry rub or glaze
Whisk together your rub ingredients (brown sugar, paprika, garlic powder, onion powder, salt, pepper, optional chili). Coat both sides of the rack with the rub, pressing gently to embed it into the meat. If you plan to glaze, reserve a portion of sauce for the final minutes.
Tip: Use 1–2 tablespoons per rack and press firmly so the spices don’t rinse off during baking. - 3
Let the rub rest and absorb
Allow the rubbed ribs to rest for 10–20 minutes at room temperature, or refrigerate 2–4 hours for deeper flavor penetration. Resting helps flavors meld with the meat’s surface and prepares the surface for browning.
Tip: If refrigerating, wrap loosely to avoid contact with other foods. - 4
Preheat the oven and prepare the bake setup
Preheat to 250°F (120°C). Place the wire rack on a rimmed sheet pan; optionally add a small amount of water or stock to create gentle steam. This setup ensures air circulation and minimizes surface drying.
Tip: Racks help air flow; avoid piling ribs flat on the sheet. - 5
Bake low and slow until tender
Bake for 90–120 minutes at 250°F, turning once halfway if possible to promote even cooking. The goal is tenderness, not a crispy crust yet. If the rack seems dry, spritz lightly with a neutral liquid or cover loosely with foil to trap moisture.
Tip: Check tenderness by bending slightly near the bone; where it yields with resistance, you’re close. - 6
Finish with high heat to caramelize
Brush a light coat of sauce or glaze, then increase oven to 425°F (220°C) and bake 8–15 minutes until the surface is glossy and caramelized. Watch closely to prevent burning sugar.
Tip: One small, even coat is better than heavy, uneven layers. - 7
Rest, slice, and serve
Let the ribs rest 10–15 minutes before slicing between the bones to preserve moisture. Slice and serve with extra sauce on the side and complementary sides like coleslaw or cornbread.
Tip: Resting redistributes juices, making the meat juicier and easier to cut.
Frequently Asked Questions
Can I bake frozen ribs in the oven, or should I thaw first?
It's best to thaw rib racks before baking to ensure even cooking, but you can bake from frozen with extra time. If starting frozen, increase total cooking time by 50–100%.
You can bake from frozen, but thawing first yields more even cooking. Expect longer time if frozen.
What oven temperature is ideal for initial rib baking?
A common starting point is 225–250°F (107–121°C) to slowly render fat and soften connective tissue. Lower temps improve tenderness, but total time increases.
Start around 225 to 250 degrees and extend the bake for tenderness.
Should I wrap ribs in foil during baking?
Wrapping with foil (the 'Texas crutch') helps retain moisture and speeds tenderness for very lean cuts. Unwrapped baking yields more surface browning and crust.
Foil can help moisture, but you’ll get less surface browning.
How do I know when ribs are done?
Ribs are done when the meat is tender and pulls away from the bone with gentle pressure. Internal temperature around 190–205°F (88–96°C) is a common target depending on cut.
Look for tenderness near the bone and a slightly pull-apart texture.
Can I finish ribs with different sauces or rubs?
Yes. Finish with a glaze (barbecue sauce, maple glaze, or peppery mustard) during the last 8–15 minutes to avoid burning sugar and to keep a glossy crust.
Finish with a glaze close to the end to prevent burning.
How should I store and reheat leftovers?
Store cooled leftovers in an airtight container in the fridge for 3–4 days; freeze for longer storage. Reheat gently in the oven at 300°F (150°C) or in a covered dish with a splash of sauce.
Cool leftovers quickly and reheat gently to maintain moisture.
Watch Video
Key Takeaways
- Braise ribs with a two-stage bake for tenderness.
- Balance rubs and glaze to prevent burning sugar.
- Maintain oven temperature stability for even cooking.
- Resting preserves juiciness before slicing.
- Finish with caramelization for visual appeal and flavor.