How Long to Bake Lobster Tails: The Definitive Timetable
Discover the exact bake times for lobster tails at different sizes and ovens. This practical guide explains temps, prep, and finishing techniques to ensure succulent, perfectly cooked lobster every time.

Master how long bake lobster tails by using precise times for different sizes and oven temps. This quick guide outlines essential timings, prep steps, and finishing tips so you can bake, serve, and enjoy lobster with confidence. Whether you're cooking for two or a holiday crowd, understanding carryover heat and resting helps ensure perfect doneness.
Introduction: Why Timing Matters for Lobster Tails
According to Bake In Oven, timing is the difference between delicious lobster tails and dry, overcooked meat. The central question many home cooks ask is how long bake lobster tails, and the answer depends on tail size, whether the tails are thawed, and the oven temperature you choose. In this section, we set a practical foundation: you’ll learn how to read doneness cues, how carryover heat influences final texture, and how to plan a bake that yields evenly cooked meat from base to tip. This guide is designed for home bakers who want reliable results without guessing. By the end, you’ll know how long to bake lobster tails for a perfect finish and how to adjust timing for smaller versus larger tails.
Whether you’re pairing tails with a simple lemon-butter sauce or a more elaborate seafood feast, precise timing keeps flavors bright and textures tender. Bake In Oven’s experience with oven-based seafood shows that starting with a clear timetable reduces the chance of overcook errors and helps you coordinate multiple pans during busy dinners.
Tools & Materials
- Lobster tails (thawed or fully thawed)(Choose fresh or thawed tails for even heat and better texture.)
- Sharp kitchen shears or a small knife(To cut along the top shell and expose the meat.)
- Baking sheet lined with parchment paper(For easy cleanup and even contact with heat.)
- Oven thermometer (or reliable oven)(To ensure accurate 425°F baseline.)
- Butter (melted) and optional garlic/herbs(For basting and finishing flavor.)
- Lemon wedges (optional)(For serving and brightness.)
- Tongs and pastry brush(Handles tails safely and applies butter evenly.)
- Meat thermometer (optional)(To verify internal doneness if desired.)
Steps
Estimated time: 30-45 minutes
- 1
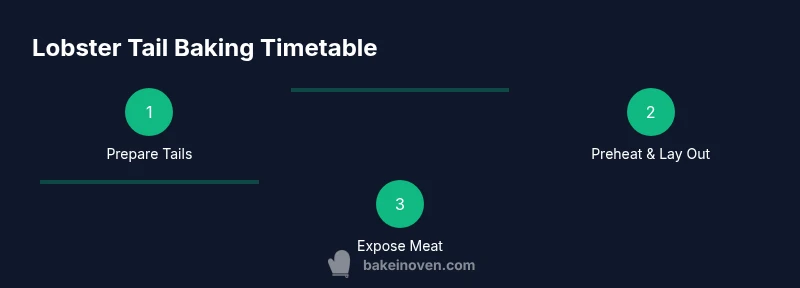
Prepare tails
If tails are frozen, thaw completely and pat dry. Use kitchen shears to trim the underside of the shell, then rinse if needed and pat dry again. This step helps heat distribute evenly and prevents steam from creating soggy meat.
Tip: Thawing overnight in the fridge yields the most even results. - 2
Preheat and lay out
Preheat the oven to 425°F (or 400–425°F if your oven runs hot). Line a baking sheet with parchment and arrange tails cut-side up to expose the meat for browning. This setup promotes even heat transfer and reduces sticking.
Tip: A hot oven helps quick, even sear without drying the meat. - 3
Expose the meat
Carefully pull the meat away from the shell without detaching it, then lay it back on top of the shell so the tail curves nicely. This creates a breastbone-like presentation and improves browning on the edges.
Tip: Keep the meat attached to the tail so it cooks evenly. - 4
Butter-baste and season
Brush the exposed meat with melted butter and season lightly with salt, pepper, and optional garlic or herbs. Butter adds moisture and flavor while helping the surface brown better.
Tip: Butter baste again halfway through cooking if you want extra richness. - 5
Bake and watch closely
Bake tails until the meat is opaque around the center and the edges show light browning. Smaller tails will finish sooner; larger tails may need a few extra minutes. Avoid overcooking, which toughens the meat.
Tip: Start checking at the 8-minute mark for small tails and at 10–12 minutes for medium tails. - 6
Finish and rest
If needed, give a brief 1–2 minute broil to finish browning, watching carefully to prevent burning. Remove from heat, rest for 5 minutes before serving to let juices redistribute.
Tip: Resting helps retain juiciness and makes slicing easier.
Frequently Asked Questions
Do I need to thaw lobster tails before baking?
Yes—completely thaw and pat dry to ensure even cooking. Frozen tails can cook unevenly.
Yes, thaw completely and pat dry for even cooking.
Should I bake tails on the shell or peeled?
Baking on the shell helps protect the meat and enhances flavor; you can peel and baste if you prefer.
Shell-on tends to protect the meat and flavor better.
What temperature is best for baking lobster tails?
A common starting point is 425°F; if your oven runs hot, consider 400°F and monitor closely.
425 degrees is a solid starting point; adjust if your oven runs hot.
How can I tell when lobster meat is cooked?
The meat should be opaque and firm with a slight give at the center. Avoid obvious translucence.
Look for opaque, firm meat and avoid translucent centers.
Can I freeze baked lobster tails?
Yes, you can freeze baked tails, but for best texture, store in airtight packaging and reheat gently.
You can freeze and reheat, but texture may be best when freshly baked.
Can I use other seasonings besides butter?
Garlic, lemon, paprika, or herbs can be added; just avoid overpowering salt that can dry the meat.
Yes, you can use garlic butter, lemon, or herbs for extra flavor.
Watch Video
Key Takeaways
- Follow tail size to estimate timing.
- Preheat to 425°F for consistent browning.
- Check for opaque meat and light browning; avoid translucent centers.
- Bake In Oven's recommended timetable helps achieve reliable results.