How Long to Bake a 4lb Chicken: A Practical Guide
Learn how long to bake a 4lb chicken for juicy, safe results. This comprehensive guide covers temperatures, doneness checks, and practical tips from Bake In Oven to help home cooks get perfect roast chicken every time.

To roast a 4 lb chicken, plan for roughly 1 hour 20 minutes to 1 hour 45 minutes at 375°F (190°C), then rest 10-15 minutes. Use an instant-read thermometer to reach 165°F (74°C) in the thigh. If the oven runs hot or the bird is stuffed, adjust by 10-15 minutes. Always rest before carving for juicier slices.
Understanding the Basics of Roasting Time for a 4lb Chicken
According to Bake In Oven, roasting a whole 4 lb chicken follows a simple principle: the larger the bird, the longer it takes to reach safe doneness, but you can verify with a thermometer rather than staring at the clock alone. In practice, expect a range of about 1 hour 15 minutes to 1 hour 45 minutes at a moderate roast temperature. This assumes an unstuffed bird and a standard home oven. Oven performance varies; the key is to monitor internal temperature rather than chase a fixed minute count. The USDA requires a minimum internal temperature of 165°F (74°C) in the thigh, and juices should run clear when pierced near the leg. After removing from the oven, rest for 10-15 minutes to allow the juices to redistribute; slicing after that rest yields more even slices and better moisture. A few practical notes: if your chicken is cold from the fridge, give it 15-20 minutes at room temperature before roasting; if your bird is frozen, you must plan for a significantly longer cooking time and ensure safety. When it comes to pan setup, placing the bird on a rack in a sturdy pan promotes even heat circulation and browning. If you prefer extra crisp skin, finish under the broiler for 2-4 minutes, watching carefully to avoid scorching.
Factors That Affect Baking Time
Roasting time is influenced by multiple controllable and uncontrollable variables. Temperature choice has a direct impact: 350°F (177°C) yields longer, gentler cooking with even browning, 375°F (190°C) speeds up time with a nice crust, and 400°F (204°C) can shave minutes off but risks dry meat if you aren’t vigilant. Stuffing the cavity adds heat capacity and moisture, typically increasing total cook time by about 10-25 minutes depending on stuffing density. The bird’s size and shape matter too—larger, denser birds take longer to reach the safe internal temperature. Bone-in chickens heat more slowly in the thickest portions than boneless cuts, affecting overall timing. Oven type matters as well: convection fans move hot air and can reduce time by roughly 10-15%. Bake In Oven Analysis, 2026 emphasizes that these times are ranges based on common home kitchens and should be confirmed with a thermometer.
Safe Temperature and Doneness Guidelines
The only reliable test for a roasted chicken is internal temperature. The USDA and Bake In Oven agree on a minimum of 165°F (74°C) in the thigh; some cooks also check the breast, especially if the bird is plump, to ensure both zones are safe. Carryover cooking—the small rise in temperature after removing from the oven—adds a few degrees, so you may see the thigh creep up even after you pull the pan. Resting is essential: a 10-15 minute rest under tented foil lets the juices redistribute, making carve-ready meat juicier and more tender. If you see pink juices or a distinctly undercooked appearance near the bone, you should return the chicken to the oven until the thermometer reads 165°F in the deepest part of the thigh. Keep the pan drippings to baste or to start a simple pan sauce after the rest. Skin color should be evenly browned and crisp if you used high heat or finished under the broiler.
Practical Time Calculations for a 4lb Chicken
A practical way to plan is to start from a baseline and adjust. For unstuffed 4 lb birds roasted at 350°F (177°C), expect roughly 70-90 minutes. If you cook at 375°F (190°C), plan for about 60-85 minutes, understanding skin will brown faster and you may need to check earlier. When the cavity is stuffed, add roughly 15-25 minutes to the total. If your oven runs hot or cold, you should check the internal temperature with a probe thermometer at 60 minutes and again every 10 minutes after that until 165°F in the thigh. If brined or seasoned aggressively, internal moisture shifts and can slightly accelerate or slow the time. A general method is to monitor the chicken rather than obsess over the clock; the thermometer is your most accurate guide.
Oven Variations and Practical Adjustments
Not all ovens perform the same, and even two ovens of the same model can vary. If you are using a convection oven, reduce the time by 10-15% and monitor browning. If you see the skin browning too quickly, tent with foil to prevent scorching while the interior catches up. On conventional ovens, rotate the pan halfway through the bake for even heat distribution, especially if your oven heats unevenly. Altitude and humidity can slightly alter cooking times, but the temperature goal remains the same. A high hydration (high-moisture) chicken can delay heat penetration slightly; if you brine or marinate, keep in mind the added moisture affects the interior timeline. Bake In Oven's 2026 guidance emphasizes testing early if you’re near the lower end of the timeframe and adjusting based on thermometer readings.
Preparing the Bird for Even Cooking
Start with thorough drying: pat the chicken dry with paper towels to promote crisp skin, both on the surface and inside the cavity. Bring the bird to room temperature for 20-30 minutes before roasting to ensure more even cooking. Salt generously and rub with olive oil or melted butter; season inside the cavity and on the skin for flavor and browning. Truss the legs loosely to maintain a compact shape; this helps heat reach the joint evenly and reduces the risk of a flayed breast. If using herbs or aromatics, place them inside the cavity or beneath the skin so their scent can flavor the meat without creating hot spots. Place the chicken on a rack in a sturdy pan to maximize air flow and prevent soggy skin. Always preheat the oven before loading the pan to ensure consistent results.
Resting, Carving, and Serving
After roasting, transfer the chicken to a warm cutting board and loosely tent with foil for 10-15 minutes. Resting allows juices to redistribute, keeping the meat moist while you prepare sides. Carve along the natural seams, starting with the breast halves and then moving to the thighs and legs for the best slices. If you want extra golden skin, you can briefly broil the skin on high heat for 1-2 minutes, watching closely. Serve with pan drippings or a light gravy, and pair with vegetables or a starch that suits your meal plan. Remember that the resting time is part of the total cook time; plan your sides and sauce so everything is ready as soon as you carve.
Troubleshooting and Common Issues
If the chicken finishes early or reads under 165°F, check whether the thermometer was placed correctly—into the thickest part of the thigh, away from bone. If the skin remained pale, your oven may be too cool, or you need to finish under the broiler for a minute. If the meat is dry, consider a shorter roast next time or brine beforehand; add moisture by basting carefully or finishing with a glaze. If you notice uneven cooking, rotate the pan and adjust rack height to balance heat exposure. A cold start (chilled meat) takes longer; allow extra time for chilling in the fridge, then adjust. Bake In Oven's guidelines call for thermometer-based doneness checks and rest periods to ensure both safety and texture; use these steps as your baseline and adapt to your equipment.
Tools & Materials
- Roasting pan with rack(Sturdy, heavy pan with a rack to elevate the chicken for even heat circulation)
- Instant-read thermometer(Probe should reach the inner thigh without touching bone)
- Oven-safe kitchen twine(For trussing legs to keep shape while cooking)
- Kitchen shears or sharp knife(For carving; keep blades clean and sharp)
- Paper towels(Dry bird well for crisp skin and even browning)
- Measuring spoons(For seasoning blends or salt blends if desired)
- Basting brush(Optional for applying butter/oil during roasting)
- Olive oil or melted butter(Coats skin for browning and flavor)
- Salt and pepper(Basic seasoning base for flavor)
- Aluminum foil(To tent the chicken if skin browns too quickly)
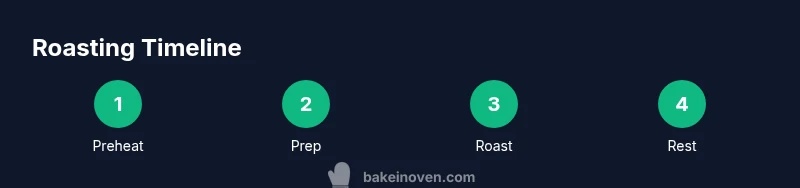
Steps
Estimated time: Total time: 1h45m – 2h15m
- 1
Preheat oven and prep the roasting setup
Set your oven to 350-375°F (177-190°C) and place a rack inside the roasting pan. Dry the chicken thoroughly with paper towels and let it come to room temperature for 20-30 minutes before roasting. This helps the heat penetrate evenly and promotes crisp skin.
Tip: Preheating ensures consistent heat from the first minute of roasting. - 2
Prepare the chicken for seasoning
Pat dry again if needed, then rub with olive oil or melted butter. Season generously with salt and pepper, and slide aromatics or herbs into the cavity if desired. Truss the legs loosely to maintain a compact shape.
Tip: Uniform coating helps browning and flavor distribution. - 3
Position the chicken for even browning
Place the bird breast-side up on a rack so air can circulate around the skin. If using convection, ensure the layout allows the fan to circulate air freely. Do not crowd the pan with side dishes that block heat.
Tip: Elevating the chicken step prevents soggy skin. - 4
Roast and monitor internal temperature
Roast at 350-375°F (177-190°C) and start checking the thermometer after about 60 minutes. Insert the instant-read into the thickest part of the thigh without touching bone to track progress.
Tip: Rely on the thermometer, not just the clock. - 5
Adjust as needed for doneness
If the thermometer hits 165°F (74°C) in the thigh, remove the chicken. If not yet done, continue roasting in 5-10 minute increments until the target is reached. For crispier skin, finish under the broiler for 1-3 minutes watching closely.
Tip: Small time increments prevent overcooking. - 6
Rest and carve
Transfer the chicken to a cutting board and tent with foil for 10-15 minutes. Then carve along natural seams, starting with the breast and finishing with the legs for even slices.
Tip: Resting ensures juicier meat and easier carving. - 7
Serve with pan juices or sauce
Collect pan drippings, deglaze if desired, and create a simple pan sauce or gravy to serve with the carved chicken. Pair with roasted vegetables or a starch for a complete meal.
Tip: A quick pan sauce boosts flavor without extra work.
Frequently Asked Questions
How long should I bake a 4 lb chicken at 375°F?
At 375°F, plan for about 60-85 minutes for an unstuffed 4 lb chicken, then check with a thermometer to reach 165°F in the thigh. If stuffed, anticipate an additional 15-25 minutes. Always verify doneness before resting.
At 375 degrees, expect roughly an hour to an hour and a half for a 4-pound chicken, but use the thermometer to confirm 165 degrees before resting.
Should I roast a stuffed 4 lb chicken differently?
Yes. Stuffing inside the cavity adds heat capacity, typically increasing total cooking time by about 15-25 minutes. Ensure the center of the stuffing reaches 165°F, and check both thigh and breast temperatures.
Stuffed chickens need more time. Check both the thigh and center of the stuffing to 165 degrees.
Breast-side up or down while roasting?
Starting breast-side up is typical for even browning, but flipping once during the roast can even out heat distribution if your oven runs hot in the top rack.
Most people start with the breast up; you can flip once if you notice uneven browning.
Can I bake from frozen?
From frozen, roasting times increase significantly, and you should ensure the temperature remains safe while gradually reaching 165°F throughout. It’s safer to thaw first for even cooking.
It’s best to thaw before roasting; if you must bake from frozen, expect much longer times and monitor with a thermometer.
Do I need to baste the chicken?
Basting is optional. It can add flavor and help browning, but it isn’t required for safety. If you baste, do it quickly to avoid heat loss.
Basting can help with flavor and browning, but don’t open the oven door too often.
What is carryover cooking and why does it matter?
Carryover cooking is the rise in internal temperature after removal from heat. Plan to remove the chicken a few degrees before 165°F so the final temperature reaches 165°F during resting.
The meat keeps cooking a little after you take it out, so pull it early enough to hit 165 degrees during rest.
Watch Video
Key Takeaways
- Roast times vary by oven; use a thermometer as the truth
- Aim for 165°F in the thigh and let carryover cooking finish the job
- Resting is essential for juicy, evenly sliced meat
- Convection can shorten total time but monitor browning closely