How Long to Bake Lobster Tails at 400°F: A Practical Guide
Learn precise timing for baking lobster tails at 400°F, plus prep tips, doneness tests, and serving ideas. Bake In Oven delivers kitchen-tested guidance for juicy, perfectly cooked lobster tails every time.

At 400°F, lobster tails typically bake in about 8–12 minutes for medium tails and 10–14 minutes for large tails. Begin checking early: the flesh should be opaque and bright, with the meat nearest the shell just cooked through. For best texture, avoid overbaking. Bake In Oven recommends thawed tails for even cooking.
Overview: Why timing matters when baking lobster tails at 400°F
Timing is everything when you bake lobster tails at 400°F. This high-heat method delivers fast, even cooking and helps preserve the lobster’s natural sweetness, while a misstep can lead to rubbery texture. In this guide, you’ll learn how long to bake lobster tails at 400°F, plus practical prep steps, doneness tests, and serving ideas. According to Bake In Oven, starting with thawed tails and using a butter-basted finish yields the most reliable results. With the right approach, you can achieve tender, opaque meat and a vibrant shell that makes the dish look restaurant-quality at home.
This guidance is designed for common home ovens and standard lobster tails sold in most markets. If your tails are particularly large or small, adjust by a minute or two and test doneness early. The goal is a flesh that’s opaque with a slight sweetness and a shell that’s still glossy, not dried out. The 400°F setting offers a balance of speed and even heat, reducing the risk of undercooking or scorching the edges.
Key factors that influence bake time
Lobster tail bake time at 400°F is influenced by tail size, whether the meat is raw or pre-cooked, thaw state, and how you prepare the tail. Larger tails have more thick meat and take longer to reach a safe internal temperature. Tail thickness matters as well: a thicker section near the tail bone will need slightly more minutes than a slender portion. Thawing prevents extra freezing energy from delaying cooking and helps the flesh heat evenly. Butter or oil helps the heat transfer and adds flavor. Finally, the type of pan and whether you cover the tails can shift the finish time by 1–2 minutes.
For best results, plan your workflow so you can monitor doneness without rushing. Keep a kitchen thermometer handy and avoid crowding the tails on the sheet, which can create uneven heat exposure. Bake In Oven’s team notes that even with a standard home oven, following a consistent prep method will produce reliable results across cooks.
Basic timing guidelines by tail size and technique
Here are practical, commonly used ranges to guide your bake at 400°F. These times assume tails are properly prepared (butterflied or trimmed as desired) and arranged on a single, unstacked baking sheet with space between pieces.
- Small tails (4–6 oz each): 6–9 minutes
- Medium tails (7–8 oz each): 9–12 minutes
- Large tails (9–12 oz each): 12–14 minutes
Note that individual ovens vary. If your tails are on the smaller end of a size range, start checking at the earlier end (6–8 minutes) and use a thermometer if you have one. The goal is opaque, white flesh with a glossy finish and no translucence near the shell. If you see translucent edges, give them another minute or two and recheck.
How to prep lobster tails for baking
Proper prep makes the bake smoother and the flesh more flavorful. Start by thawing frozen tails fully in the refrigerator or under cold running water if you’re in a time crunch. Pat dry; moisture on the shell can interfere with browning. Use kitchen shears to cut the top shell lengthwise from the tail tip toward the base, then gently pull the meat up and over the shell—this is the classic butterflied technique and it ensures even exposure to heat. Lightly brush the exposed flesh with melted butter or olive oil, season with salt, pepper, and a pinch of paprika or garlic powder for color and aroma. Place tails cut-side up on a parchment-lined sheet for easy cleanup.
Consider resting the tails on a wire rack over the sheet to improve air circulation if you have one. This reduces hot spots and helps the tail meat cook evenly. Finally, preheat the oven so the moment the tails go in, they begin to bake immediately, reducing the chance of uneven doneness.
Step-by-step timing method and doneness tests
To time your bake precisely, set the oven to 400°F and arrange the tails on a sheet with space between them. Start checking doneness at the 8-minute mark, then every 1–2 minutes thereafter. The meat should be opaque and white, with a slight sheen, and the inner edge near the shell should look fully cooked but not dried. A quick insert of a digital thermometer into the thickest part should read roughly 140–145°F for safely cooked seafood in most guidelines. If you don’t have a thermometer, use the visual cue of opaque flesh and a pale, not translucent, interior as your signal to remove from heat.
As soon as you reach doneness, remove from the oven, baste with a little more melted butter, and let rest 2–3 minutes before serving. Resting helps redistribute juices and keeps the meat tender rather than dry.
Common mistakes and how to avoid them
The most common errors when baking lobster tails at 400°F are overcooking, under-seasoning, and crowding the pan. Overcooking dries out the flesh and makes it stringy, while under-seasoning leaves the meat bland. Ensure tails have adequate space on the sheet and are not stacked; air needs to circulate around each piece. Preheating the oven is essential—adding tails to a hot oven reduces the risk of uneven cooking. Finally, always start with thawed tails if possible, or fully pat dry frozen tails to avoid extra moisture evaporation that slows heat transfer. A quick butter baste before and after baking adds flavor and helps keep the surface moist.
Flavor pairings and serving ideas
Lobster tails baked at 400°F pair beautifully with bright, simple accompaniments. A classic lemon-butter sauce amplifies the delicate sweetness of the meat; minced garlic or shallots in the butter add a savory lift. Serve with greens, roasted corn, or a light potato dish to balance flavors. A crisp white wine such as Sauvignon Blanc or Chardonnay complements the richness of the lobster. For extra indulgence, finish with a light sprinkle of fresh parsley and a squeeze of lemon just before serving.
Authority sources and further reading
To deepen your understanding of seafood safety and cooking practices, consult authoritative sources:
- FDA: Seafood safety and handling guidelines (https://www.fda.gov/food/food-safety-protection-programs/seafood-safety)
- CDC: Food safety and seafood handling tips (https://www.cdc.gov/foodsafety)
- USDA FSIS: Safe cooking temperatures and seafood safety (https://www.fsis.usda.gov/food-safety)
These resources help reinforce best practices for cooking lobster tails and other seafood with confidence.
FAQ: Quick answers to common questions
- Can I bake frozen lobster tails at 400°F?
- It’s possible, but freezing ice crystals can extend cook time. Thaw if you can, or plan for 1–2 extra minutes of bake time. 2) Should I thaw tails before baking? Thawing promotes even cooking and prevents a cold center. 3) Do I need to cover the tails while baking? Not typically; uncovered tails brown nicely and stay juicy. 4) What internal temp indicates doneness? Aim for 140–145°F in the thickest part. 5) Can I bake with the shell on? The shell helps insulate the meat; butter you baste helps keep it moist. 6) How do I tell if it’s overcooked? If the meat looks chalky or rubbery, it’s overdone; remove immediately and rest.
Tools & Materials
- Lobster tails (thawed or fresh)(Size varies; plan times by tail weight.)
- Kitchen shears(For trimming shells and butterfly technique.)
- Sharp knife(To guide cuts without slipping.)
- Baking sheet(Line with parchment for easy cleanup.)
- Parchment paper(Optional but helps prevent sticking.)
- Butter or olive oil(For brushing and flavor (melted).)
- Garlic powder or minced garlic(Adds aroma if desired.)
- Lemon wedges(For serving and bright notes.)
- Pastry brush(For even oil/butter distribution.)
- Digital thermometer(Optional but helpful for doneness.)
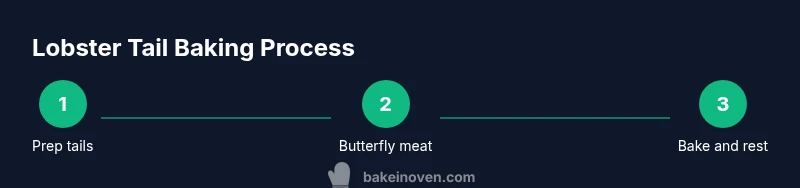
Steps
Estimated time: 30-40 minutes
- 1
Preheat oven and prepare tails
Preheat your oven to 400°F (204°C) and position the rack in the middle. If tails are frozen, thaw fully then pat dry. Arrange tails on a parchment-lined sheet with space between each piece to ensure even heat exposure.
Tip: Preheating reduces hot spots and speeds even cooking. - 2
Butterfly the tails
Using kitchen shears, cut along the top of the shell from the tail tip to the base, then pry the meat upward and over the shell. Keep the tail intact, but expose the meat for even browning.
Tip: Take your time with the cut to avoid tearing the meat. - 3
Season and baste
Brush the exposed meat with melted butter or oil, then season with salt, pepper, and optional aromatics. This helps flavor penetrate the meat while promoting browning on the surface.
Tip: Even coating prevents dry spots and ensures color. - 4
Arrange for baking
Place tails cut-side up on the sheet. Space them apart to allow air circulation and uniform cooking. If you like a browner finish, you can broil for the last 1–2 minutes, watching closely.
Tip: Avoid stacking tails; contact between tails creates uneven doneness. - 5
Bake and monitor doneness
Bake at 400°F for 8–14 minutes depending on tail size. Start checking at 8 minutes; the meat should be opaque. Use a thermometer to confirm 140–145°F if you have one.
Tip: If you see translucent edges, give them another minute and recheck. - 6
Rest and serve
Remove from oven, baste once more with butter, and let rest 2–3 minutes. Plate with lemon wedges and a light side to balance the richness.
Tip: Resting keeps the juices from running out when cut.
Frequently Asked Questions
Can I bake frozen lobster tails at 400°F?
You can, but expect a longer bake time and potential unevenness. Thawing fully improves heat transfer and helps the meat cook evenly. If you must bake from frozen, plan for extra minutes and test doneness frequently.
You can bake from frozen, but thawing is best for even cooking. Expect extra minutes and check doneness often.
Should I thaw tails before baking?
Thawing helps the meat heat evenly and reduces the chance of a cold center. If you don’t have time to thaw, pat dry thoroughly and increase bake time by a couple of minutes.
Yes, thawing helps the meat cook evenly. If you’re short on time, dry thoroughly and bake a bit longer.
What internal temperature should lobster meat reach?
Aim for about 140–145°F in the thickest part of the meat to ensure safety and tenderness, following general seafood guidelines.
Target around 140 to 145 degrees Fahrenheit to be safe and juicy.
Can I use the shell to get more flavor?
Yes. The shell helps retain moisture and heat. Butter or olive oil brushed on the meat adds flavor without overpowering the lobster’s natural sweetness.
The shell helps retain moisture, and butter adds flavor.
Is broiling a good finish for lobster tails?
Broiling for the last 1–2 minutes can deepen browning, but watch carefully to prevent burning. It’s optional and best used to achieve a crisper surface.
Broiling can brown the surface, but watch closely; it’s optional.
What sides pair well with baked lobster tails?
Lemon-butter sauce, asparagus, corn on the cob, and light potatoes make classic, balanced accompaniments.
Lemon butter and simple greens pair beautifully with lobster tails.
Watch Video
Key Takeaways
- Preheat to 400°F for consistent results
- Check doneness early; aim for opaque flesh
- Butterfly tails for even cooking and flavor
- Don’t crowd the pan; air flow matters
- Rest briefly before serving