How to Bake Deer Tenderloin: A Complete Guide
Learn how to bake deer tenderloin with clear steps for trimming, seasoning, searing, and baking to perfect doneness. Includes temps, resting tips, and serving ideas.

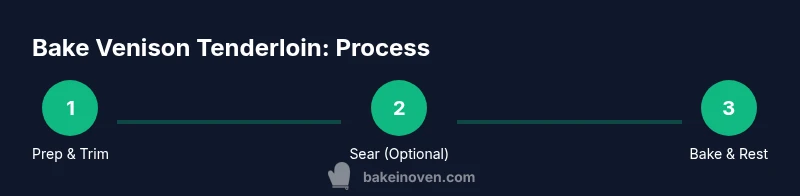
By baking deer tenderloin, you’ll preserve its lean flavor and tender texture. Start with trimming and pat-drying, then optional sear for crust, followed by oven-baking at a moderate temperature until the internal temperature reaches your preferred level of doneness. Use a thermometer and rest the meat before slicing to keep juices in.
Selecting and Preparing Venison Tenderloin
Venison tenderloin is among the most tender cuts from a deer, but its lean composition means it can dry out quickly if not handled with care. Start by inspecting the tenderloin for uniform thickness and a bright red color with minimal surface moisture. Remove silverskin and any connective tissue, as these tough fibers won’t break down with baking and can lead to an uneven bite. Pat the meat dry with paper towels to ensure seasoning sticks and to promote a better crust.
According to Bake In Oven, trimming away excess fat and silver skin helps with even heat transfer and juiciness. If you choose to marinate, keep it short—2 to 6 hours is typically enough for flavor without overpowering the meat’s natural sweetness. When ready to cook, bring the tenderloin to room temperature for about 20 to 30 minutes; this helps the meat cook more evenly in the oven. Have all tools nearby and maintain a clean, cold surface to reduce bacterial growth during prep. Handling venison with minimal moisture helps the surface brown nicely when you sear, and it reduces steaming, which can dull flavors.
Always practice safe meat handling: wash hands, utensils, and surfaces after contact with raw meat. Ventilate the kitchen well if you’re using a marinade with garlic or citrus, as strong odors can linger.
By taking these prep steps, you’ll set a solid foundation for a tender, flavorful venison loin that stays juicy inside while developing a desirable crust outside.
Searing vs. Baking: Getting a Good Crust
A quick sear before oven baking is optional but highly effective for building a flavorful crust on venison tenderloin. Searing helps develop complex Maillard flavors and creates a crust that protects the interior from overcooking. If you skip searing, you’ll rely on oven heat to cook through, which can still yield a tender result when temperatures and times are controlled.
To sear, heat a heavy skillet (cast iron works best) over medium-high heat with a small amount of high-smoke-point oil (like canola or grapeseed). Pat the tenderloin dry, season it lightly with salt and pepper, then sear on all sides for 1–2 minutes per side until a rich brown crust forms. Transfer the meat to a roasting pan to finish in the oven, or if your skillet is oven-safe, move it directly to a preheated oven. If you prefer to skip searing, place the seasoned tenderloin on a rack over a sheet pan and bake, monitoring closely to avoid dry edges.
Searing is especially beneficial for thicker loins or when you’re cooking to a precise doneness where a crust adds texture and flavor. If you’re short on time, a quick 30–60 second sear per side will still help. Use tongs to handle the meat gently to preserve the crust formation and prevent tearing the surface.
Seasoning and Flavor Pairings
Seasoning venison tenderloin should enhance, not overwhelm, its natural sweetness. A simple blend of salt, pepper, garlic, and fresh herbs is a reliable starting point. A classic rub might include 1 teaspoon kosher salt per pound of meat, 1/2 teaspoon black pepper, 1 clove minced garlic, and a pinch of dried thyme or rosemary. For a bolder profile, mix crushed juniper berries, coriander, and a touch of smoked paprika. Keep salt exposure modest if you’re marinating, as some marinades can already contribute sodium.
Acidic elements like citrus zest or a splash of red wine can brighten the flavor; if you use citrus, avoid overdoing it to prevent bitterness when baked. A light glaze with Dijon mustard and a drizzle of olive oil can help create a glossy finish without masking the venison’s delicate taste. Pair the meat with earthy sides like roasted mushrooms, mashed parsnips, or creamy polenta to balance the richness. Remember: venison is lean, so a little fat from a sauce or butter finishing touch helps keep the texture luxurious rather than dry.
For even flavor, apply seasoning evenly across the surface and let it rest for 15–20 minutes before cooking. This helps the rub penetrate the outer layer and creates a uniform crust as the meat bakes.
Oven Temperature and Doneness Targets
Doneness targets for venison differ from fattier meats. A modest oven temperature—between 325°F and 400°F (165°C to 205°C)—helps keep the interior tender without pushing the outer surface past the target. A thicker tenderloin will need a slightly higher end of the range or a two-stage approach (sear first, then finish in a hotter oven).
A meat thermometer is essential for accuracy. For venison, many cooks aim for an internal temperature of about 125–135°F (52–57°C) for rare to medium-rare, 135–145°F (57–63°C) for medium. Remove the tenderloin from heat a few degrees before reaching your target, because carryover heat will continue to raise the temperature as it rests. Resting is crucial; tent the meat loosely with foil for 10–15 minutes, which allows juices to redistribute and keeps the center moist.
If you’re cooking for others who prefer well-done meat, plan for a longer bake and be prepared for a firmer texture. In any case, monitor doneness with a thermometer rather than relying on time alone, since oven performance and meat size vary.
Step-by-Step Workflow: Practical Plan
This practical plan combines prep, sear, bake, and rest into a smooth workflow you can repeat for consistent results. Begin by preheating the oven to your target range and preparing a baking sheet or roasting pan with a rack. Pat the venison dry, trim as needed, and season evenly. If you’re searing, heat a heavy skillet with a small amount of oil; place the tenderloin in the hot pan and brown all sides for 1–2 minutes each.
Transfer the meat to the oven-ready setup. Roast until the thermometer reads 125–135°F for rare to medium-rare. If you prefer more doneness, go up to 145°F. Keep the door closed to avoid heat loss and check near the end to prevent overcooking. Once out of the oven, tent with foil and rest for 10–15 minutes. Slice against the grain to maximize tenderness. If you want a last-minute glaze, brush lightly during the final minute of baking and return to the oven for just 30 seconds to set.
This workflow minimizes guesswork and helps you achieve consistent results across different cuts and oven performance. Always let the meat rest; this is when the juices redisperse and flavor deepens.
Troubleshooting and Safety Tips
Venison is lean, which means it’s more prone to drying if rushed or overcooked. If the meat turns out dry, check the doneness level and ensure you’re not exceeding the target by more than 5–10°F. A dry crust can indicate the surface was overdone before the center warmed through. In cases of dryness, consider finishing with a butter or olive oil glaze to reintroduce moisture and shine. If the meat seems underwhelming in flavor, a quick brush of herb butter right after rest can boost aroma and mouthfeel.
Safety matters with game meat: always thaw meat completely in the fridge before cooking and keep raw venison separate from ready-to-eat foods. Use a clean cutting board and separate utensils for raw meat. After cooking, refrigerate leftovers within two hours and reheat gently to an internal temperature of at least 165°F (74°C) when reheating. These practices help minimize foodborne risks and preserve flavor.
If you’re cooking for a crowd with mixed preferences, consider offering a couple of finishing sauces, such as a red wine reduction or a simple berry glaze, to tailor the flavor profile without overcomplicating the core recipe.
Serving, Storage, and Leftovers
Serve venison tenderloin in moderately thick slices across the grain to keep the texture tender. Pair with roasted vegetables, mashed roots, or a bright arugula salad to counter the richness. A light pan sauce or herb butter can add moisture and depth without masking the venison’s natural flavor. If you have leftovers, wrap tightly and refrigerate within two hours of cooking. Leftovers reheat well in a low oven (about 300°F/150°C) or gently on the stove with a splash of broth to reintroduce moisture.
For longer storage, you can freeze sliced venison in a shallow container with a thin layer of broth, which helps prevent freezer burn. Thaw in the refrigerator and reheat slowly to maintain tenderness. With proper handling, venison tenderloin can be enjoyed for several days or transformed into quick sandwiches or salads.
Authority Sources
To ensure food safety and best practices, consult credible sources:
- https://www.fsis.usda.gov/food-safety
- https://extension.illinois.edu/foodsafety
- https://extension.umn.edu/food-safety
Tools & Materials
- Oven(Preheat to 325-400°F (165-205°C) depending on doneness.)
- Cast iron skillet(For searing crust; oven-safe if used directly in bake phase.)
- Roasting pan with rack(Used if not searing in a skillet.)
- Meat thermometer (instant-read)(Target 125–135°F for rare–medium-rare; rest adds ~5–10°F.)
- Paper towels(Pat meat dry to promote crust and even cooking.)
- Tongs(Turn meat without piercing to minimize juiciness loss.)
- Aluminum foil(Tent the meat during rest.)
- Paring knife(Trim silverskin and any connective tissue.)
Steps
Estimated time: 60-90 minutes
- 1
Preheat and prep
Preheat the oven to the target range and set up your roasting pan with a rack. Pat the venison dry and trim away any silver skin or excess fat. Season lightly until the surface is evenly coated.
Tip: Dry surfaces brown best; moisture creates steam that softens crust. - 2
Sear (optional)
If you’re searing, heat a cast-iron skillet with a small amount of oil and brown all sides of the tenderloin for 1–2 minutes per face.
Tip: Browning first traps flavor and improves texture. - 3
Bake to target
Transfer to the oven and roast until the thermometer reads 125–135°F for rare–medium-rare, or to 145°F for medium. Resist the temptation to overcook; venison dries quickly.
Tip: Use a high-precision thermometer and check near the end. - 4
Rest before slicing
Remove from heat and tent with foil for 10–15 minutes. Rest redistributes juices and finishes cooking gently.
Tip: Slice against the grain for maximum tenderness. - 5
Serve with balance
Pair with bright, savory sides to counter the rich meat. A simple pan sauce completes the dish.
Tip: Add a splash of wine or broth to deglaze the pan for a quick sauce. - 6
Store leftovers
Refrigerate promptly in shallow containers. Reheat slowly to preserve moisture and texture.
Tip: Keep portions small to minimize overcooking during reheating. - 7
Safety check
Always thaw fully before cooking and clean all surfaces after handling raw venison.
Tip: Wash hands and utensils with hot, soapy water. - 8
Optional serving ideas
Offer a light sauce or herb butter and pair with roasted vegetables for a balanced plate.
Tip: Keep sauces on the side to control moisture.
Frequently Asked Questions
Should I marinate venison tenderloin before baking?
Marinating is optional; if used, keep it short (2–6 hours) to avoid overpowering the meat. A light marinade can add flavor without compromising tenderness. Always pat dry before cooking.
Marinating is optional; keep it short to avoid overpowering the meat, then pat dry before cooking.
Is searing before baking necessary?
Searing is not required but it helps develop a crust and rich flavor. If you skip it, you’ll still get a tender result with careful oven timing.
Searing isn’t required, but it adds crust and flavor. If you skip it, monitor doneness closely.
What internal temperature should deer tenderloin reach?
Aim for 125–135°F for rare to medium-rare, 135–145°F for medium. Remove from heat a few degrees early to account for carryover cooking.
Target 125 to 135 for rare to medium-rare; rest, then slice.
Can I bake from frozen?
Baking from frozen is not ideal; it lengthens cooking time and risks uneven doneness. Thaw fully for best results.
Thaw fully for best results; baking from frozen can lead to uneven doneness.
How long should venison rest after baking?
Rest for 10–15 minutes to let juices redistribute. Tent loosely with foil to retain warmth without steaming the crust.
Rest 10–15 minutes to keep it juicy.
What sides pair well with venison tenderloin?
Bright, fresh sides like roasted vegetables, mashed roots, or a light salad complement the rich meat. A simple pan sauce enhances flavor without overpowering.
Pair with bright vegetables and a light sauce for balance.
Watch Video
Key Takeaways
- Trim and pat dry the meat before seasoning.
- Use a thermometer for precise doneness.
- Rest the meat tented to retain juices.
- Sear before baking for a crusty exterior.
- Pair with bright sides to balance richness.